Lead Settings
1.1 Navigation
Go to:
Sales Module → Settings → Lead
You will see these tabs:
- Field Setting
- User Assignment
- Lead Recurring
- Source
- Branch Assignment Rule
- And more
Setting
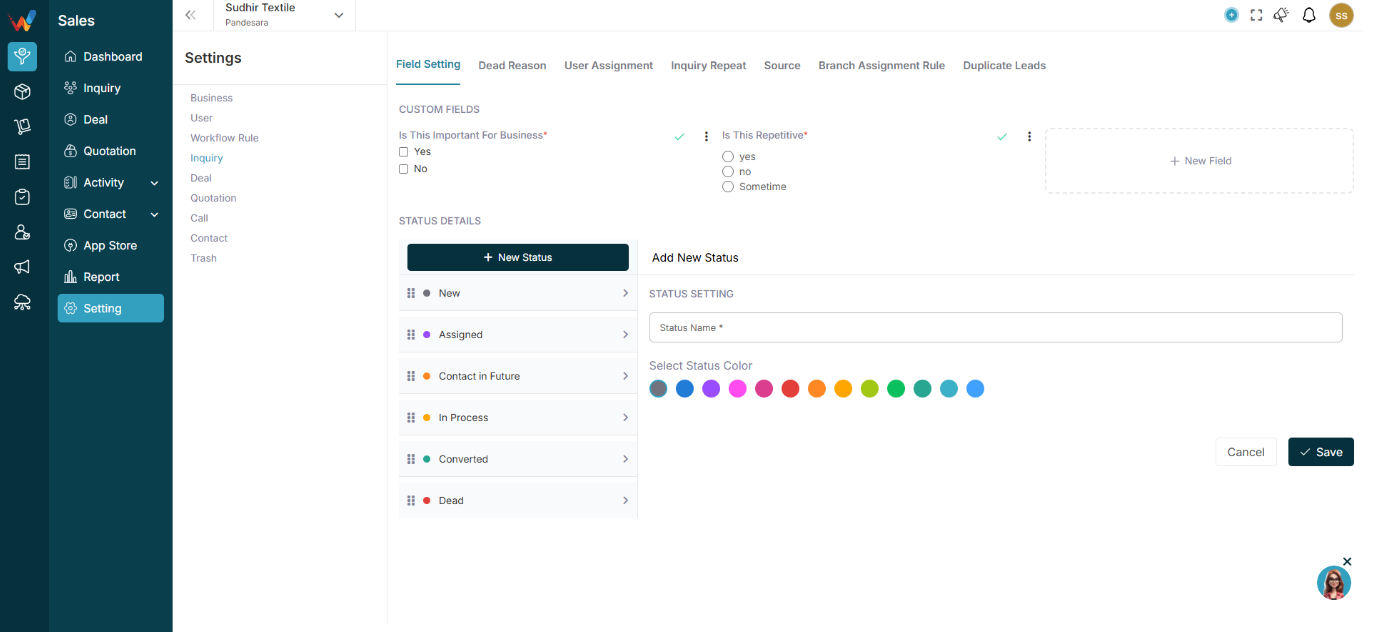
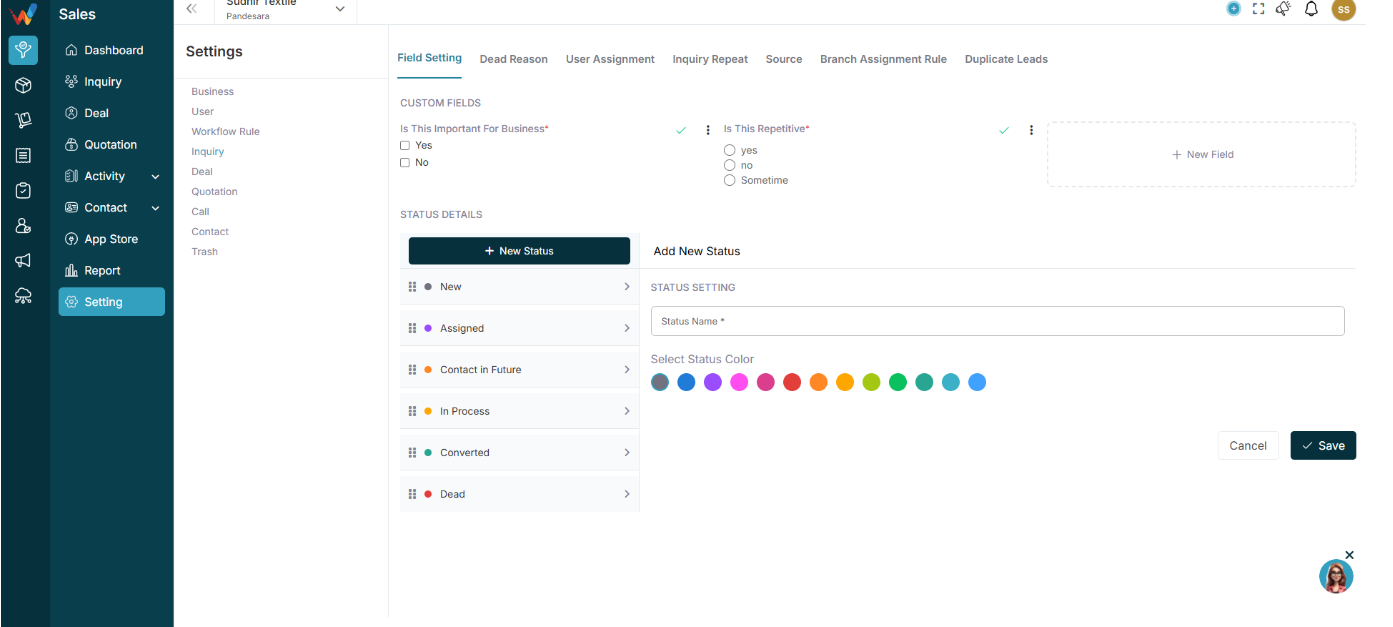
2.1 Field Setting
This controls what information is collected in every lead.
2.2 Custom Fields
2.2.1 Create Custom Fields
You can create custom fields based on your textile business needs.
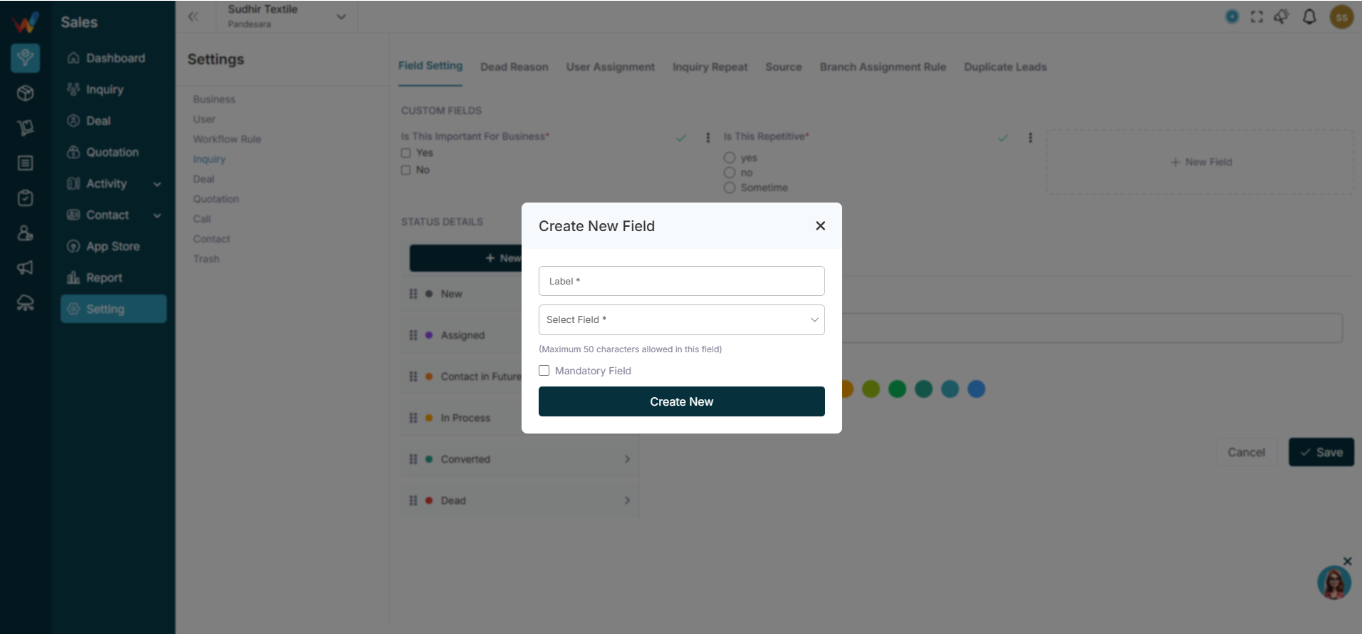
Click:
New Field
2.2.2 Fill Details
Field — Description
Label — Field name (Example: Fabric Type)
Type of Field — Select field type
Mandatory — Optional checkbox
2.3 Available Field Types

- Paragraph (long text)
- Radio Button
- Checkbox
- Text Field
- Number
- Dropdown
- Date
2.4 Textile Examples
Field Name — Type
Fabric Type — Dropdown
GSM — Number
Quantity Required — Number
Required Delivery Date — Date
Sample Sent — Checkbox
2.5 Field Actions
Click 3 dots on field:

- Activate Field or Deactivate Field
- Edit
- Delete
Inactive fields will not appear in lead form.
Status Setting
3.1 Status Details
This defines your lead pipeline stages.
You can:
- Create new status
- Edit existing
- Change color
- Rearrange sequence
3.2 Add Status

Enter:
- Status Name
- Select Status Color
Click Save.
3.3 Example Textile Pipeline
- New
- Assigned
- Intro Call
- In Process
- Followup
- Contact in Future
- Final Follow up
- Dead
3.4 Why Status Colors Matter
Colours help:
- Identify urgent leads
- Separate hot & cold leads
- Improve visual tracking in Kanban view
Source Settings
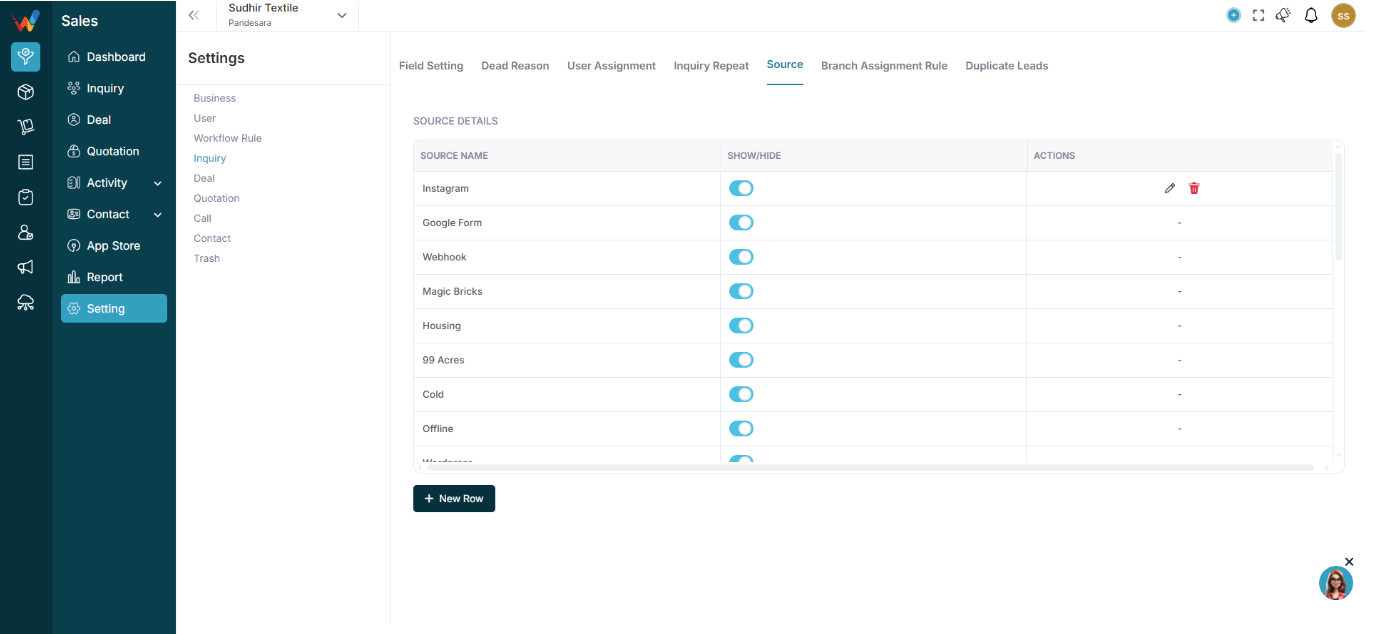
4.1 Navigation
Navigate to:
Lead Settings → Source
You will see:
- Source Name
- Show/Hide
- Actions
Examples:
- Google Form
- TextileCRM Demo
- Webinar
- JITO Event
- Webhook
- wp-ads-demo
4.2 Add New Source

Click:
New Row
Add:
Source Name
Save.
4.3 Show / Hide Toggle
If ON:
Source appears in lead form.
If OFF:
Source hidden (not deleted).
4.4 Why Source Is Important
Helps track:
- Which event gave most leads
- Which ads convert
- Which exhibition worked
- ROI calculation