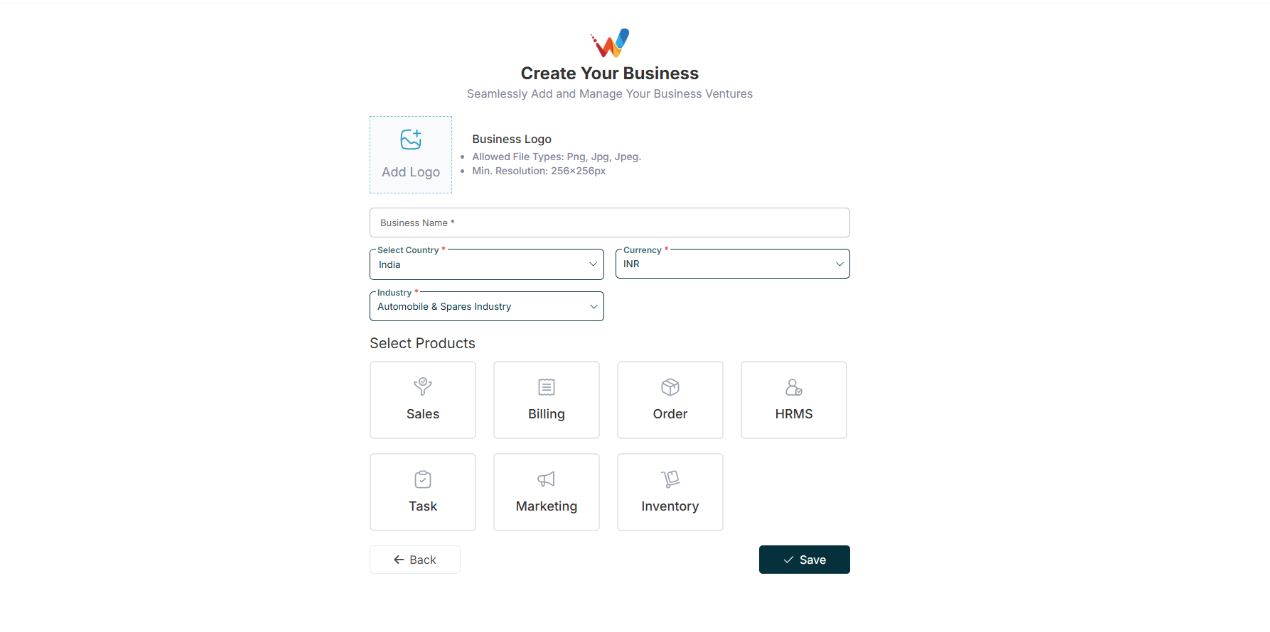
You will see this screen when you create a new business
Business Creation Guide
Why Business Setup Is Important?
Before using Wortal, you need to create your business profile.
This allows you to:
- Store your company details
- Add branches
- Add warehouses
- Add bank accounts
- Enable billing & GST
- Manage multi-branch textile operations
Business Profile Setup
2.1 Step 1: Go to Business Profile
Navigation Path:
Sales Module → Settings → Business Profile
You will see three tabs:
- Business Profile
- Branch
- Bank Details
2.2 Step 2: Fill Business Profile Details
2.2.1 Upload Business Logo
Click on logo area
Upload your company logo
This logo will appear on invoices and Quotations.
2.2.2 Enter Business Information
Field — What to Enter
Business Name — Your registered company name
Industry — Select Textile / IT / Other
Currency — Default INR (change if needed)
Contact Number — Main business phone number
Email — Official company email
Website — Your website (if available)
PAN Number — Company PAN
After filling details, click Save.
Branch Setup
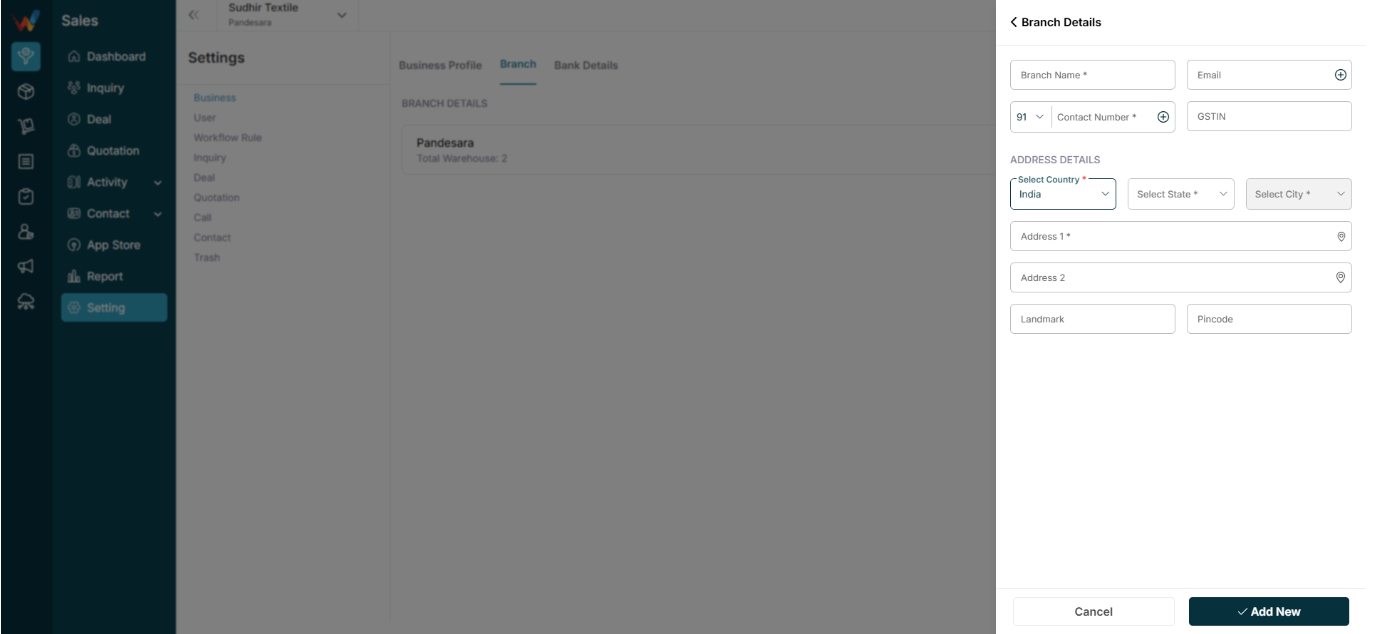
3.1 Step 3: Add Branch Details
If you have:
- Multiple offices
- Different godowns
- Different cities operations
You should create branches.
Go to:
Branch Tab → Click “+ Branch”
HQ will be a default system generated Branch, editable.
3.2 Fill Branch Details
3.2.1 Basic Information
- Branch Name
- Contact Number
- GSTIN (if applicable)
Fill all the details in HQ, as it will be reflecting in Quotations and Invoices.
3.2.2 Address Details
You must enter:
- Country
- State
- City
- Address Line 1
- Address Line 2 (optional)
- Landmark (optional)
- Pincode
Click Add New.
Warehouse Setup (Inside Branch)
Navigation Path:
Sales Module → Settings → Business → Branch

4.1 Add Warehouse Inside Branch
After branch is created, you can:
- Add multiple warehouses
- Set one as Primary
- Activate / Deactivate warehouse
This is useful for:
- Textile stock Separation
- Separate godowns
- Multi-location inventory tracking
Primary Warehouse will be a default system generated warehouse, editable.
Bank Details Setup
Navigation Path:
Sales Module → Settings → Business → Branch Details

5.1 Add Bank Details
Go to:
Bank Details Tab → Add New Bank
5.2 Fill Bank Details
Fields — Required
IFSC Code — ✅
Account Number — ✅
Account Holder Name — ✅
Account Type — ✅
Bank Name — ✅
Branch Name — ✅
UPI ID — Optional
You can:
- Multiple Banks can be added
- Different Banks can be added for different Branches
- Set one bank as Default Bank, to be used in quotation and invoices
- Edit or Delete later
This bank will be used in:
- Invoice printing
- Quotation documents
Final Checklist Before Starting Operations
6.1 Checklist
- Business Profile saved
- At least 1 Branch created
- At least 1 Warehouse added
- Default Bank added
Once done, you can:
- Add products/designs
- Start adding leads
- Create orders
- Generate invoices
Important Tips for Textile Businesses
- If you operate in multiple cities → Create separate branches
- If you only have one office but multiple godowns → Create multiple warehouses
- If you deal in GST billing → Ensure GSTIN is correctly added
Common Mistakes to Avoid
- Not setting Primary Warehouse
- Entering wrong GSTIN
- Skipping bank details (invoice will show blank)
- Using personal phone number instead of official number
How This Helps You
After proper business setup:
- Owner gets branch-wise reports
- Stock reports branch specific
- Orders are mapped correctly
- No confusion in billing
- Team access is controlled branch-wise