Textile Business Example
1.1 Example Scenario
You have:
- HQ (Main Office)
- Adajan (Branch)
- Parvat Patiya (Branch)
You create:
- Admin → Full Access
- Branch Manager → Only Adajan
- Sales Person → Only Parvat Patiya
- Intern → Limited Access
Now:
- Each person sees only relevant data
- Owner sees all reports
- No data leakage across branches
Common Mistakes to Avoid
- Giving Admin access to everyone
- Forgetting to assign branch
- Deleting user instead of deactivating
- Not defining role properly
Final Checklist
- Invite sent
- Role assigned
- Branch access selected
- User accepted invite
- Status Active
Now your team is ready to work inside Wortal.
Understanding User Roles
1.1 Understanding User Roles
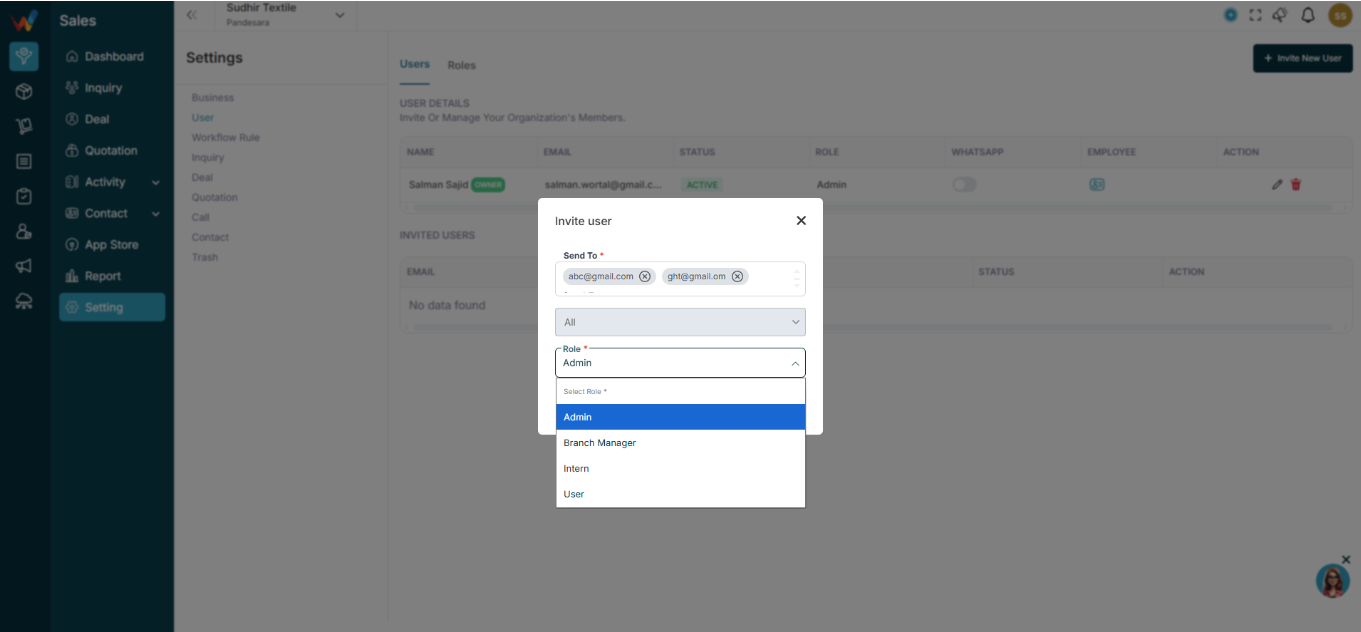
When assigning role, you can select:
- Admin
- Branch Manager
- User
- Intern
- And able to create a custom role as well
Each role has predefined permissions (based on your RBAC(Role-Based Access Control)).
Assign Branch Access
2.1 Assign Branch Access
While editing user access, you can:
- Select single branch
- Select multiple branches
- Select All branches
Example:
Branch-wise access ensures:
- Sales person sees only their branch data
- Branch manager sees their branch operations
- Admin sees all branches
Edit User Access
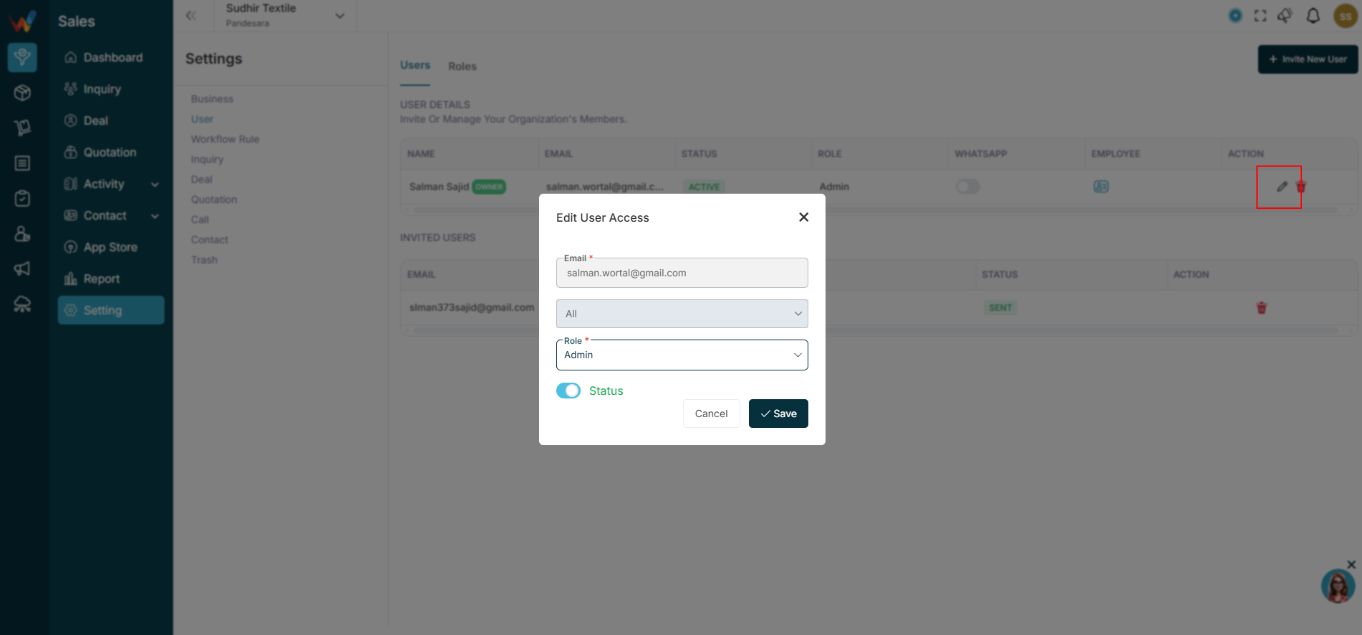
3.1 Edit User Access
Go to:
Settings → Users → Click Edit Icon
Popup shows:
- Email
- Branch selection
- Role
- Status Toggle
You can:
- Change role
- Add / Remove branch access
- Activate / Deactivate user
Click Save.
Activate / Deactivate User
4.1 Activate / Deactivate User
Inside Users list, status shows:
- ACTIVE (Green)
- INACTIVE (Red)
If you turn status off:
- User cannot login
- Data remains safe
- Access is blocked
Useful when:
- Employee leaves
- Temporary suspension
- Role change
WhatsApp Access Toggle
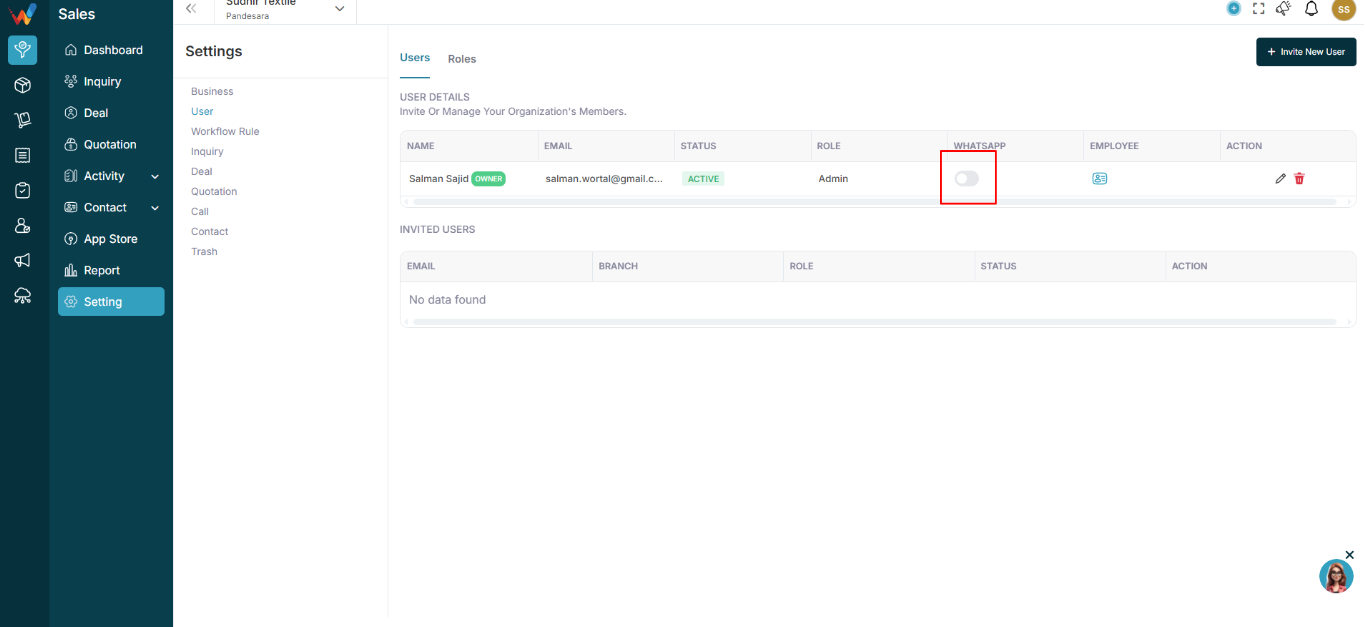
5.1 WhatsApp Access Toggle
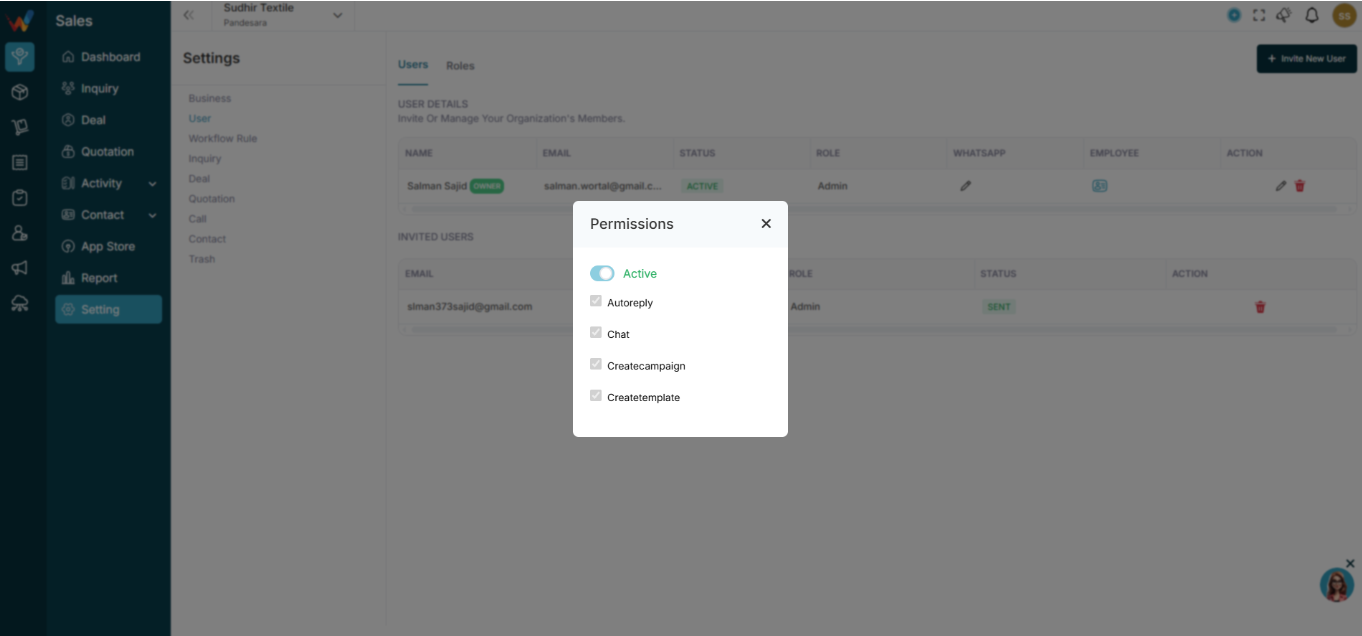
In Users table you will see:
WhatsApp toggle
This controls:
- WhatsApp integration access
- Chat / sharing features
Delete User
6.1 Delete User
Click the Delete icon.
6.2 Important
- Deleting user removes login access
- Past activity remains in reports
- Recommended to Deactivate instead of Delete
How to Create / Invite New User
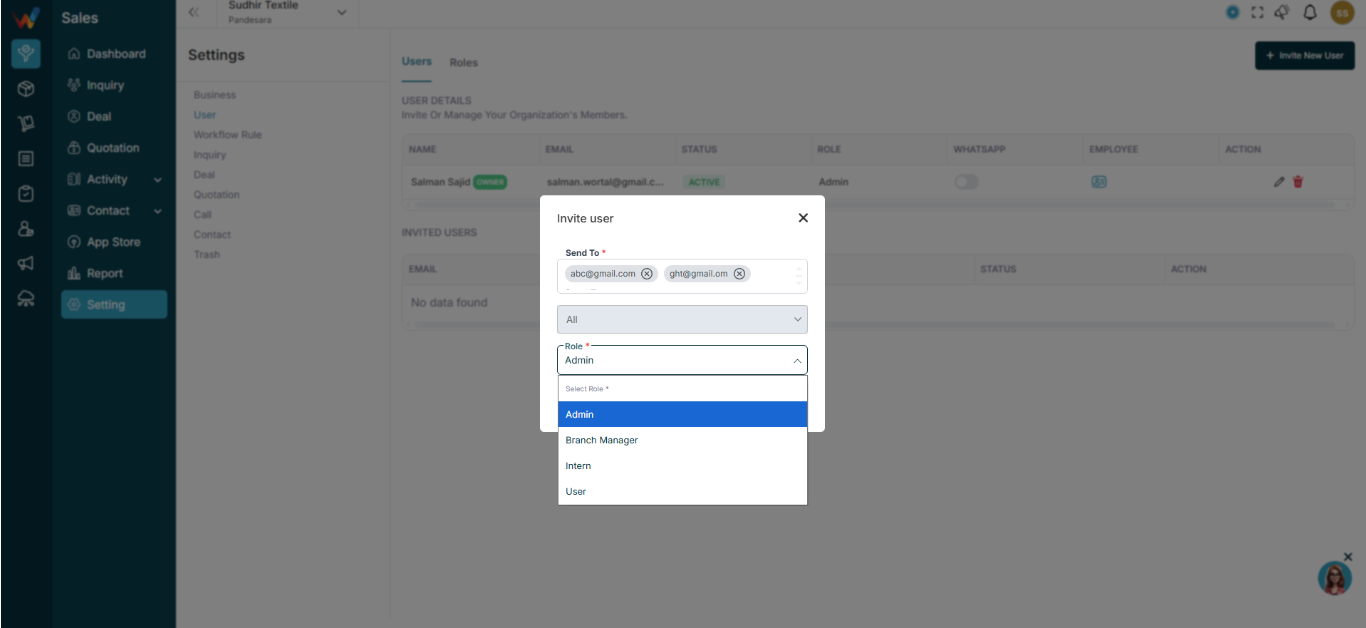
Navigation Path:
Sales Module → Settings → User → Users
The system includes a user invitation flow that allows a business owner or admin to add users to their business by sending an invitation to their email address along with an assigned role. After the invitation is sent, the system checks whether the email is already registered on the platform. If the user is already registered, they can log in and directly access the business with permissions based on their assigned role. If the user is not registered, they must first create an account using the invitation link sent to their email. Once the registration is completed, the system links the account to the invitation and grants the user access to the business according to the assigned role.
2.1.1 Step 1: Go to
Settings → Users
You will see:
- Users tab
- Roles tab
- Invite New User button
Click + Invite New User.
2.1.2 Step 2: Invite User
A popup will open.
2.1.3 Fill Required Details
Field — Description
Send To — Enter user’s email
Select Branch — Choose one or multiple branches
Select Role — Assign role
Click:
- Send Invite
or
- Save as Draft
What Happens After Sending an Invitation?
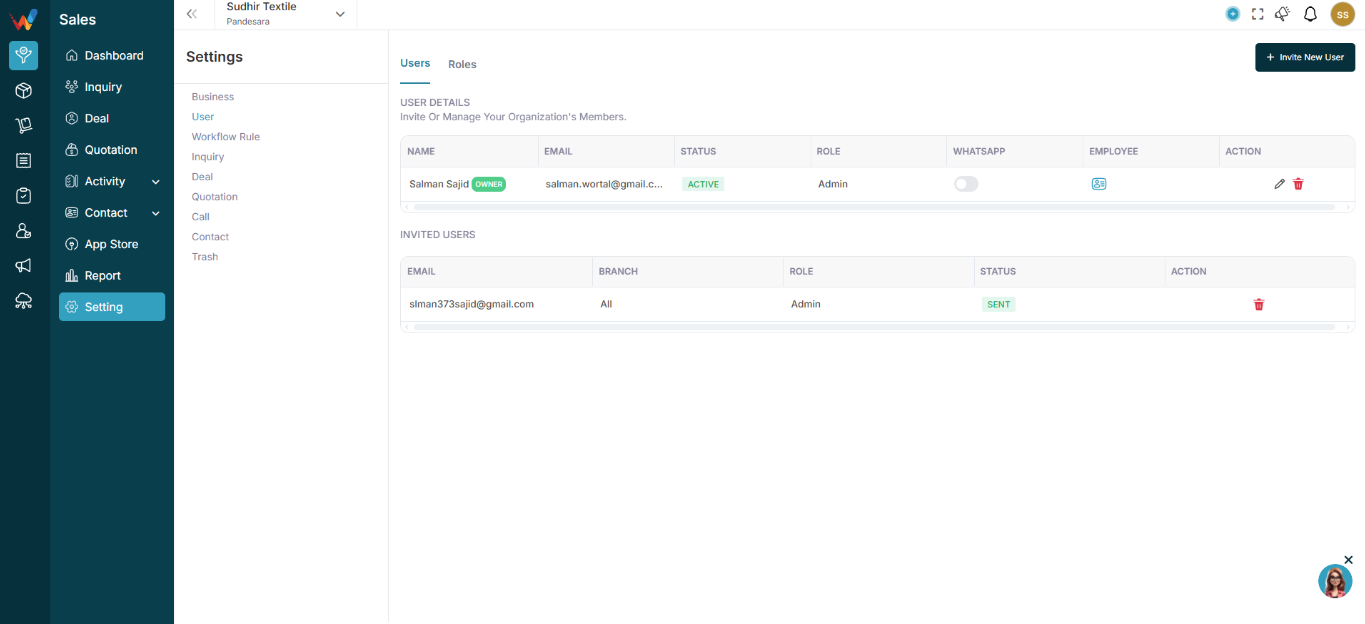
- User receives email invitation
- Status shows as Pending (in Invited Users section)
- Once accepted → user becomes Active
User Management Guidance Under – Wortal
User management allows you to:
- Add team members
- Assign roles
- Give branch-wise access
- Control permissions
- Activate / Deactivate users