E-Way Bill
Add E-Way Bill
1.1 Generate E-Way Bill
Part A: Basic Transport Information
Part A captures outward supply details and transporter information.
1.1.1 Sub-Type for Outward
Field type
Dropdown.
Example
Job Work.
Purpose
Used to define the nature of outward transaction.
Common types may include:
- Supply
- Export
- Job Work
- Transfer
- Others (as per GST structure)
This field determines the legal category of goods movement.
1.1.2 Transporter Name
Field type
Text.
Purpose
Used to enter the transporter company name.
1.1.3 Transporter ID
Field type
Text.
Purpose
Used to enter transporter GSTIN or Transporter ID. Important for government validation.
1.1.4 Approximate Distance in KM (Mandatory)
Mandatory field used to enter the approximate distance between dispatch and delivery location. This distance determines E-Way Bill validity period.
1.1.5 Pin to Pin Distance Search
Used to calculate approximate distance automatically based on PIN codes. Helps reduce manual error in distance entry.
1.2 Part B: Transport Movement Details
1.2.1 Transport Mode
Field type
Radio button selection.
Options:
Defines the mode of transport for goods movement.
1.2.2 Doc or RR or Airway No. or Landing
Field type
Text.
Used to enter document reference number such as:
- LR Number
- RR Number
- Airway Bill Number
- Bill of Lading
Mandatory for certain transport modes.
1.2.3 Transport Date
Field type
Date picker.
Defines date of goods dispatch. Used to calculate E-Way Bill validity.
1.2.4 Vehicle No.
Field type
Text.
Enter vehicle registration number. Required when transport mode is Road.
1.2.5 Vehicle Type
Field type
Radio button selection.
Options:
- Regular
- Over Dimensional Cargo
Defines vehicle classification.
After Successful Generation
- E-Way Bill number is generated
- Linked to invoice
- Stored in invoice record
- Available for download
Validation and Validity Logic
3.1 Validation Logic
System checks:
- Invoice exists
- E-Way Bill configuration enabled
- Credentials valid
- Distance entered
- Transport mode selected
- Vehicle number entered (if Road mode selected)
3.2 Validity Logic
E-Way Bill validity depends on:
- Distance in KM
- Transport mode
Government rules define expiry timeline based on distance.
Common Mistakes And Best Practices
Common Mistakes (Create Invoice)
- Not selecting Invoice Series
- Wrong GST rate selection
- Forgetting to select customer
- Entering incorrect quantity
- Applying incorrect manual adjustments
Common Mistakes (E-Way Bill)
- Entering wrong vehicle number
- Incorrect transport mode selection
- Forgetting to enter approximate distance
- Generating E-Way Bill before finalizing invoice
- Not enabling E-Way Bill configuration in settings
- Using invalid transporter ID
Best Practices (E-Way Bill)
- Always verify transporter ID before saving
- Use Pin-to-Pin search for accurate distance
- Ensure vehicle number is correct
- Confirm transport mode before submission
- Generate E-Way Bill only after invoice finalization
- Avoid editing invoice after E-Way Bill generation
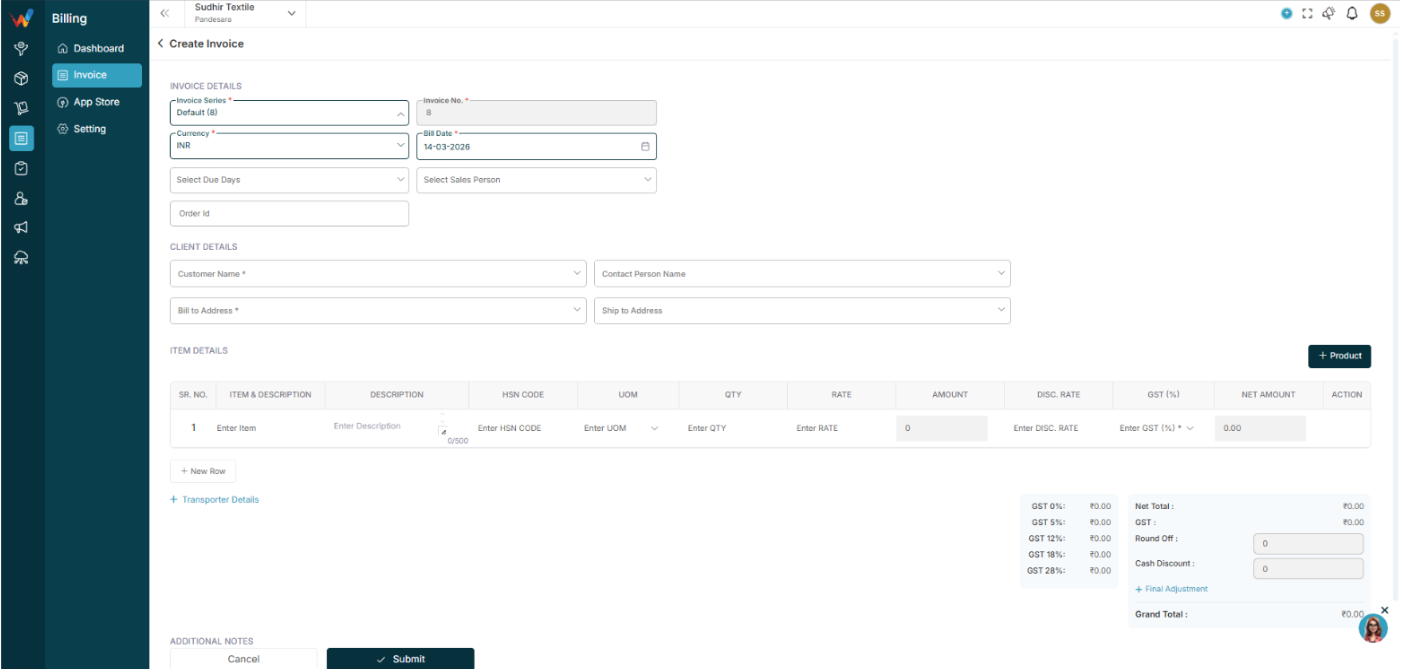
How To Create Invoice
Navigation Path:
Billing Module → Invoice → Click on + Invoice

1.1 Invoice Details Section
1.1.1 Invoice Series (Mandatory)
Field type
Dropdown.
Purpose
Defines invoice numbering format.
Behavior:
- User selects series (example: Sale, FY, etc.)
- System generates invoice number based on series configuration
- Controls prefix, suffix, and starting number logic
Important
Invoice number logic depends on Voucher Series configuration.
1.1.2 Invoice No. (Mandatory)
Auto-filled based on selected series.
1.1.3 Currency (Mandatory)
Field type
Dropdown.
Default
INR.
1.1.4 Bill Date (Mandatory)
Field type
Date picker.
Purpose
Defines invoice date.
1.1.5 Select Due Days
Field type
Dropdown.
Purpose
Defines payment term duration. The system may calculate due date automatically based on selected days.
1.1.6 Select Sales Person
Field type
Dropdown.
Purpose
Assigns responsible salespeople.
Used for:
- Performance tracking
- Sales reporting
- Commission calculation (if enabled)
1.1.7 Order ID
Field type
Optional.
Purpose
Used to link invoices with a specific order record.
Client Details Section
2.1 Customer Name (Mandatory)
Field type
Dropdown selection.
When selected:
- Billing address auto-fetches
- GSTIN auto-fetches
- Customer details populate below
2.2 Contact Person Name
Field type
Optional.
Purpose
Used when a customer organization has multiple contacts.
2.3 Bill to Address (Mandatory)
Field type
Dropdown selection.
Purpose
Defines official billing address.
2.4 Ship to Address
Field type
Optional.
Purpose
Used when delivery location differs from billing address.
Item Details Section
This is the most important section of invoice creation.
3.1 Table Columns
- SR. NO.
Auto-generated sequence number. - Item and Description
Select item from product master.
If item not available:
Click Product button to create a new product - Description
Optional item-level notes.
Character limit: 500. - HSN Code
Required for GST compliance. Defines tax category. - UOM
Unit of Measurement.
Example: PCS, KG, MTR, etc. - QTY
Quantity of product. - Rate
Price per unit. - Amount
Auto-calculated field.
Formula:
Amount = Quantity × Rate
Users cannot manually override calculated logic. - GST (Percent)
Dropdown selection.
Options include: 0 percent, 5 percent, 12 percent, 18 percent, 28 percent.
The system calculates tax based on the selected rate. - Net Amount
Auto-calculated.
Formula:
Net Amount = Amount + GST - Action Column
Used to delete an item row. - New Row
Adds an additional item row for multi-product invoices.
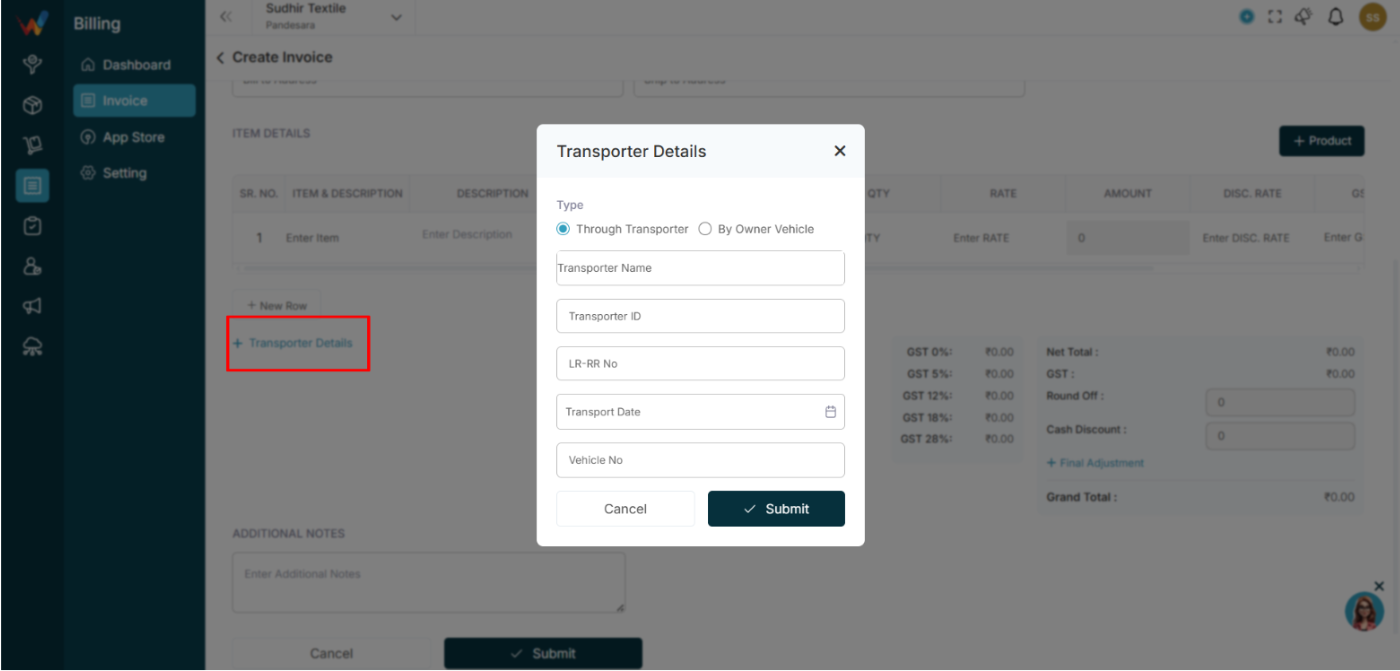
Transporter Details

Expandable section. Used when goods movement requires transporter details.
Important for:
- E-Way Bill
- Logistics tracking
Tax and Summary Section (Right Side Panel)
This section calculates totals in real time.
5.1 GST Breakdown
System shows cumulative values for:
- GST 0%
- GST 5%
- GST 12%
- GST 18%
- GST 28%
5.2 Net Total
Sum of all item amounts before GST.
5.3 GST
Total GST amount.
5.4 Round Off
Manual adjustment field used to adjust final decimal difference.
5.5 Cash Discount
Optional deduction field.
5.6 Final Adjustment
Additional manual adjustment option.
5.7 Grand Total
Final payable amount.
Formula:
Grand Total = (Net Total + GST plus or minus Round Off minus Discount plus or minus Adjustment)
Additional Notes Section
Free text field.
Used for:
- Payment terms
- Delivery instructions
- Bank details
- Special conditions
Bottom Action Buttons
7.1 Cancel
Closes the screen without saving.
7.2 Submit
Validates mandatory fields. Creates invoice record. Invoice appears in the Invoice List.
Business Examples & Best Practices
Real Business Example
Scenario:
The owner wants to check all invoices of “REEJI TRADERS”.
Steps:
- Open Invoice section
- Type “REEJI” in search
- List shows only invoices of that party(REEJI TRADERS)
- Click latest invoice
- Preview opens with full details
- Owner verifies totals and GST
- If required, owner duplicates invoice for similar billing next time
Best Practices
- Use Search for quick invoice lookup instead of scrolling
- Use Filter when searching by date, item, amount, or location
- Always verify invoice amount and GST in preview before sharing or printing
- Configure Voucher Series and Field Settings before starting billing for a new financial year
- Use Cancel Invoice instead of Delete when the record should remain for reference
- Keep customer address and GSTIN updated for accurate tax calculation
Common Mistakes (Invoice Section)
- Forgetting to click Submit in the filter panel and expecting results to change
- Not resetting filters and assuming invoices are missing
- Deleting an invoice instead of cancelling it
- Creating invoices without correct series setup leading to numbering confusion
- Not verifying GST percentage and totals before finalizing invoice
- Assuming search and filter changes invoice data (it only changes the view)
List View
Navigation Path:
Billing Module → Invoice

1.1 Page Header Title
Invoice (4)
Shows the total number of invoices currently visible in the list (after any search or filter).
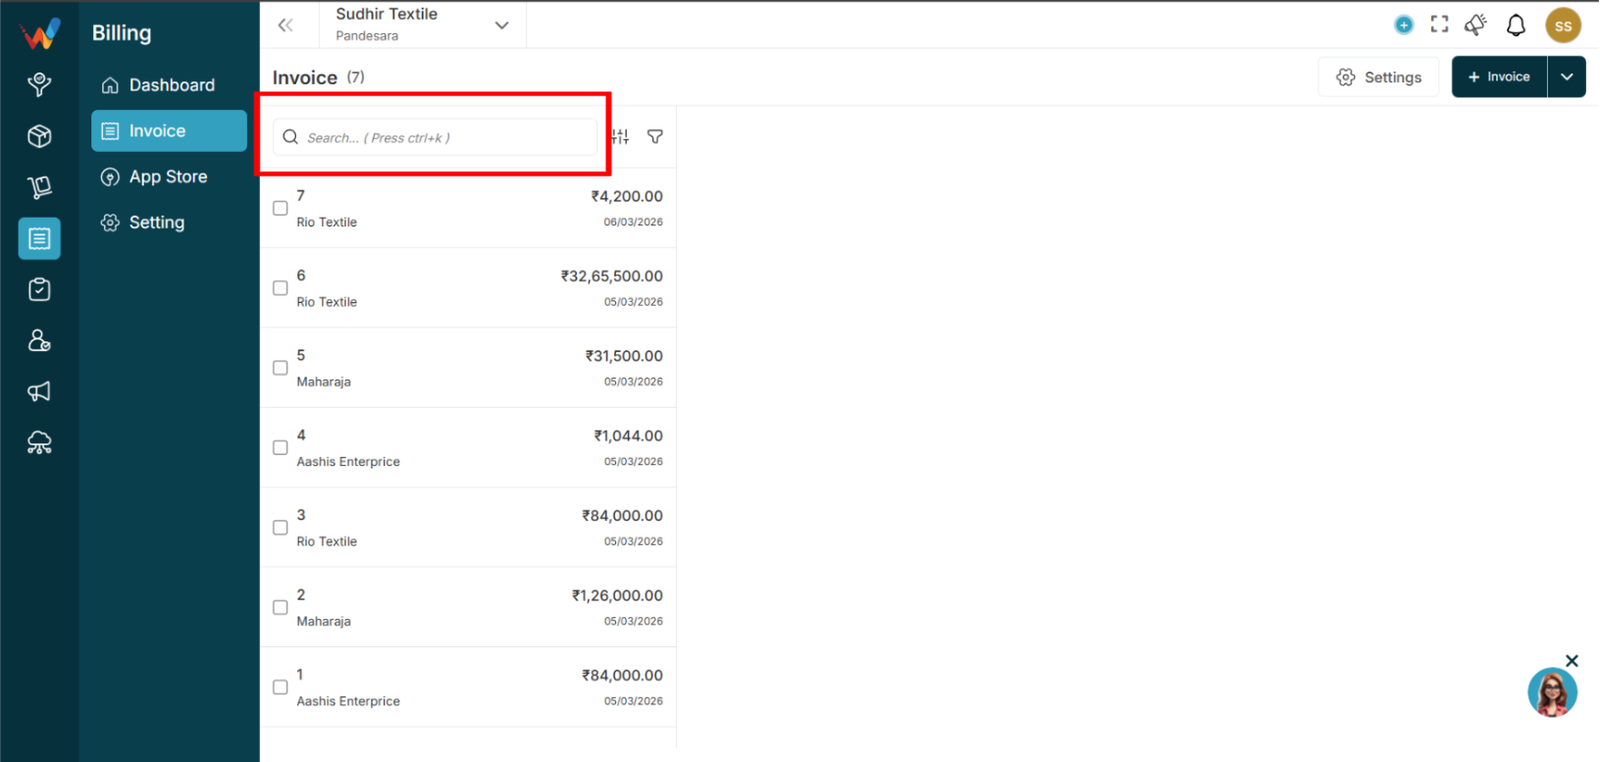
1.2 Top Left Section (Search and Filter)
1.2.1 Search Bar (Press Ctrl + K)

Purpose
Used to quickly find invoices from the list.
It searches:
- Invoice number
- Customer or party name
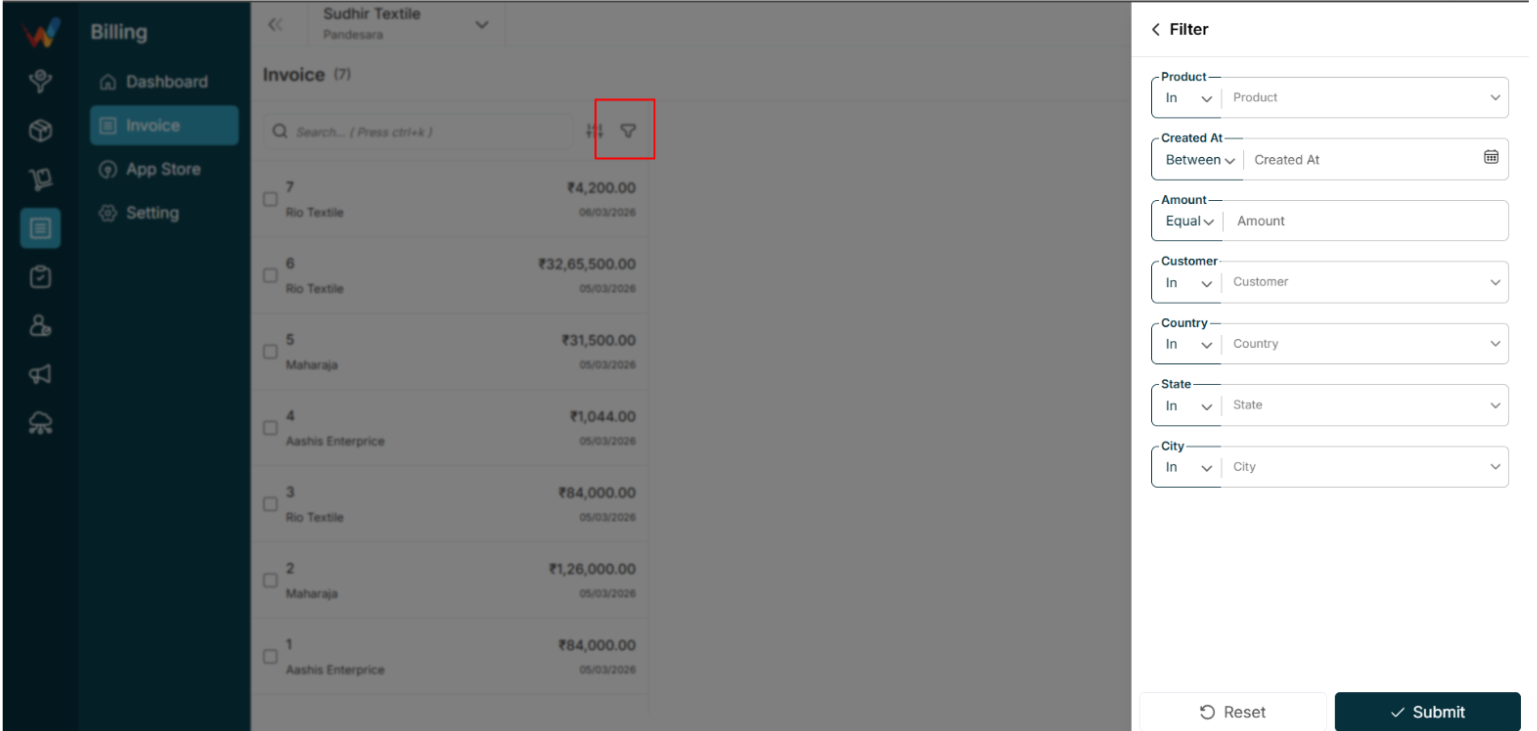
1.2.2 Filter Icon (Funnel)
Purpose
Used to open the Invoice Filter Panel.

Filters visible in the filter screen:
- Party Name
- Created Date
- Select Item
- Amount
- Country
- State
- City
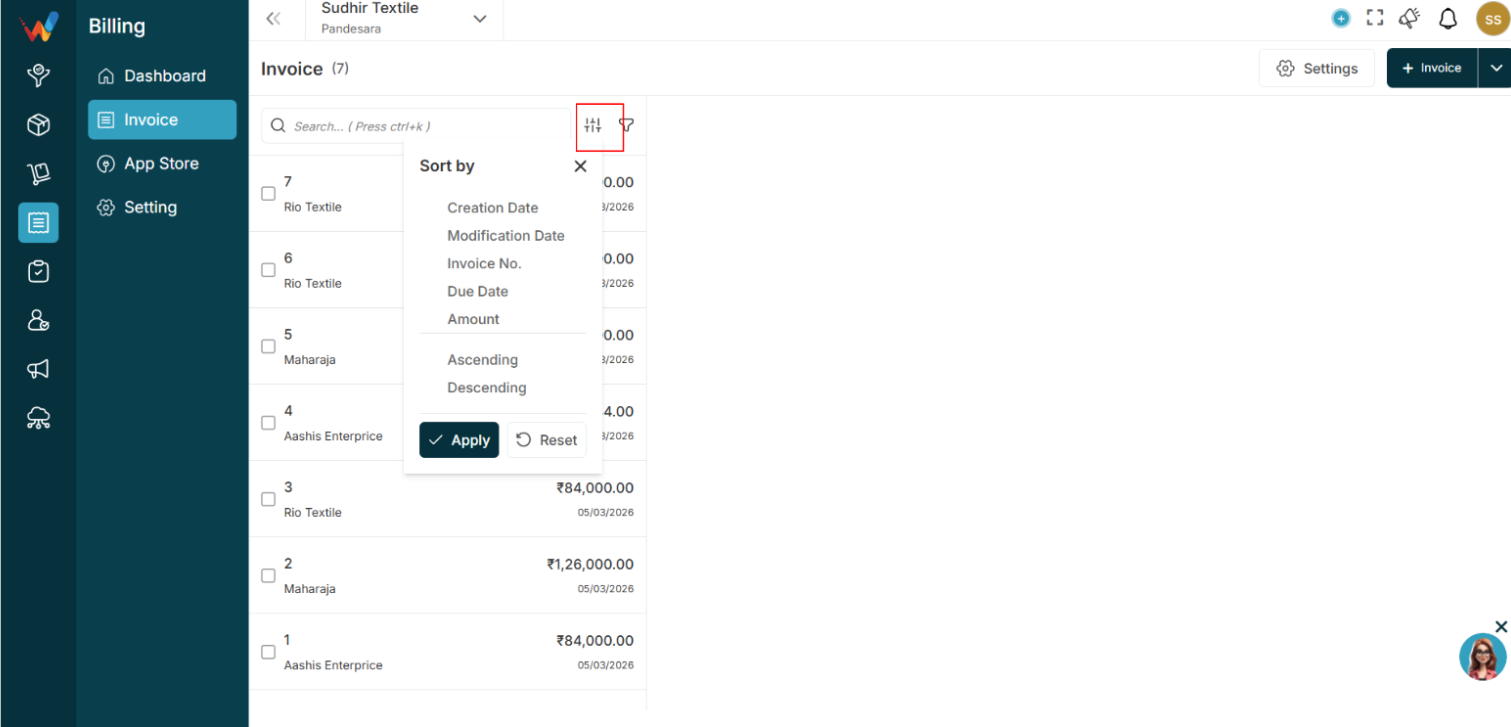
1.2.3 Sort Icon
Purpose
Used for list-level controls (sorting, arrangement, and custom view controls depending on system setup).

Sort by:
- Creation Date
- Modification Date
- Invoice No.
- Due Date
- Amount
Direction:
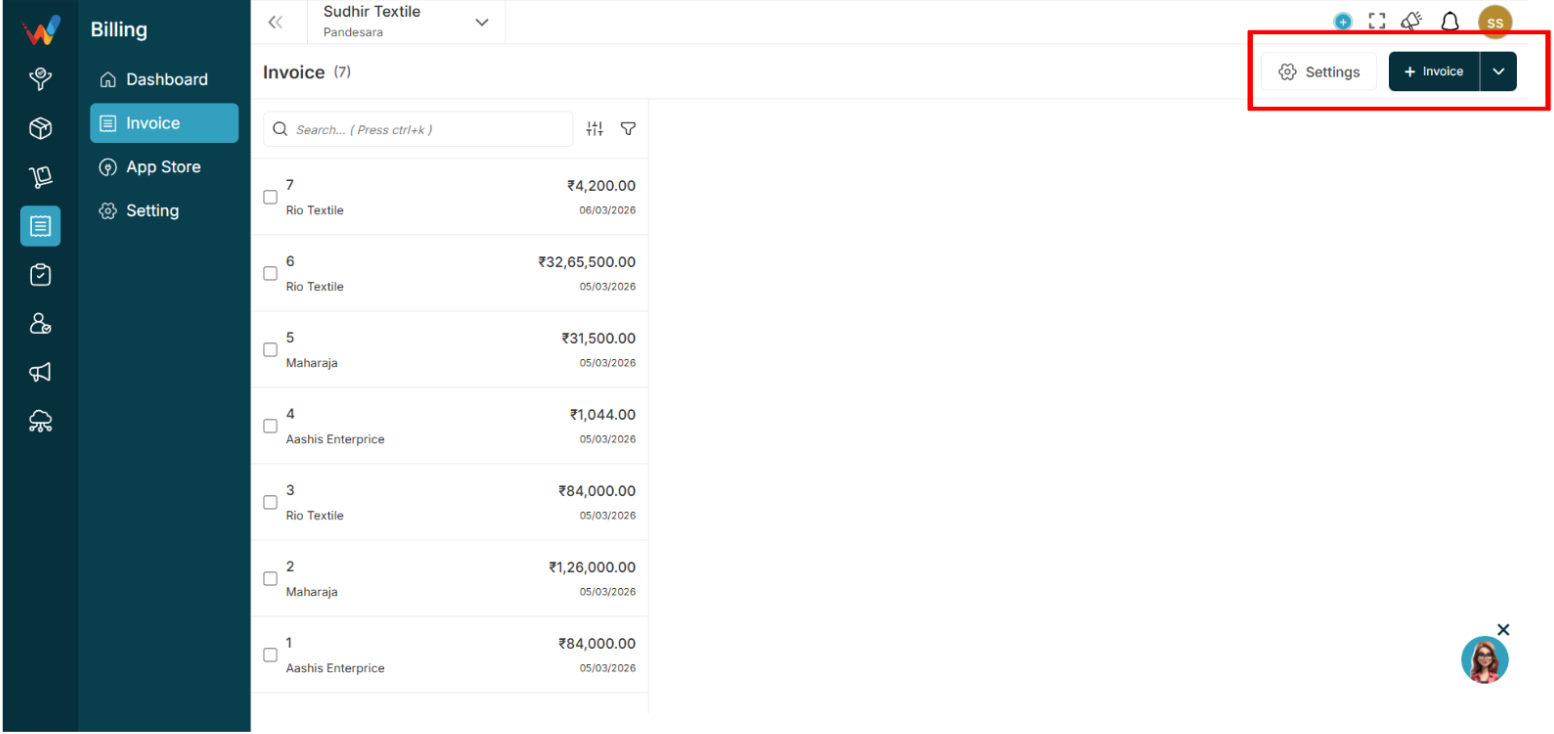
1.3 Top Right Section (Actions)
1.3.1 Settings Button

Purpose
Open invoice settings.
Used for:
- Field Settings
- Voucher Series
- Configuration (E-Invoice and E-Way Bill)
- Transporter Details
- Sales Person
1.3.2 Invoice Button
Purpose
Used to create a new invoice.
Navigation Path:
Billing Module → Invoice → Click on + Invoice
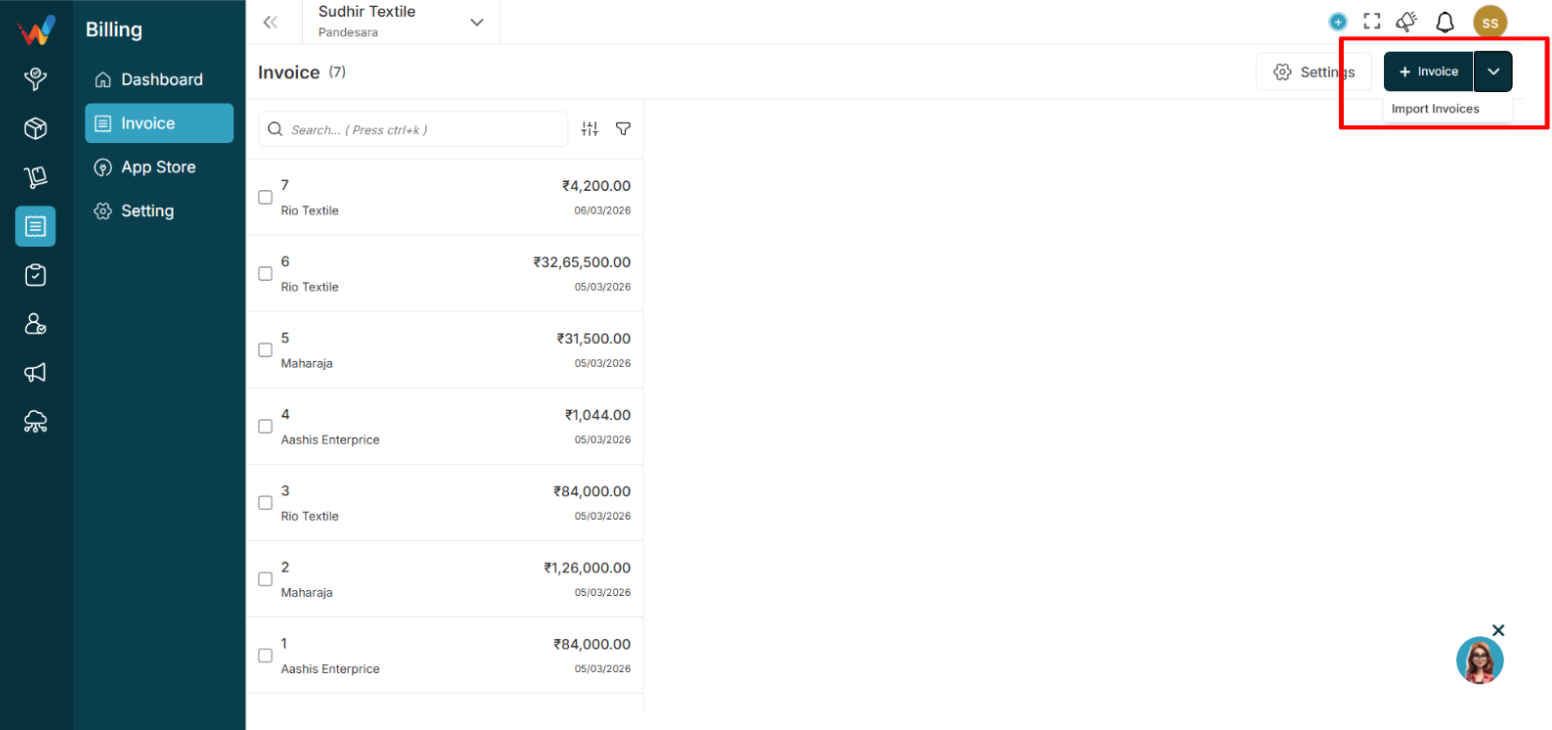
1.3.3 Dropdown Beside Invoice Button

Purpose
Provides a button to import invoices.
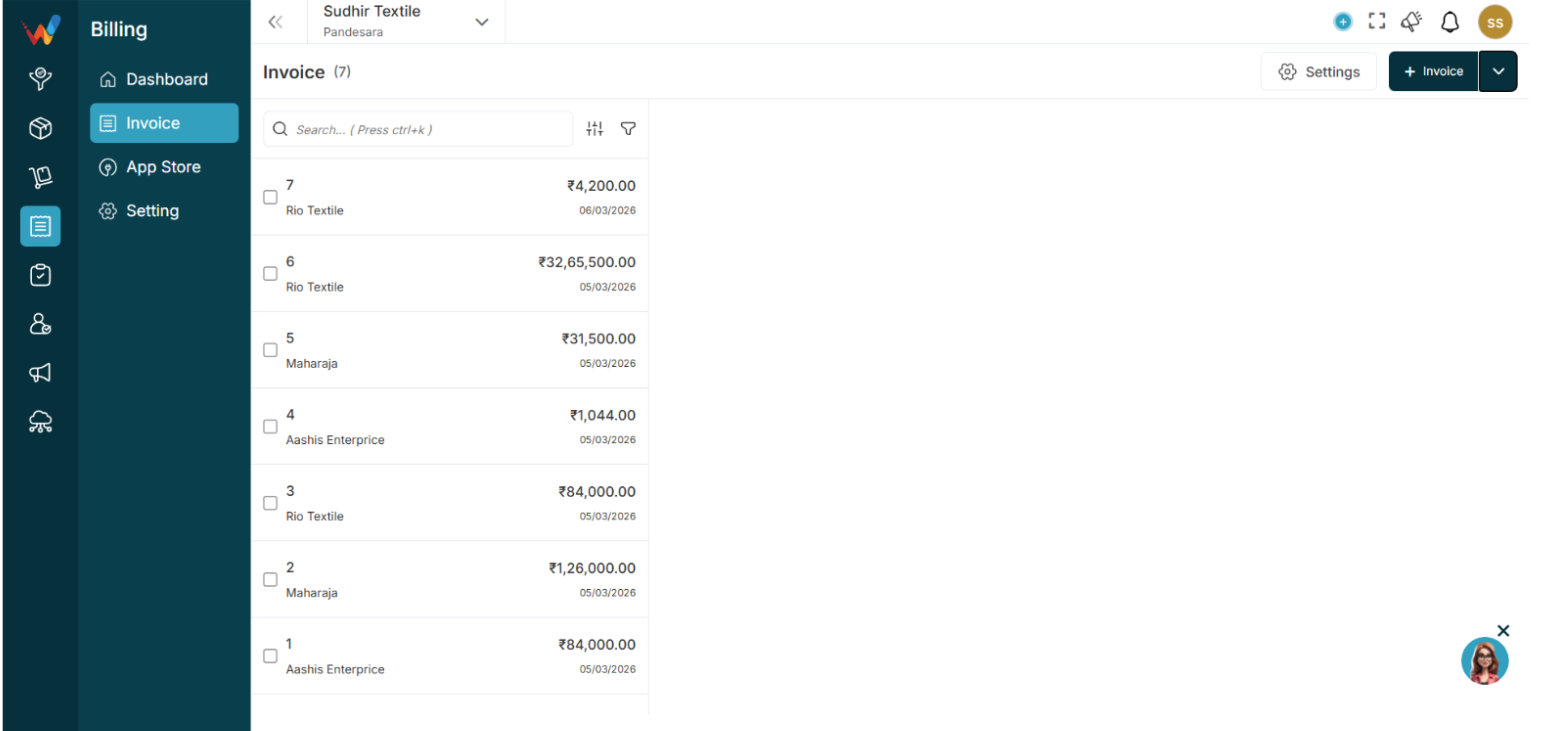
1.4 Invoice List Area (Left Panel)

Each row in the list displays:
- Invoice Number
- Party or Client Name
- Amount
- Date
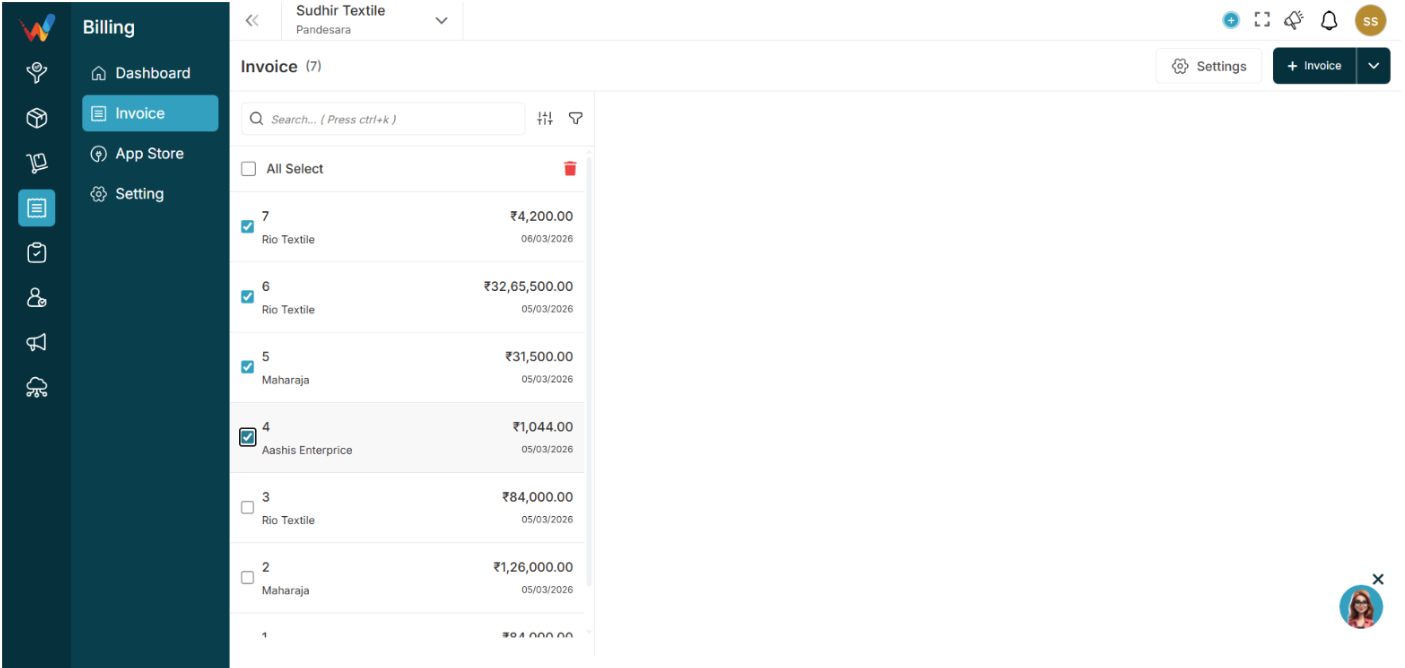
1.4.1 Checkbox per Invoice

Purpose
Used to select invoice(s) for bulk delete.
1.4.2 Clicking an Invoice Row
Purpose
Opens invoice preview on the right side.
Behavior:
- Highlights the selected invoice in the list
- Loads invoice details in the right-side preview pane
- View-only preview by default (does not edit the invoice)
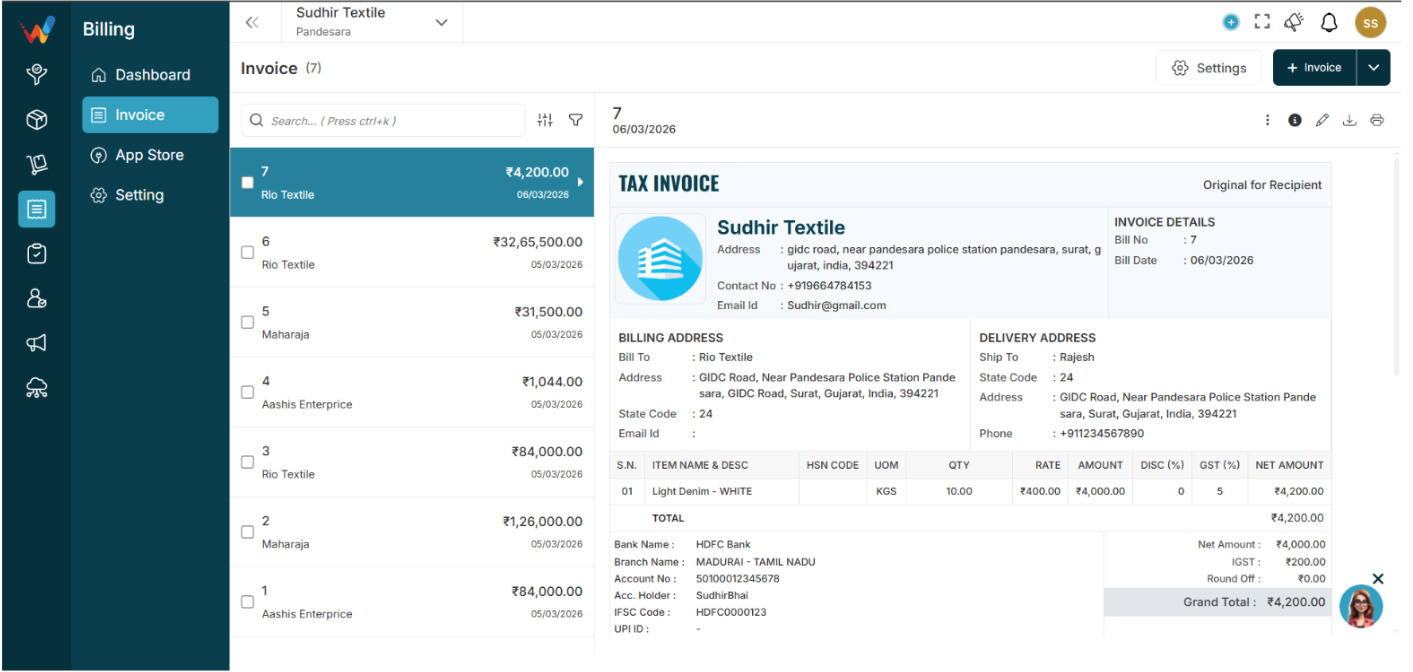
Invoice Preview

When an invoice is selected, the right side shows the full Tax Invoice preview, including:
- Company details
- Invoice details (number, date)
- Party billing details
- Item table (quantity, rate, GST, totals)
- Grand total
- Terms and conditions
- Additional notes
- Signature areas
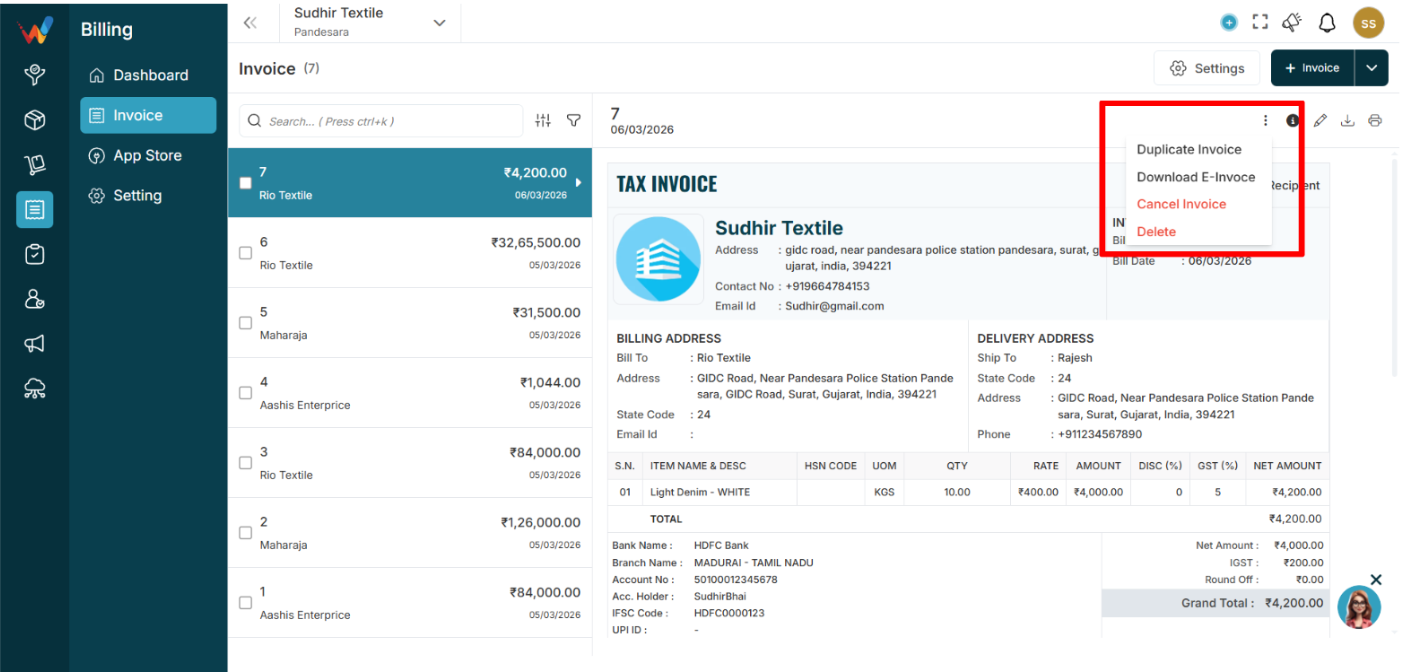
2.1 Invoice Action Menu (Three Dots in Preview)

Purpose
Provides invoice-level actions.
Actions:
- Add e-Way Bill
- Add e-Invoice
- Duplicate Invoice
- Download E-Invoice
- Cancel Invoice
- Delete
Behavior:
Add e-Way Bill
Add e-Invoice
Duplicate creates a new invoice copy
Download E-Invoice downloads the e-invoice document
Cancel marks invoice cancelled (does not remove record like delete)
Delete removes invoice and typically sends it to Trash or audit trail (based on system configuration)
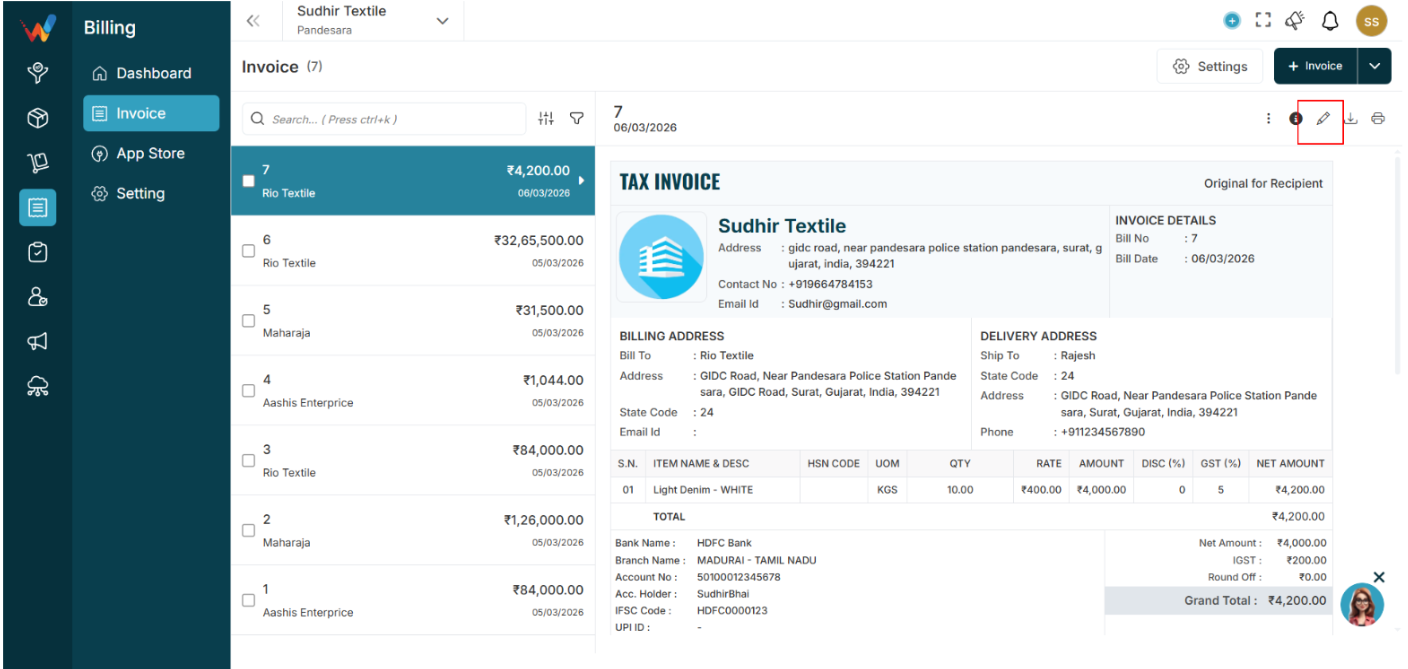
2.2 Edit

Purpose
To update or change any detail in an already created invoice.
2.3 Download
Purpose
To download the finalized invoice in PDF format.
2.4 Print
Purpose
To print an invoice from the printer connected with the system.
Introduction
Introduction to Billing (Invoice) Section
The Billing (Invoice) section is used to create, view, manage, and maintain all invoices generated in the system. It provides a list of invoices on the left side and opens the selected invoice preview on the right side.
What Users Can Do from the Invoice Section
Users can:
- Search invoices instantly
- Filter the invoice list using multiple criteria
- Open any invoice to view full details
- Create a new invoice
- Import invoices
- Open invoice settings (field settings, voucher series, configuration, etc.)
- Perform invoice actions like duplicate, cancel, delete, and download (as per permissions)
How Outward Stocks
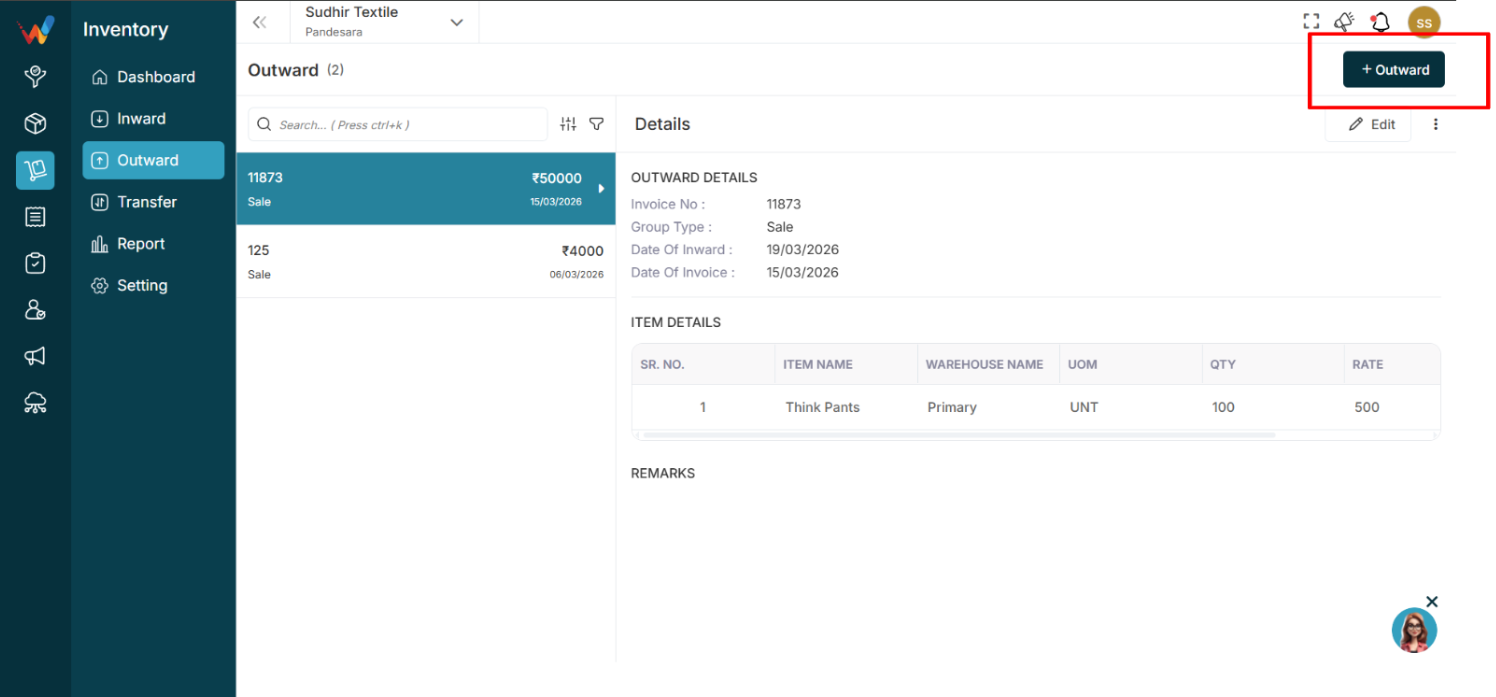
Add Outward Stocks
The Add Outward Stocks screen is used to record new stock removals.
By Clicking the “+ Outward” Button, the Following Functions Apply:
Navigation Path:
Inventory Module → Outward → Click on + Outward

1.1 Add Outward Stocks (Form Actions)
Voucher Type
Begin by selecting the Group Type, which defines the type of outward transaction. Available options include:
Invoice Details
Enter the required invoice information. This section captures the transaction’s invoice data.
Item Details
Add the items being dispatched along with their quantity and rate. To include multiple items, click + New Row.
Remark
Used to add notes or additional details.
Submit
Click Submit to save the outward entry.
Cancel
Click Cancel to exit without saving.
Back
Click Back to return to the previous screen.
Outward details And Actions
Outward – List View

Navigation Path:
Billing Module → Outward
1.1 Purpose of Outward List View
Displays all outward transactions. Each entry typically includes:
- Invoice Number
- Transaction Type
- Amount
- Date
Purpose:
Provides a complete record of stock leaving your inventory.
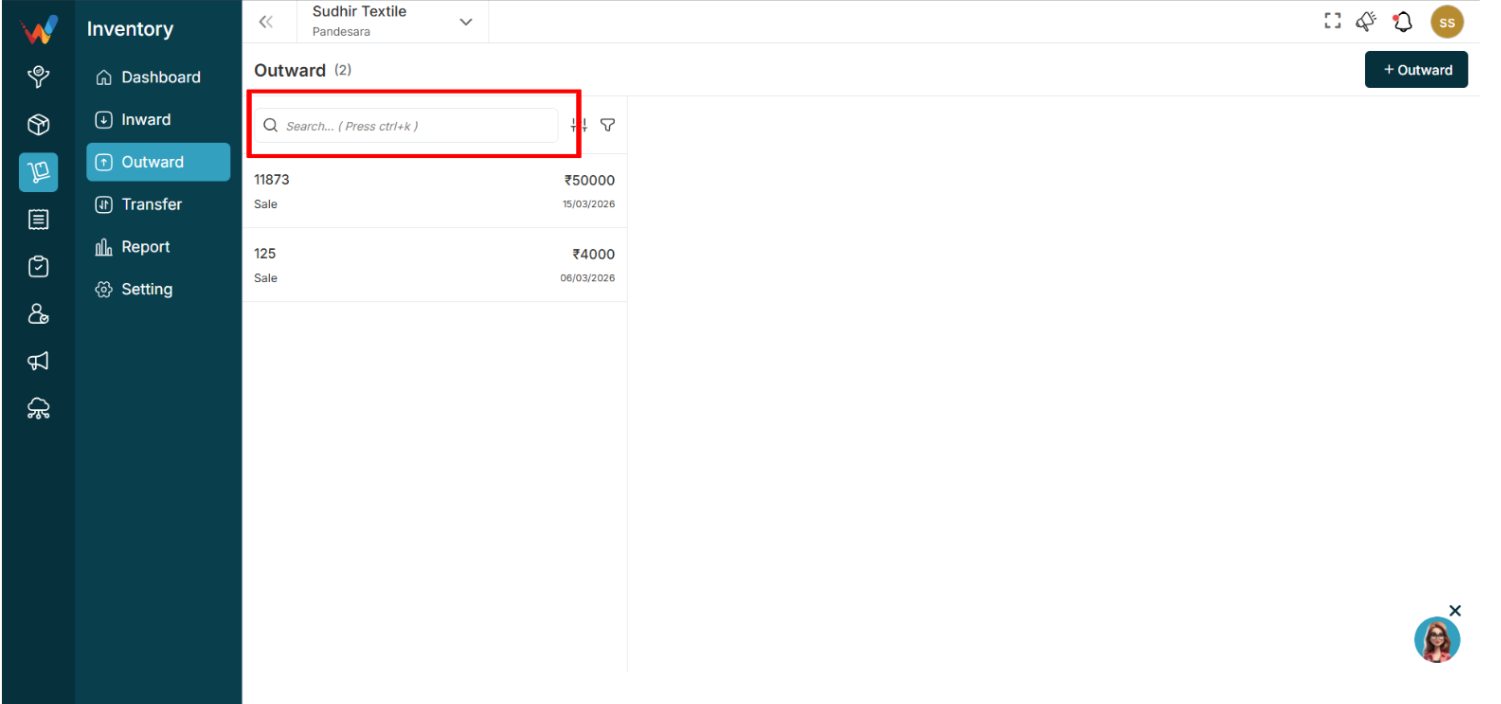
1.2 Search Bar
Used to quickly find outward transactions.
Shortcut: Ctrl + K

How to Use
- Enter Invoice No or Amount.
Note:
Item Name is not searchable.
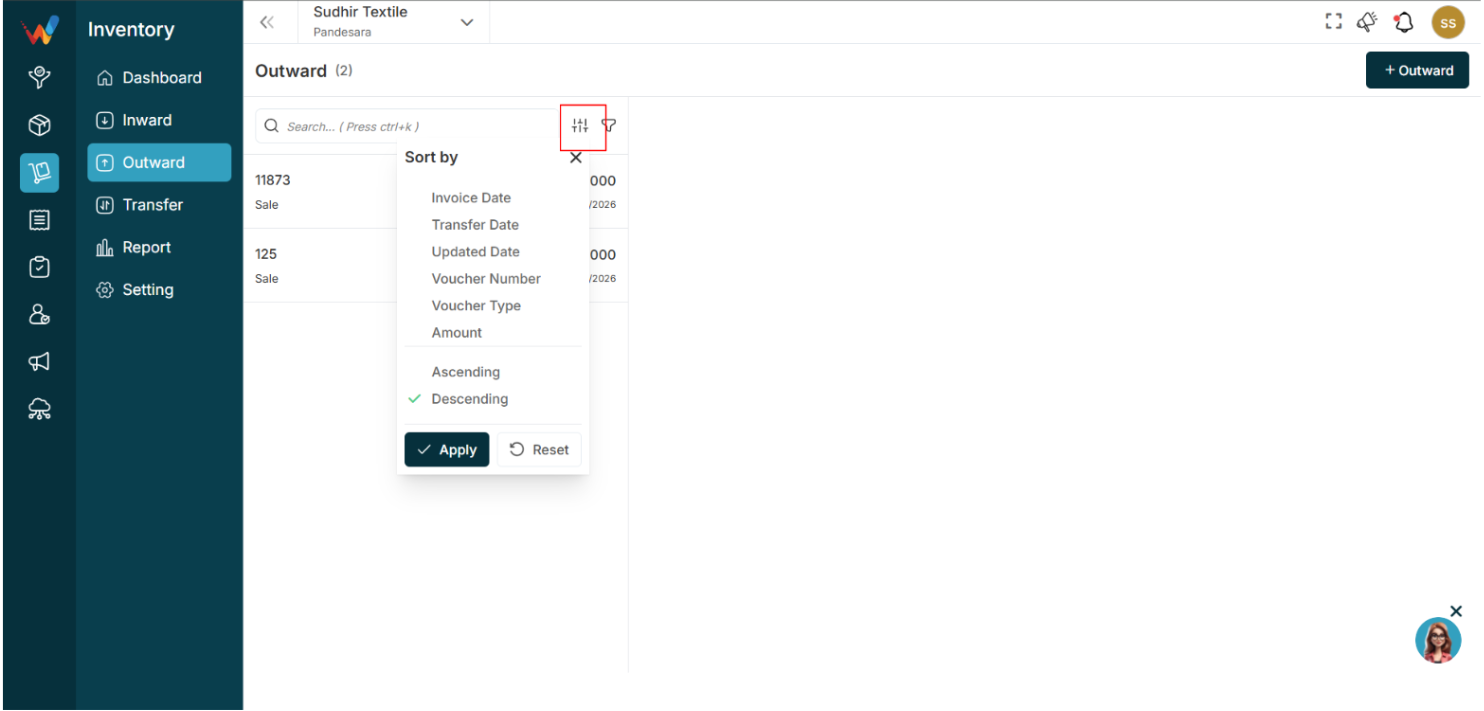
1.3 Sort Function

Used to arrange outward records.
Available Options
- Invoice Date
- Transfer Date
- Updated Date
- Voucher Number
- Voucher Type
- Amount
Sort Order
Purpose:
Helps organize and review transactions easily.
Apply: Confirms sorting
Reset: Clears selection
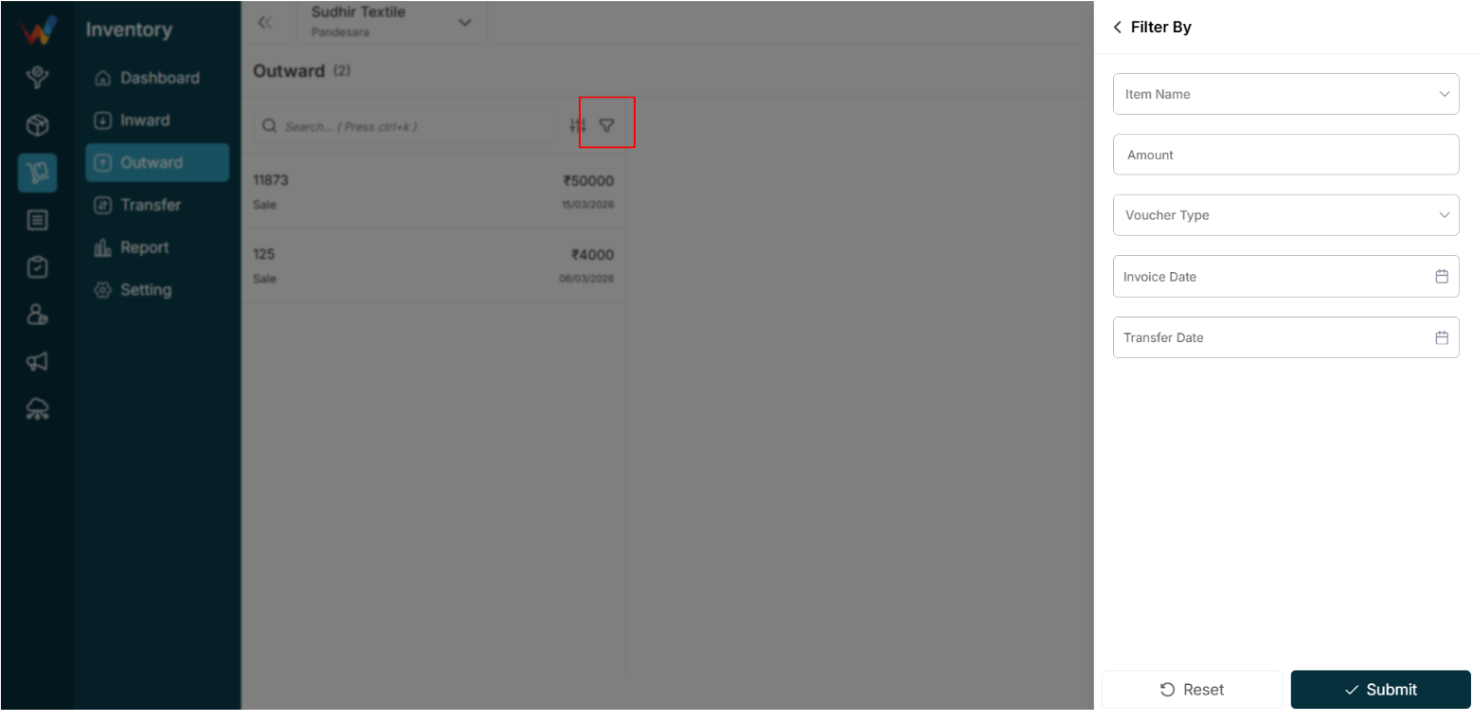
1.4 Filter Panel
It helps you find exactly what you’re looking for by filtering out unnecessary results.

Available Filters
- Item Name
- Amount
- Transfer Type
- Invoice Date
- Transfer Date
How to Use
- Open the Filter Panel.
- Enter filter details.
- Click Submit.
- Click Reset to clear filters.
Purpose:
Allows you to view only relevant transactions.
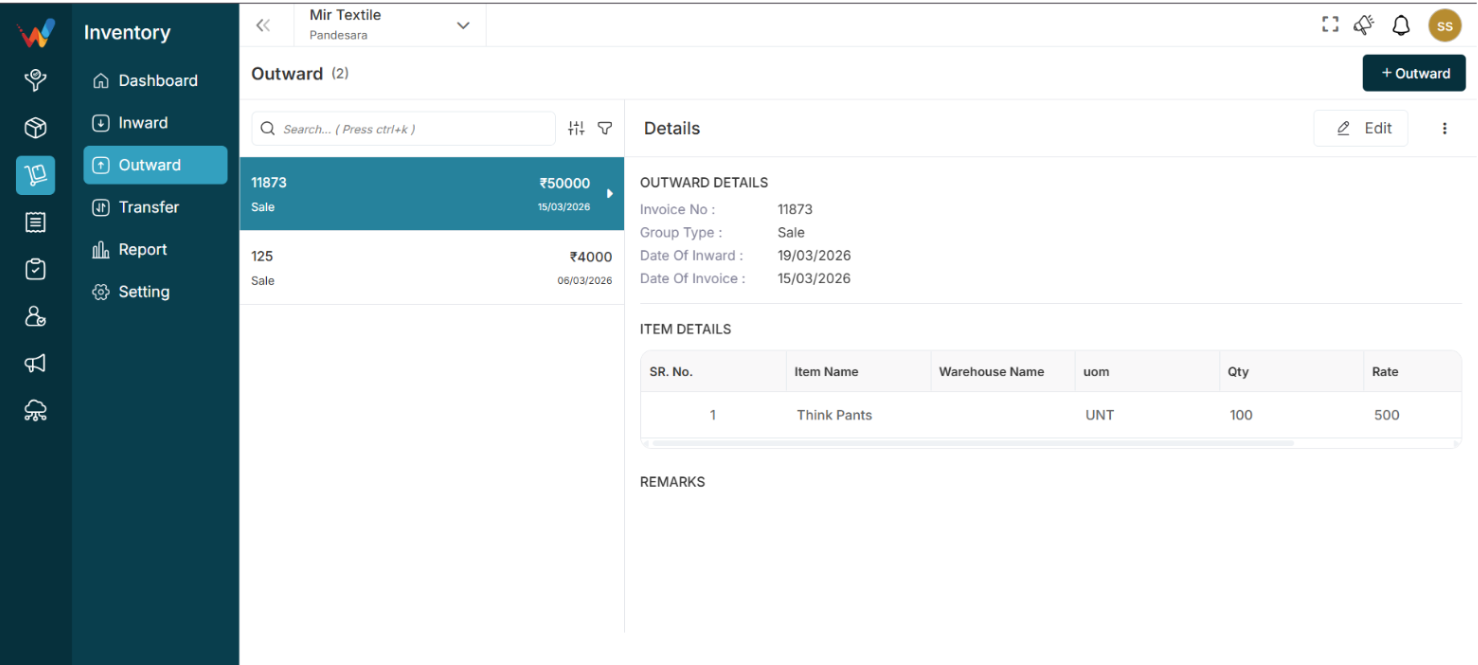
Outward Details View

This screen displays complete information for the selected outward transaction. It helps you review stock removals and verify transaction details.
2.1 Viewing Details
If you select an invoice, all related details will be displayed.
2.2 Outward Details
This section shows the basic transaction information.
Fields Available
- Invoice No: Unique invoice reference
- Group Type: Type of transaction (for example, Sale)
- Date of Inward: Linked inward date (if applicable)
- Date of Invoice: Invoice creation date
Purpose:
Helps identify and validate the transaction.
2.3 Item Details
Displays all items included in the outward entry.
Columns Available
- Sr. No.: Item sequence number
- Item Name: Name of the product
- Warehouse Name: Warehouse from which stock is removed
- UOM: Unit of measurement
- Qty: Quantity dispatched
- Rate: Item price per unit
- Amount: Total value of the item
Purpose:
Provides stock and financial breakdown.
2.4 Remarks
Displays additional notes related to the transaction.
Purpose:
Used to store comments or special details.
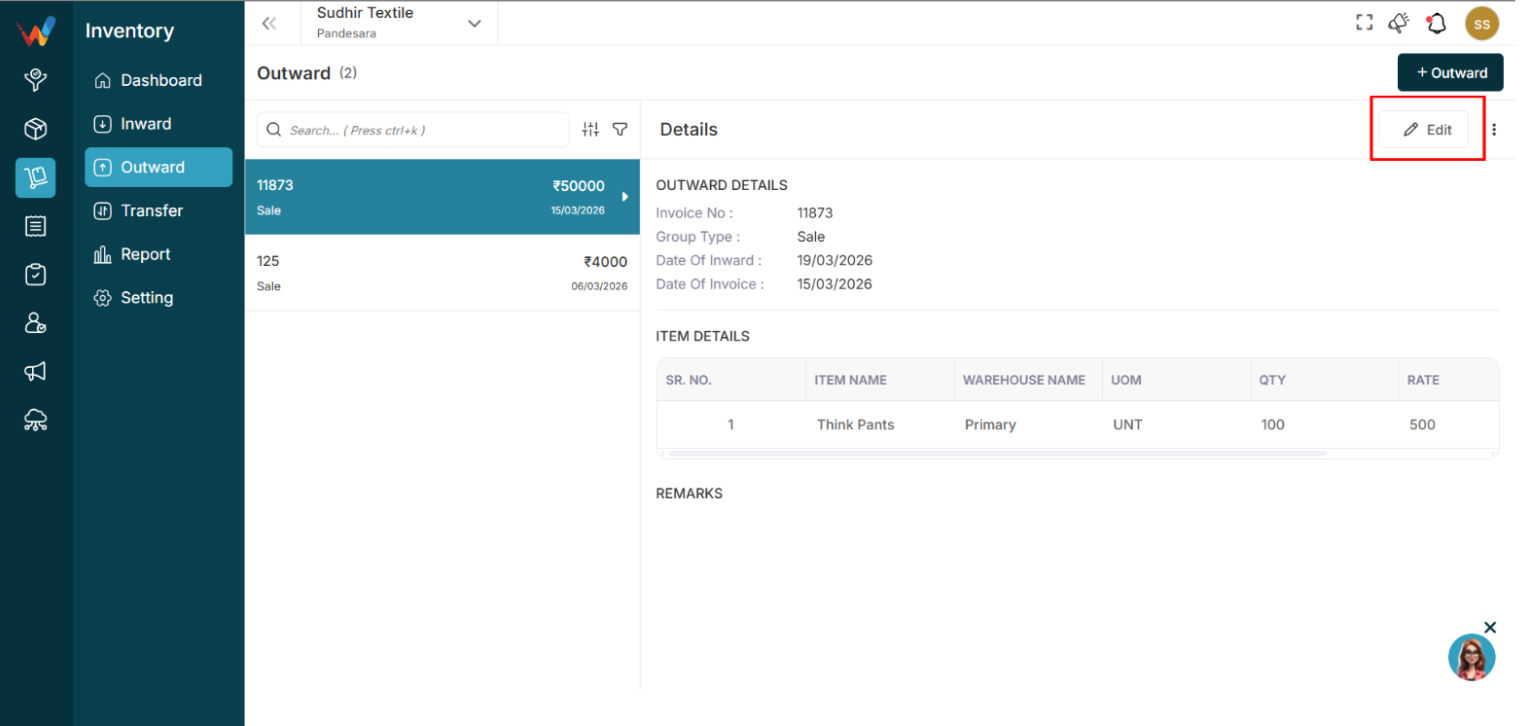
2.5 Edit Button
Used to update the outward transaction.

Navigation Path:
Inventory Module → Outward → Click on + Edit
Common Use Cases
- Correct quantity
- Update rate
- Modify invoice details
2.6 Delete Option

Used to remove the outward transaction.
Important:
Deleting this entry will update stock levels.
Recommended Practice:
Allow deletion only to authorized users.
Introduction
Introduction to Outward Module
The Outward module is used to record stock removals.
1.1 Common Use Cases
- Sales entries
- Stock dispatch
- Purchase returns
- Stock adjustments
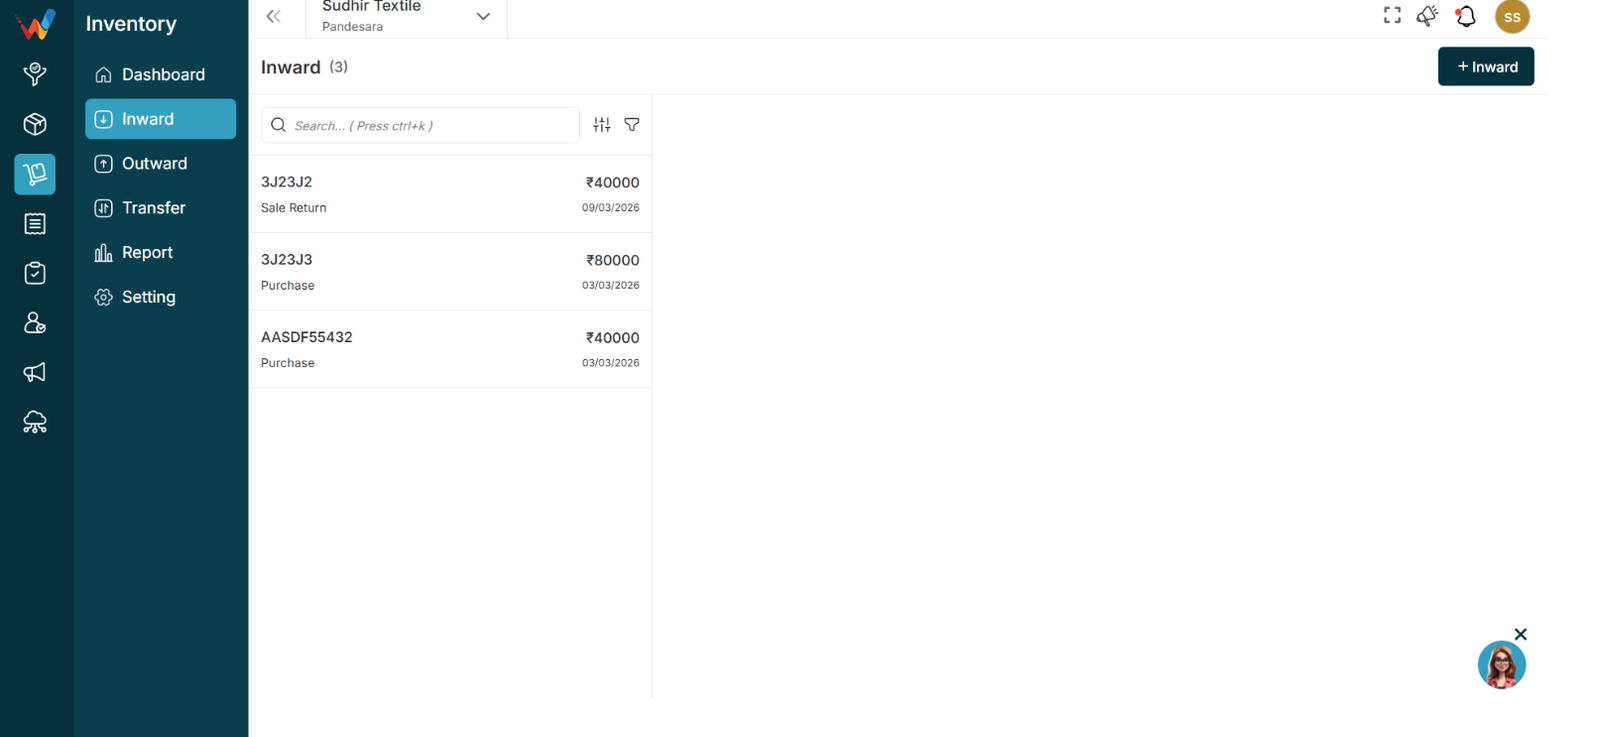
How Inward Stocks
The Add Inward Stocks screen is used to record items coming into stock. It allows you to enter invoice details and item information for inward entries.
By Clicking the “+ Inward” Button, the Following Functions Apply:

Navigation Path:
Inventory Module → Inward → Click on + Inward
1.1 Add Inward Stocks (Form Actions)
Invoice Details
Enter the required invoice information. This section captures the transaction’s invoice data.
Item Details
Add the items being received along with their quantity and rate. To include multiple items within the same invoice, click + New Row.
Remark
Use this field to add notes or additional details related to the transaction.
Submit
Click Submit to save the inward stock entry.
Cancel
Click Cancel to exit the screen without saving.
Back
Click Back to return to the previous screen.