Textile Practices & Checklist
Textile Business Example
Salesperson calls 50 leads:
30 → No Response
20 → Connected
Out of 20 connected:
- 10 → Interested
- 5 → Call Later
- 3 → Not Interested
- 2 → Planned
Owner can see:
- Real interest ratio
- Telecalling efficiency
- Lead quality
Why This Is Important
Without structured call responses:
- Sales reports become inaccurate
- Conversion ratio becomes unclear
- Follow-up becomes confusing
- Performance cannot be measured
With proper setup:
- Clear pipeline movement
- Accurate reporting
- Strong telecalling analytics
- Better team accountability
Common Mistakes
- Too many similar responses
- No standard naming
- Not separating connected vs non-connected
- Allowing sales to create random responses
Best Practice
- Keep 6 to 10 responses maximum
- Standardize naming
- Train the team on usage
- Review monthly
Final Checklist
- Incoming responses defined
- No response options defined
- Unused responses disabled
- Team trained
- Reports verified
Complete Guide
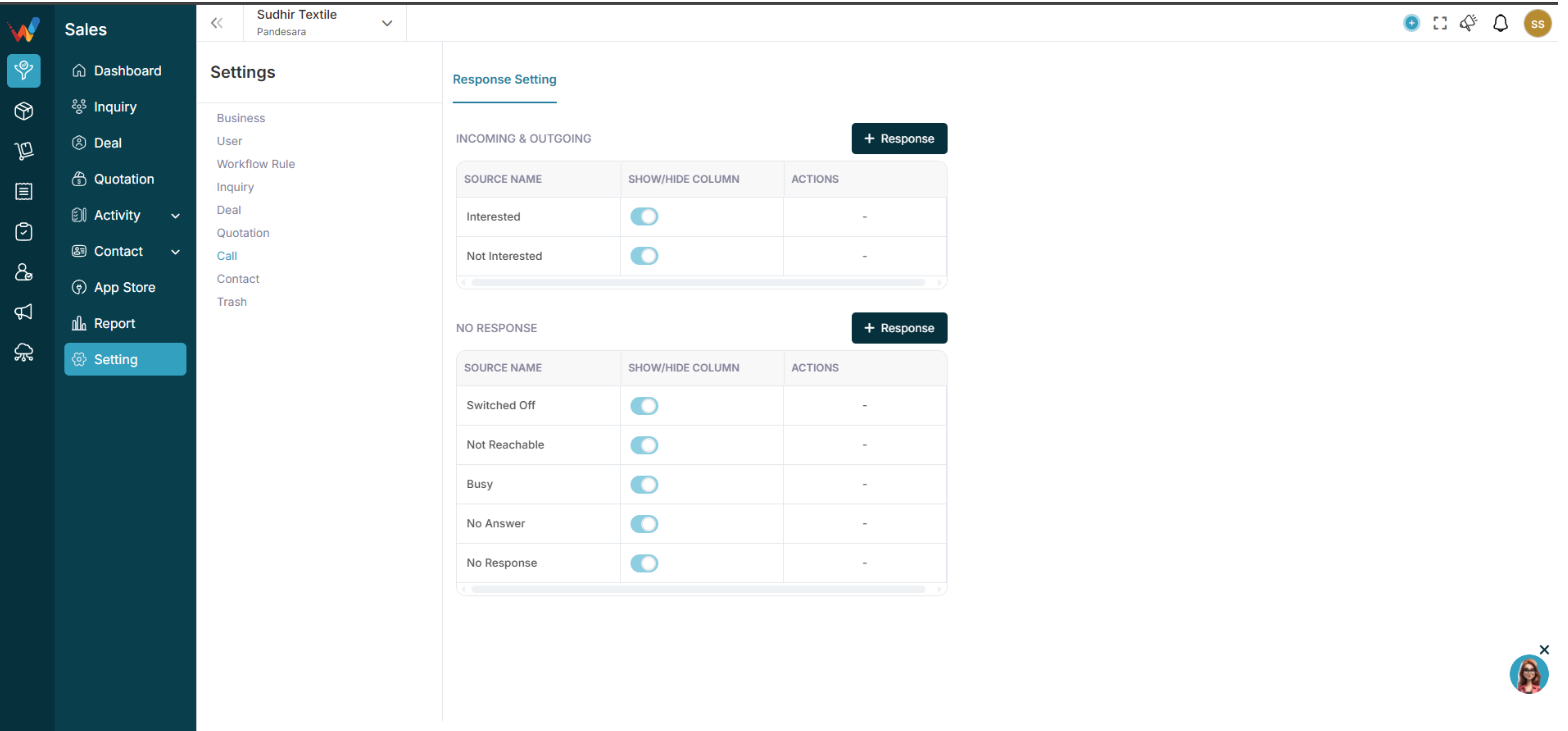
Call Settings – Navigation
Navigation Path:
Sales Module → Settings → Call

You will see two sections:
- Incoming and Outgoing
- No Response
Incoming and Outgoing Responses (Connected Calls)
2.1 What These Responses Mean
These responses are used when:
- Call was connected
- Customer spoke
- Conversation happened
Examples in your system:
- Interested
- Not Interested
- Call Later
- CNR
- Planned
- Busy
- Not Known
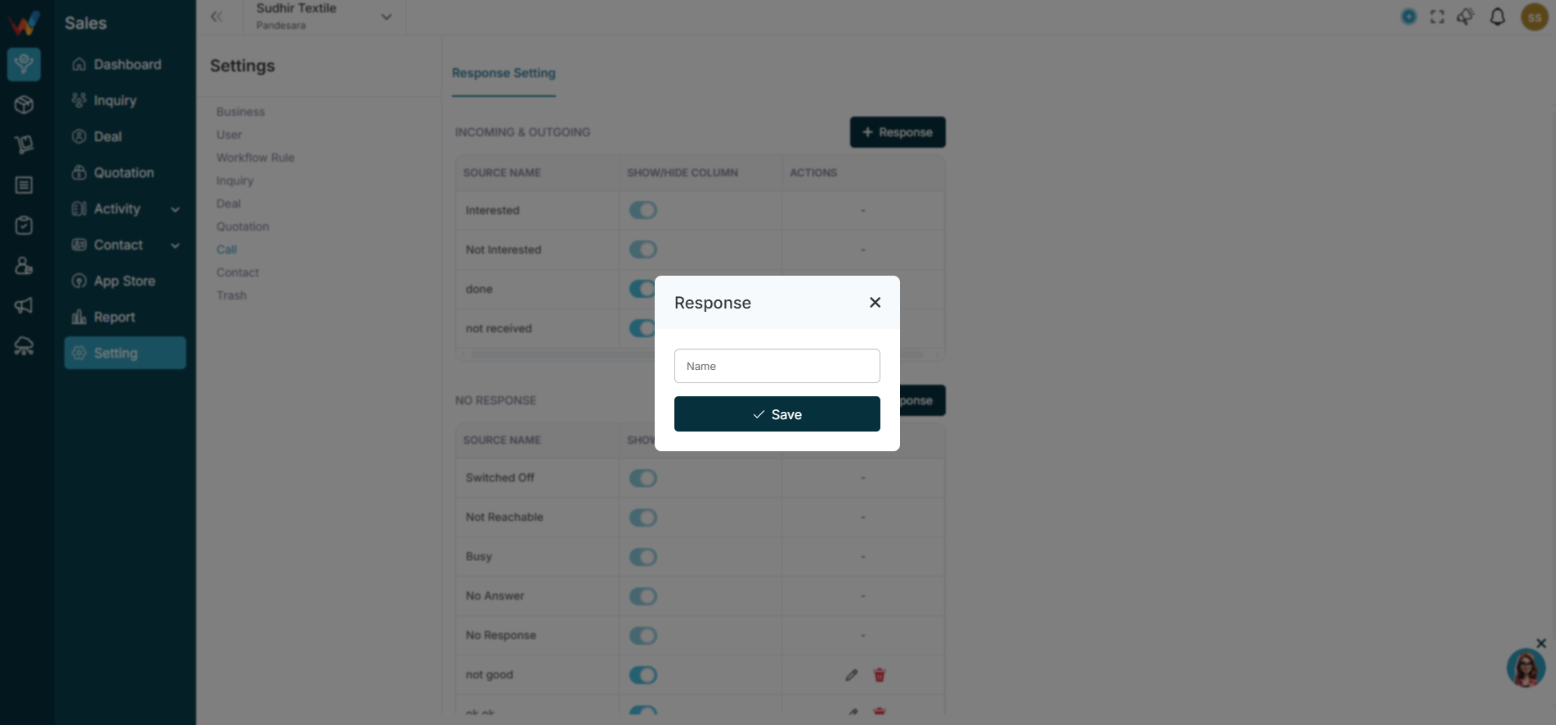
2.2 Add New Response
Click:
+ Response

Enter:
Name (Response label)
Then:
Click Save
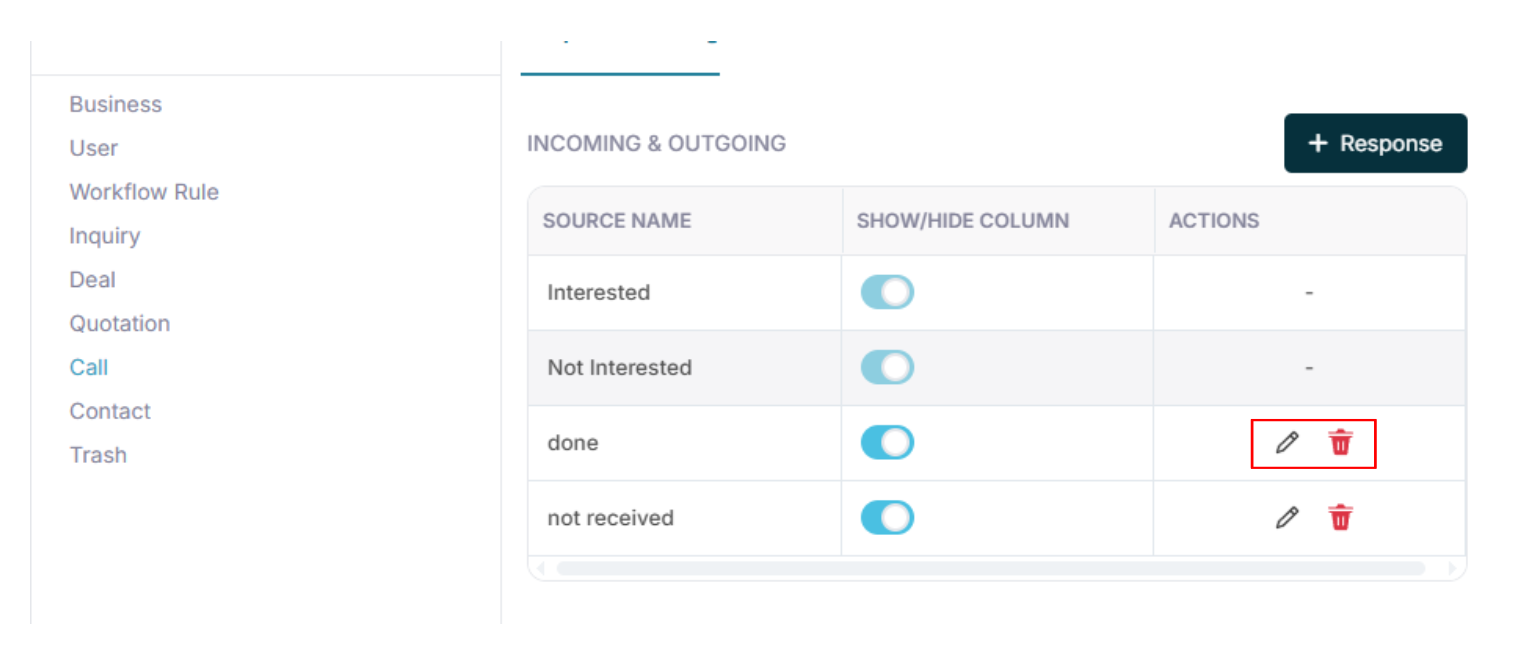
2.3 Edit or Delete Response
Click:

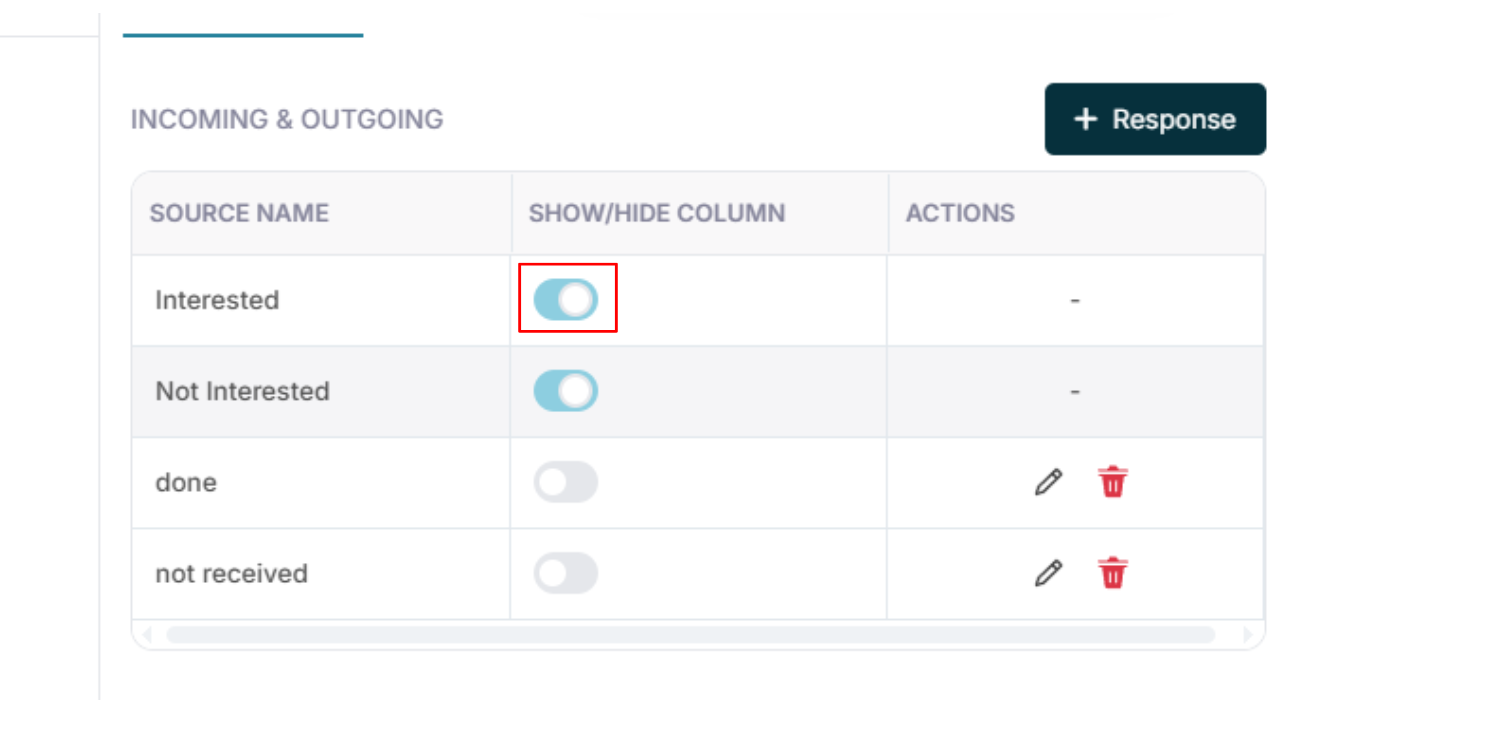
2.4 Show or Hide Toggle

You can enable or disable responses.
If toggle is OFF:
Response will not appear in the call log dropdown.
If toggle is ON:
Response will be available for selection.
No Response (Not Connected Calls)
3.1 What These Responses Mean
These responses are used when:
- Call was not connected
- Phone was unreachable
- Customer did not answer
Examples:
- Switched Off
- Not Reachable
- Busy
- No Answer
- No Response
Why Separating Response Types Matters
Incoming and Outgoing → Connected calls
No Response → Not connected calls
This helps in reporting:
- Actual conversation count
- Attempted calls
- Connection ratio
- Follow-up requirement
Introduction
1.1 Call Settings (Response Setting) — Complete Guide
Navigation Path:
Sales Module → Settings → Call
The Call Settings section in WORTAL CRM is designed to define and standardize how call outcomes are recorded and managed within the system. It allows businesses to configure response categories such as Interested, Not Interested, No Response, and other custom outcomes, ensuring that every sales interaction is properly classified and tracked.
This section plays a key role in organizing follow-up classification, helping sales teams clearly understand the next action required after each call. By enabling options to show or hide specific response types, organizations can customize the system according to their sales workflow and communication style.
Call Settings directly contribute to improving sales call tracking clarity and maintaining consistent data across the CRM. Accurate response logging ensures better reporting accuracy, allowing businesses to generate reliable insights into team performance, customer engagement, and conversion trends.
Overall, this module has a significant impact on lead follow-up tracking, sales performance reporting, conversion analytics, and overall call productivity, making it an essential component for managing and optimizing sales communication effectively.
Quotation Impact & Best Practices
Why Quotation Settings Matter
Improper setup causes:
- Confusing quotations
- Legal issues
- Wrong GST calculation
- Branding inconsistency
Proper setup gives:
- Professional document
- Clear pricing
- Faster conversion
- Better client trust
Common Mistakes
- Not setting default series
- Too many item columns
- No Terms and Conditions added
- No signature uploaded
- Wrong GST column visibility
Final Setup Checklist
- Header fields reviewed
- Item columns finalized
- Status flow defined
- Series configured
- Terms added
- Signature uploaded
- PDF preview tested
What Quotation Settings Directly Impact
Quotation Settings directly impact:
- Revenue conversion
- Client communication
- Brand image
- Reporting clarity
Complete Guide
Quotation Settings – Navigation
Navigation Path:
Sales Module → Settings → Quotation

You will see these tabs:
- Field Settings
- Quotation Status
- Quotation Series
- Other Settings
- PDF Preview
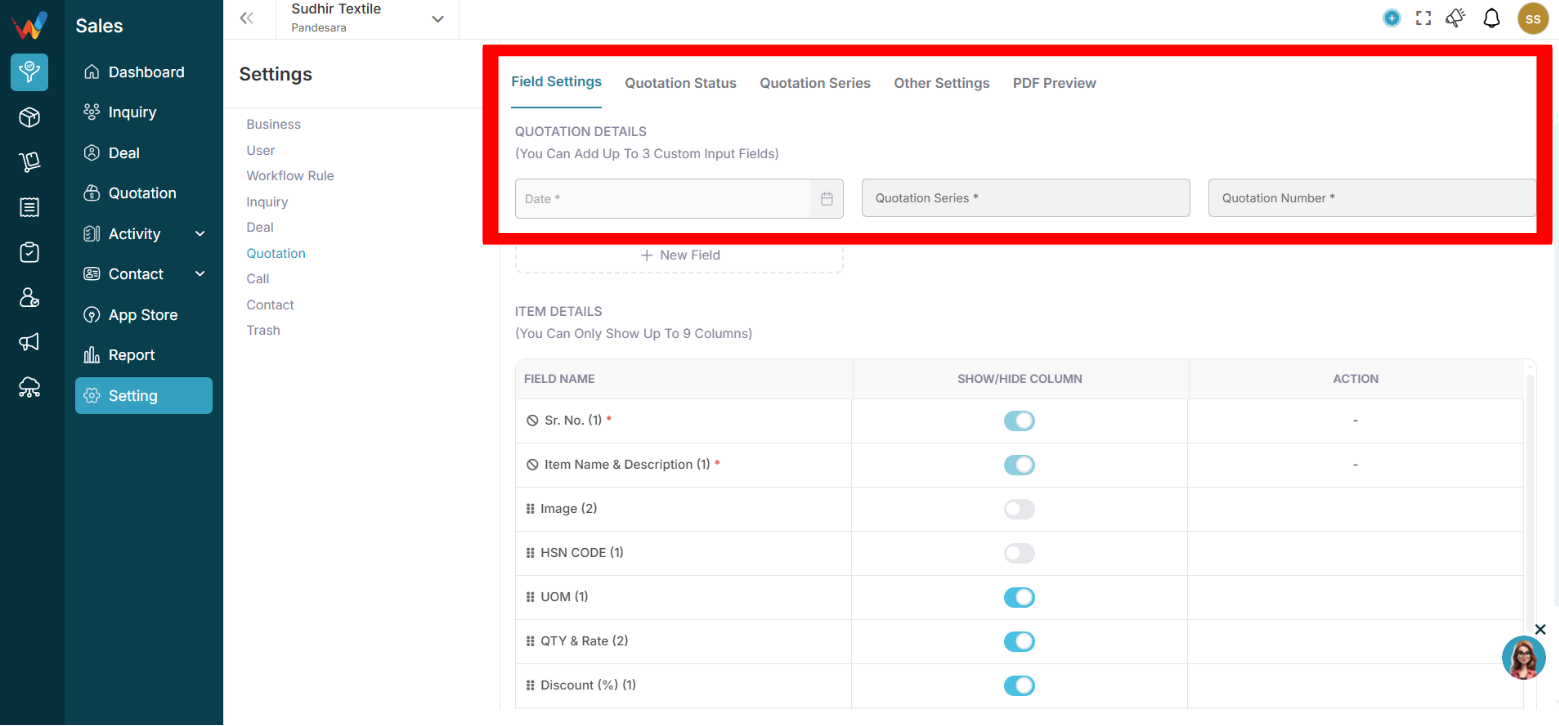
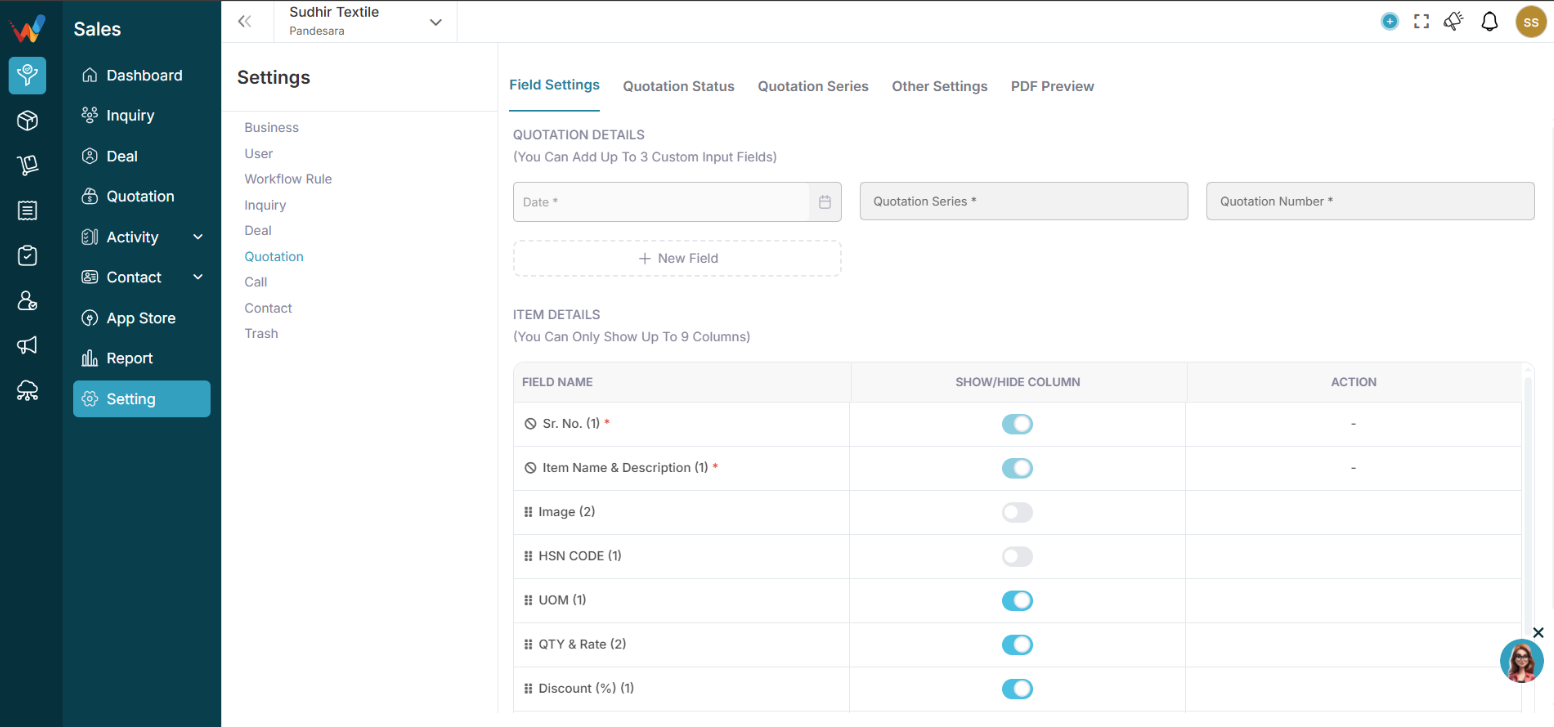
Field Settings
2.1 Section 1: Field Settings

This controls:
- Quotation Header Fields
- Custom Input Fields (Max 3)
2.2 Quotation Header Fields
2.2.1 Standard Fields
Standard fields include:
- Date
- Quotation Series
- Quotation Number
- Contact Detail
- Name
- Contact Person
2.2.2 Field Actions (3 Dot Menu)
 You can:
- Activate
- Edit
- Delete (if custom)
Click the 3 dots on a field to manage.
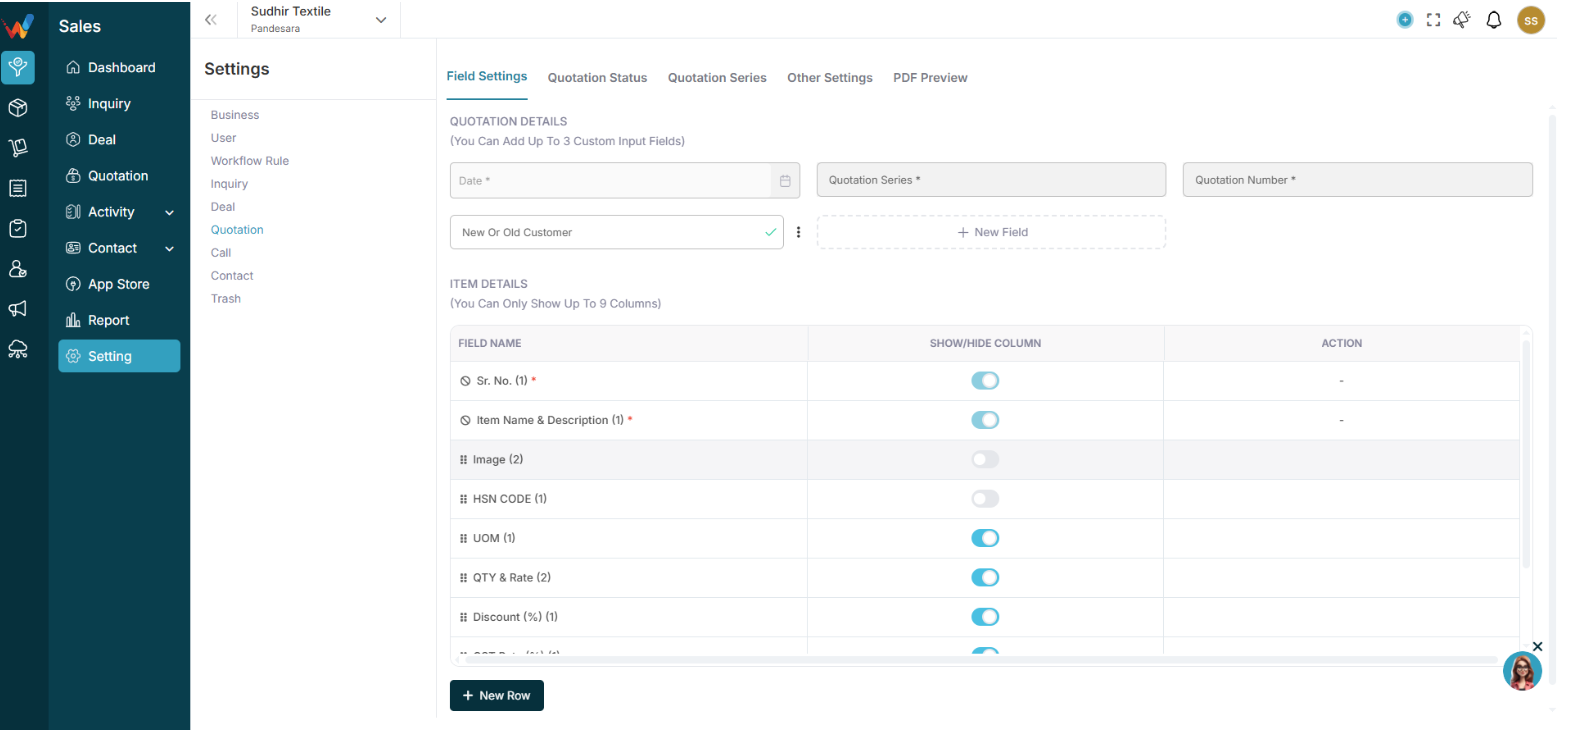
2.3 Add Custom Field (Max 3)
Click:
New Field
Examples for Textile:
2.4 Item Details Section
You can enable or disable columns (Max 9 visible).

Available columns:
- Sr. No.
- Item Name and Description
- HSN Code
- Image
- Quantity
- Rate
- UOM
- Discount (%)
- GST Rate (%)
- Amount
- Total Amount
Use toggle to:
✔ Show
❌ Hide
2.5 Recommended Textile Item Setup
Recommended (show):
- Item Name and Description
- Quantity
- Rate
- GST Rate
- Amount
- Total
Optional:
- HSN Code (if GST billing required)
- Image (for catalogue-based quoting)
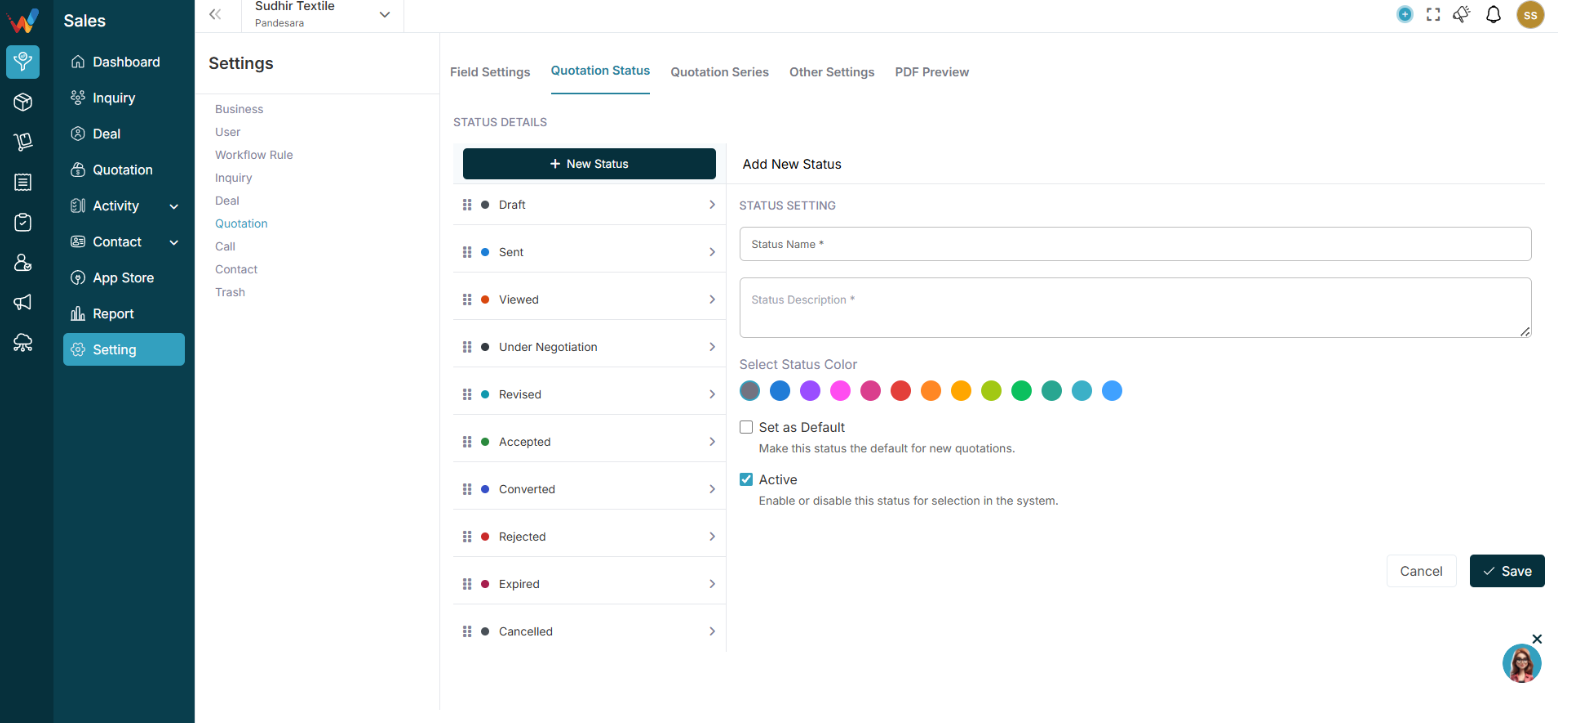
Quotation Status
3.1 Section 2: Quotation Status
Controls quotation lifecycle.

Default statuses include:
- Draft
- Sent
- Viewed
- Under Negotiation
- Revised
- Accepted
- Converted
- Rejected
- Expired
- Cancelled
3.2 Add New Status

Enter:
- Status Name
- Status Description
- Select Colour
- Set as Default (optional)
- Active toggle
3.3 Textile Quotation Flow Example
Draft → Sent → Viewed → Negotiation → Revised → Accepted → Converted
Quotation Series
4.1 Section 3: Quotation Series

Controls numbering format.
You can define:
- Series Name
- Prefix
- Suffix
- Starting Number
- Default Series
4.2 Example Textile Series Setup
Series Name: FY 2025-26
Prefix: QT-
Suffix: 25-26
Starting No: 001-
Final quotation number format:
QT-001-25-26
4.3 Best Practice
- Separate series per financial year
- Set a default series
- Avoid manual numbering
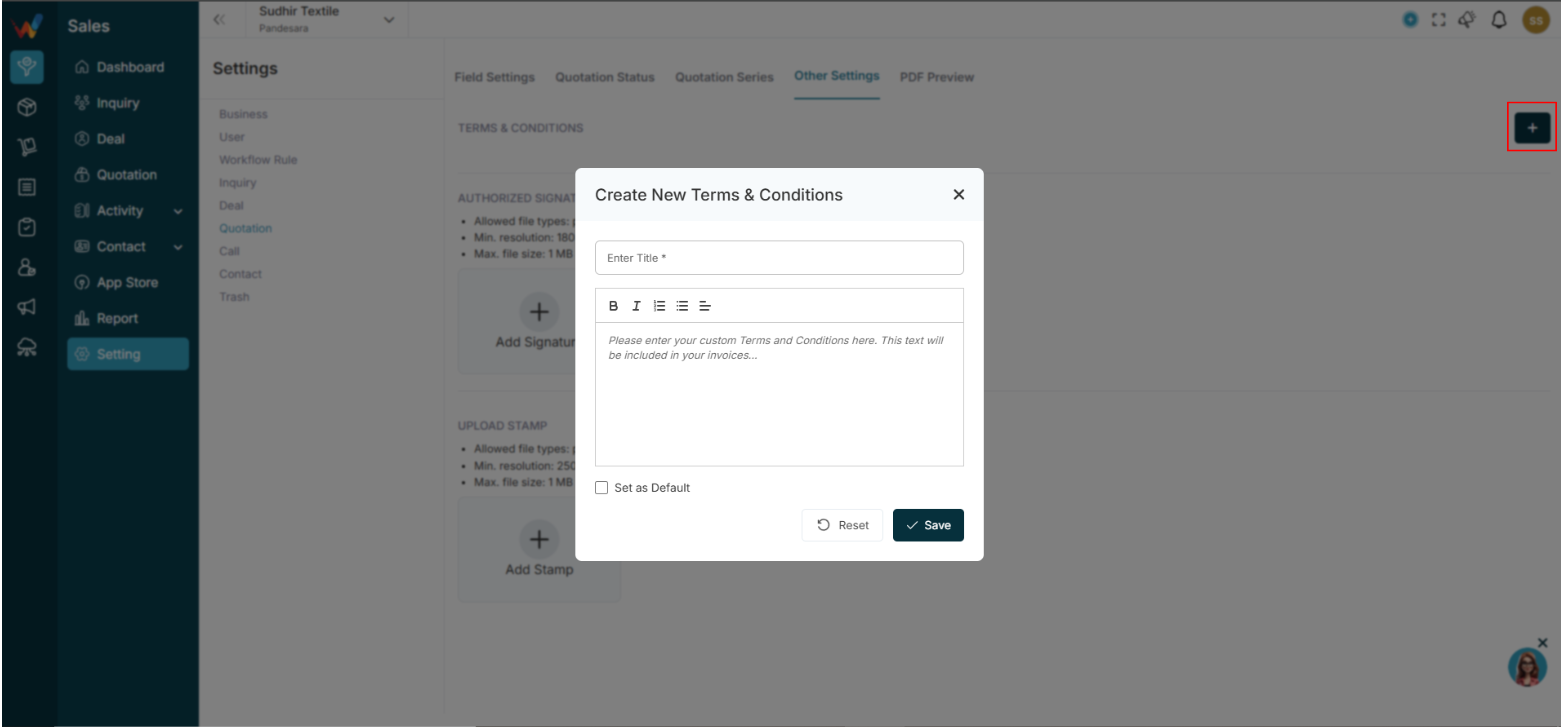
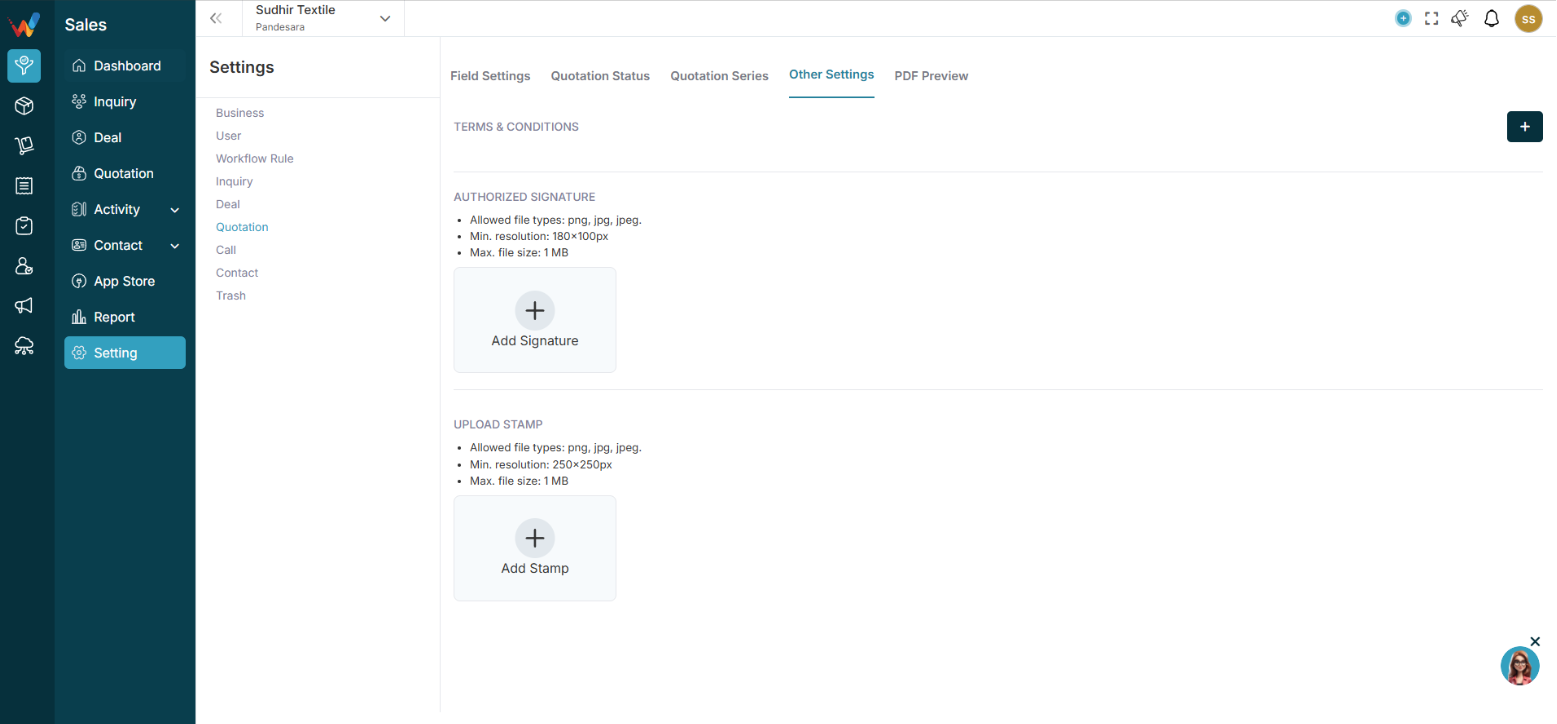
Other Settings
5.1 Section 4: Other Settings
Includes:
5.1.1 Terms and Conditions

Add:
- Payment terms
- Delivery conditions
- Return policy
- Validity period
These appear in the PDF.
5.1.2 Authorized Signature

Upload:
Max size 1MB
Minimum resolution required
Appears in the quotation PDF.
5.1.3 Upload Stamp
Upload company stamp for:
- Professional appearance
- Legal clarity
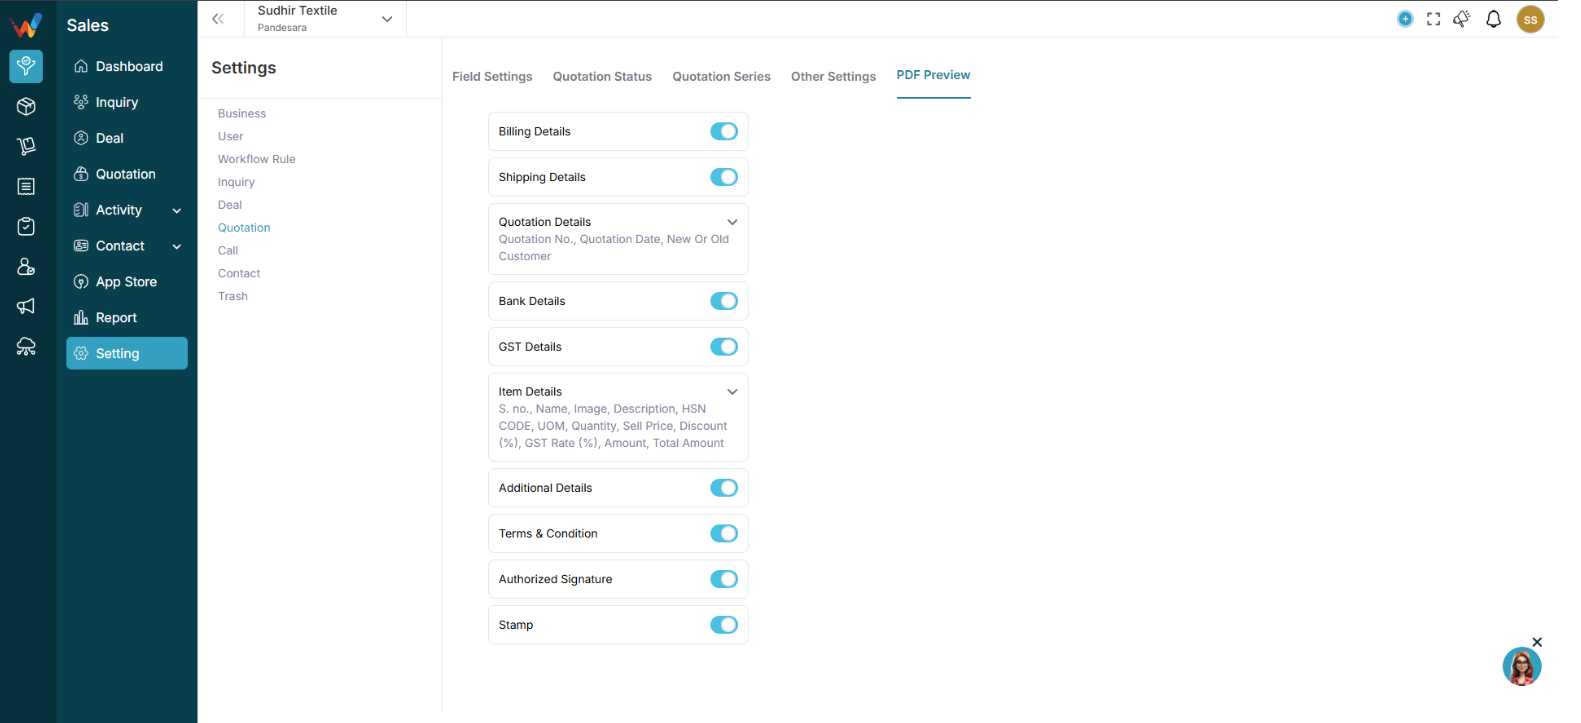
PDF Preview Settings

6.1 Section 5: PDF Preview Settings
Controls what appears in the final quotation PDF.
Toggle sections:
- Billing Details
- Shipping Details
- Bank Details
- GST Details
- Item Details
6.2 Item Details Toggle
You can control:
- Show or hide HSN
- Show or hide Image
- Show or hide Discount
- Show or hide GST enable
- Lock required fields
6.3 Textile PDF Recommendation
Show:
- Item Name
- Quantity
- Rate
- GST
- Total Amount
- Bank Details
- Authorized Signature
Optional:
- Hide HSN for non-GST customers
- Hide Image if bulk order
Introduction
1. Introduction to Quotation Settings
Navigation Path:
Sales Module → Settings → Quotation
The Quotation Settings section in WORTAL CRM is designed to control how quotations are created, structured, and presented to clients. It allows businesses to customize key elements such as quotation fields, item details, status workflow, and number generation, ensuring that every quotation aligns with internal processes and business requirements.
This module also provides control over Terms and Conditions, signature and stamp inclusion, and the overall PDF layout structure, enabling organizations to maintain consistency in client-facing documents. With options to show or hide specific item fields (such as quantity, rate, discount, GST, and total amount), users can tailor quotations based on business needs.
Quotation Settings directly impact how your brand is represented to customers. A well-configured setup ensures professional presentation, clear pricing structure, and legal clarity in every document shared. It also improves internal efficiency by standardizing quotation formats and workflows.
Overall, this section plays a crucial role in enhancing sales professionalism, strengthening branding, and ensuring accurate and structured communication with clients.
Lead vs Deal & Controls
Difference Between Lead & Deal
1.1 Comparison
Lead — Deal
Initial inquiry — Serious opportunity
Unqualified — Qualified
Early stage — Revenue stage
Can be converted — Represents expected revenue
Flow:
Lead → Convert → Deal → Order → Invoice
Common Mistakes
- Too many deal stages
- No clear stage definition
- Not using recurring
- No colour structure
Final Checklist
- Custom fields created
- Pipeline stages finalized
- Stage colours set
- Recurring enabled (if needed)
- Team trained on stage usage
What Deal Settings Directly Control
Deal Settings directly control:
- Revenue visibility
- Sales forecasting
- Conversion ratio
- Branch-wise performance
Deal Impact & Best Practices
How Deal Settings Affect Business
1.1 Business Impact
Deal Settings impact:
- Sales tracking
- Pipeline clarity
- Forecast accuracy
- Conversion reporting
Without proper stages:
- Sales team confused
- Owner cannot measure performance
- No visibility of stuck deals
Best Practice for Textile Businesses
- Keep 6–10 deal stages only
- Define clear meaning for each stage
- Restrict stage editing to admin
- Review lost deals monthly
- Use recurring for regular buyers
Complete Guide
Deal Settings – Navigation
Navigation Path:
Sales Module → Settings → Deal

You will see:
- Custom Fields
- Stage Details
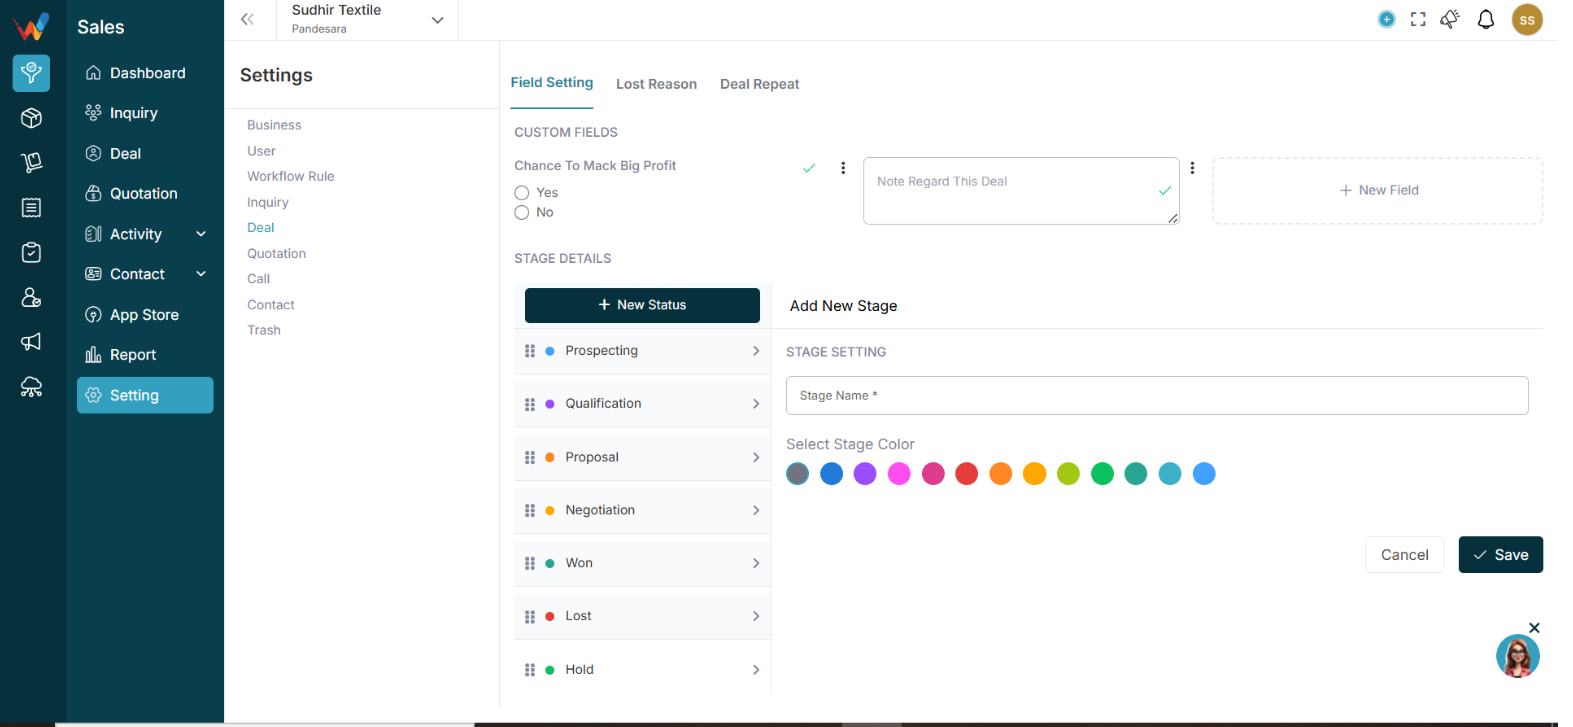
Custom Fields (Deal Level)
2.1 Section 1: Custom Fields (Deal Level)
This allows you to collect additional deal information beyond standard fields.
Click:
New Field
2.2 Create Custom Deal Field

2.2.1 Fill Details
Field — Description
Label — Name of field
Type of Field — Select type
Mandatory — Optional
2.3 Available Field Types

- Paragraph
- Radio Button
- Checkbox
- Text Field
- Number
- Dropdown
- Date
2.4 Textile Deal Custom Field Examples
Field Name — Type
Fabric Quality — Dropdown
GSM — Number
Order Quantity — Number
Delivery Date — Date
Payment Terms — Dropdown
Sample Approved — Checkbox
2.5 Field Options (3 Dot Menu)

You can:
Inactive fields won’t appear in Deal form.
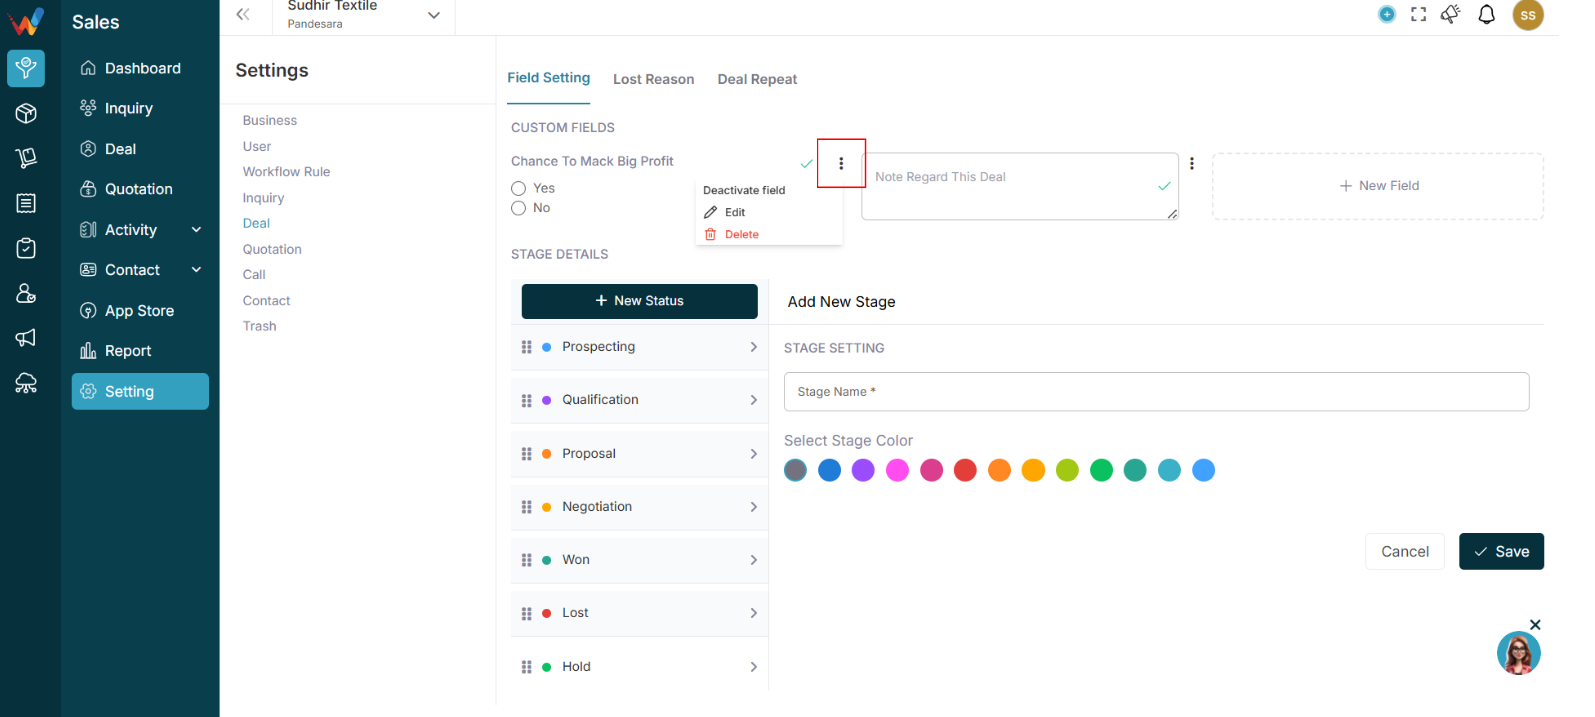
Stage Details (Deal Pipeline)
3.1 Section 2: Stage Details (Deal Pipeline)

This defines your Deal Flow / Sales Pipeline.
You can:
- Create new stage
- Edit stage
- Change color
- Reorder stage
Click:
New Status (Stage)
3.2 Add New Stage
Enter:
- Stage Name
- Select Stage Colour
Click Save.
3.3 Example Textile Deal Pipeline
Your current setup shows stages like:
- Prospecting
- Qualification
- Demo Scheduled
- Demo Done
- Proposal
- Final Follow up
- Call Not Received
- Lost
3.4 Suggested Textile Sales Pipeline
For textile trading:
- New Inquiry
- Requirement Discussion
- Sample Sent
- Price Negotiation
- Proposal Shared
- Order Confirmation
- Payment Pending
- Closed Won
- Closed Lost
3.5 Why Stage Colors Matter
Stage colors help:
- Visual clarity in Kanban
- Identify hot deals
- Track stuck deals
- Monitor lost deals quickly
Example:
- Green → Won
- Red → Lost
- Orange → Negotiation
- Blue → Initial discussion
Deal Recurring
4.1 Section 3: Deal Recurring
Deal Recurring is useful for:
- Monthly repeat orders
- Regular supply contracts
- Seasonal textile buyers
- Subscription-based clients
4.2 Example Use Case
Buyer orders:
- Every 30 days
or - Every 90 days
System automatically creates:
- New deal
- Follow-up reminder
This ensures:
- No repeat order missed
- Consistent revenue tracking
Introduction
1. Deal Settings
Navigation Path:
Sales Module → Settings → Deal
The Deal Settings section in WORTAL CRM is designed to configure how deals are structured, tracked, and managed throughout the sales lifecycle. It provides control over key elements such as custom fields, pipeline stages, and stage colours, ensuring that the deal management process is aligned with business requirements.
Through custom field configuration, businesses can capture specific deal-related information based on their workflow. The deal pipeline stages define the journey of a deal—from initial prospecting to final closure—helping teams clearly understand the current status of each opportunity. Additionally, stage colours improve visual clarity, making it easier to identify deal progress at a glance.
Deals typically represent confirmed opportunities, ongoing negotiations, or orders under discussion, making this module essential for tracking revenue potential and sales performance. By properly configuring Deal Settings, organizations can standardize their sales process, improve visibility, and ensure better decision-making across the team.