List Panel And Detail View
Left Panel — Person List

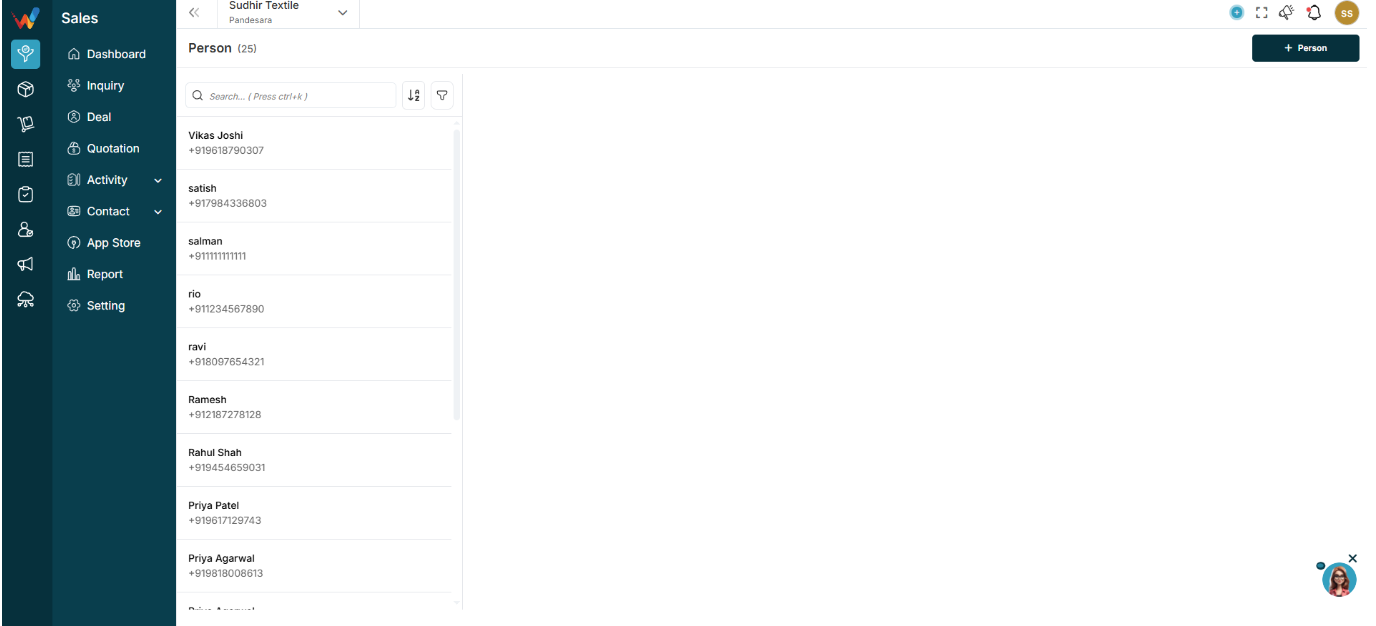
1.1 What You See in the List
This is a vertical list of all saved contacts. Each row shows:
- Person name
- Primary contact number
Example:
- Zeeshan Saleem
- +91 9760009000
1.2 Search Bar (Top)
Used for quick access when the contact database is large.
Capabilities:
- Search by name
- Search by mobile number
Shortcut: Ctrl + K
1.3 Sort Icon (A–Z / Z–A)

Enables alphabetical sorting of the person list.
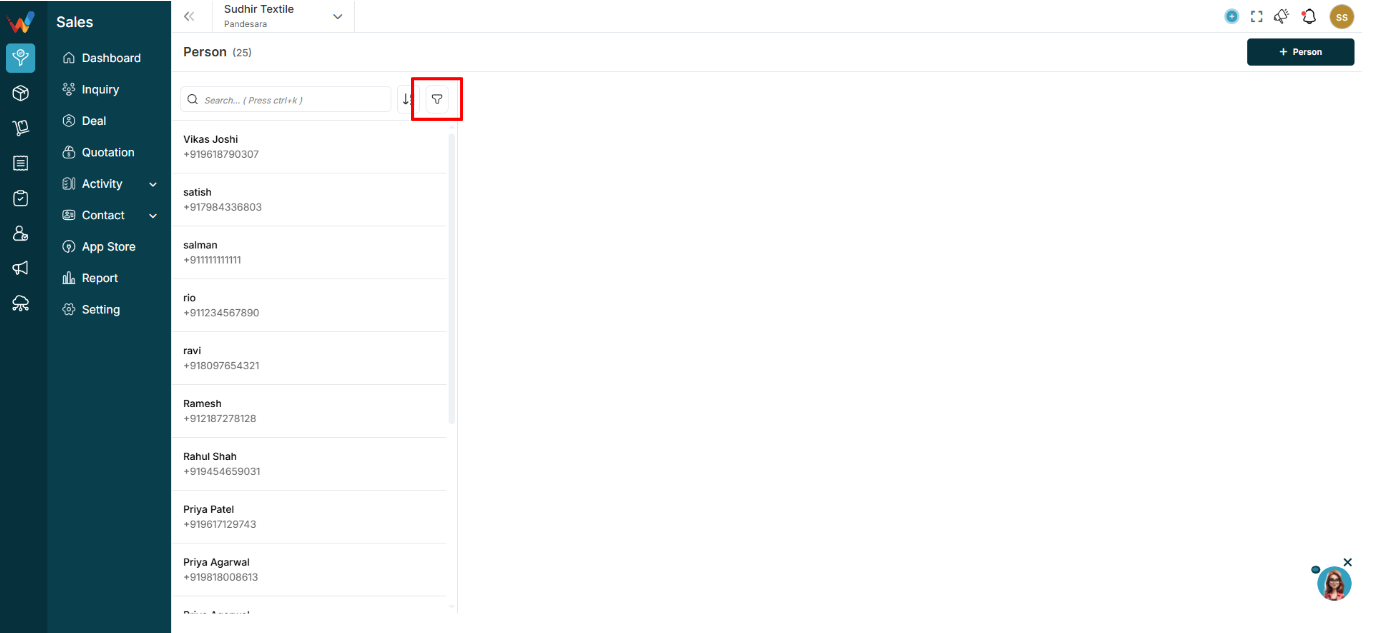
1.4 Filter Icon


Opens the filter panel (explained later in this document).
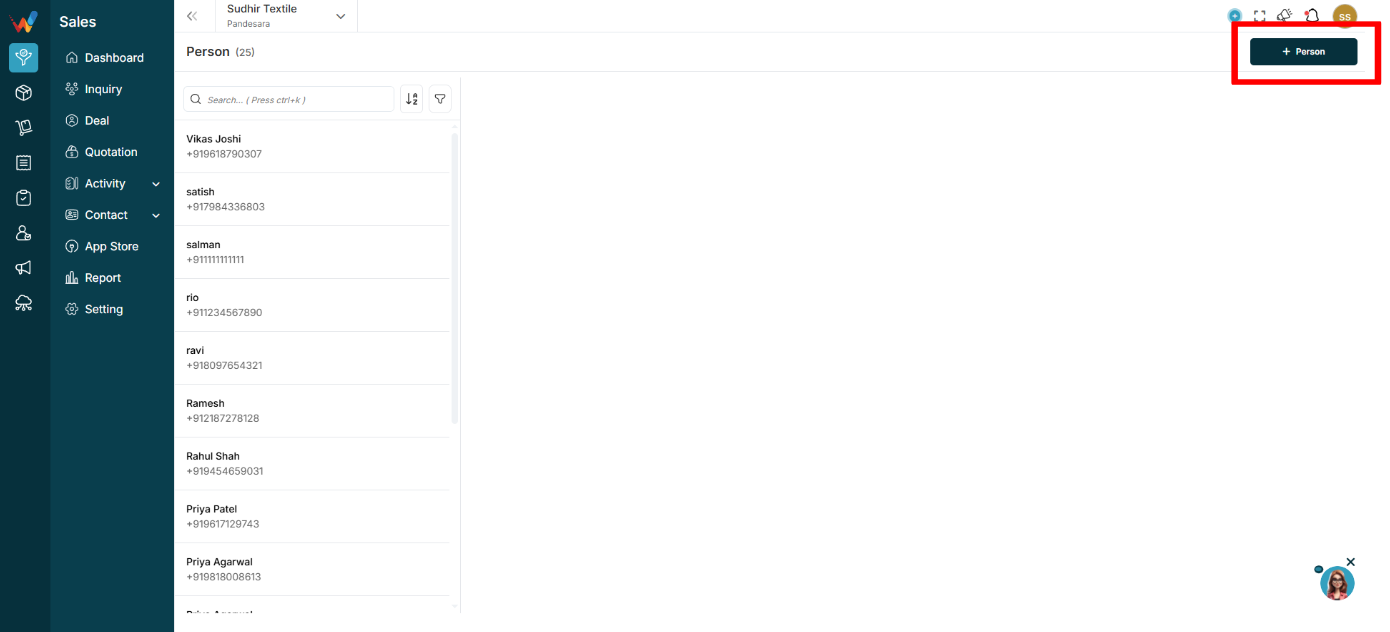
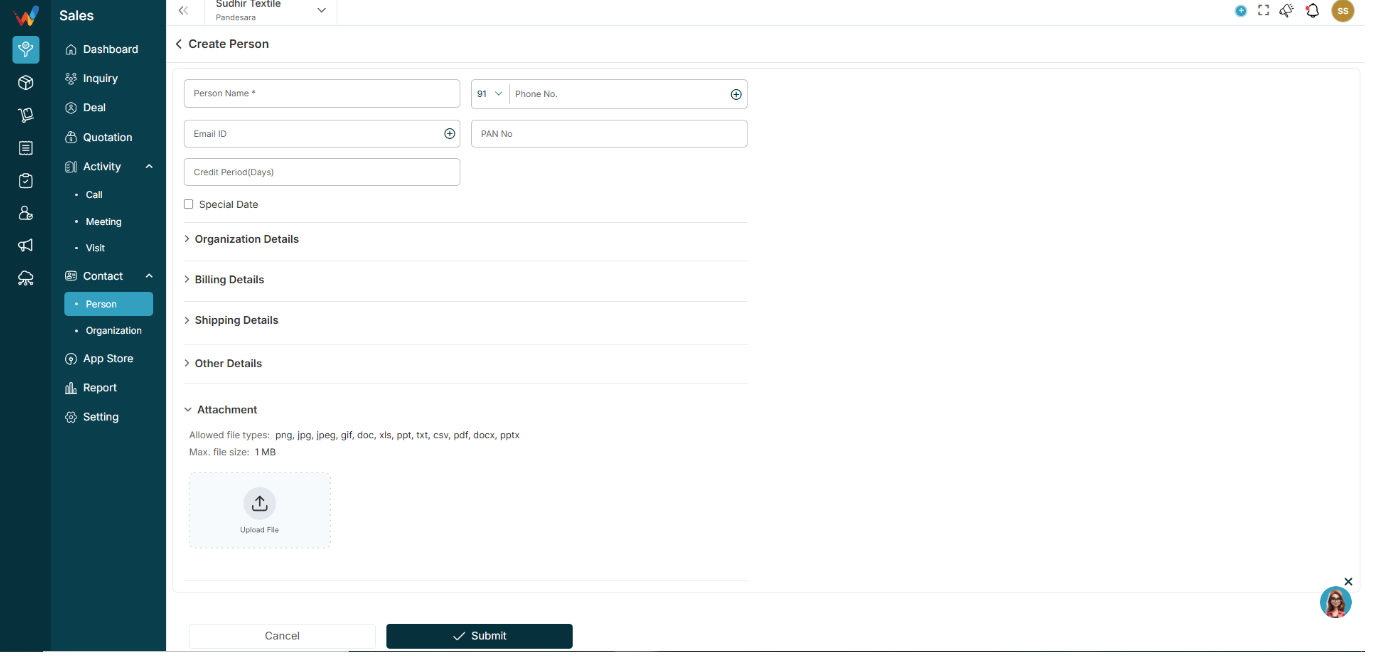
1.5 + Person Button (Top Right)
Navigation Path:
Sales Module → Contact→ Person → Click on + Person

Creates a new Person record.

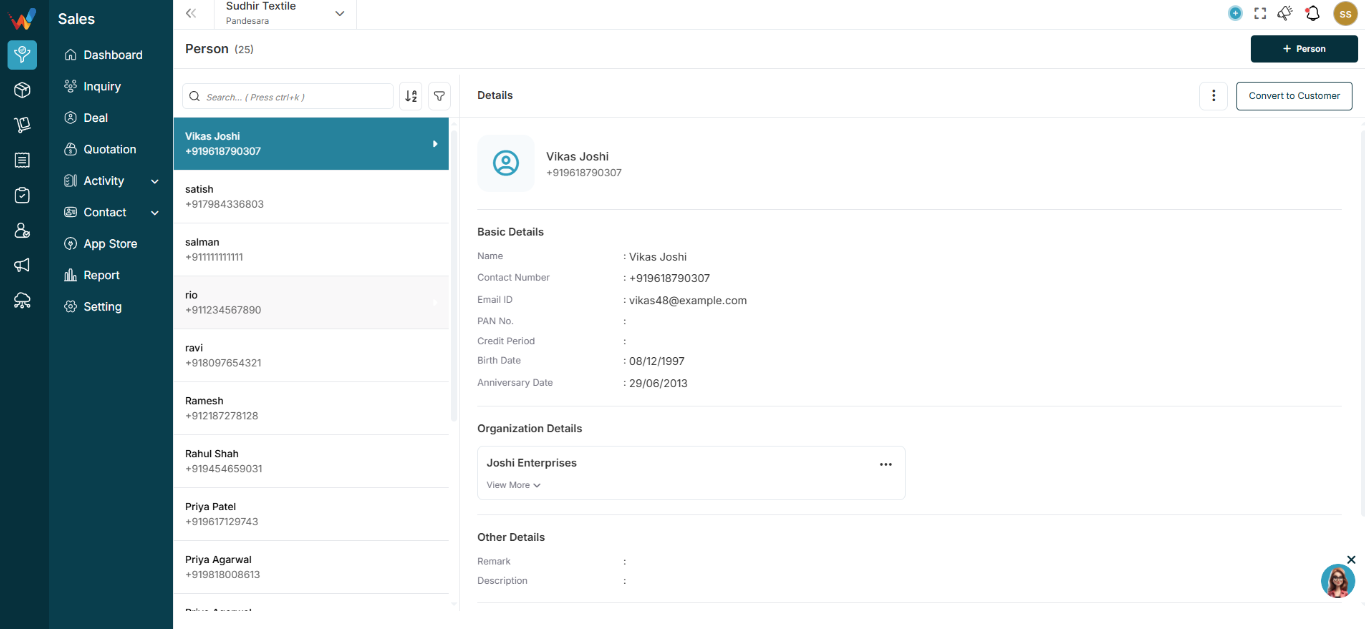
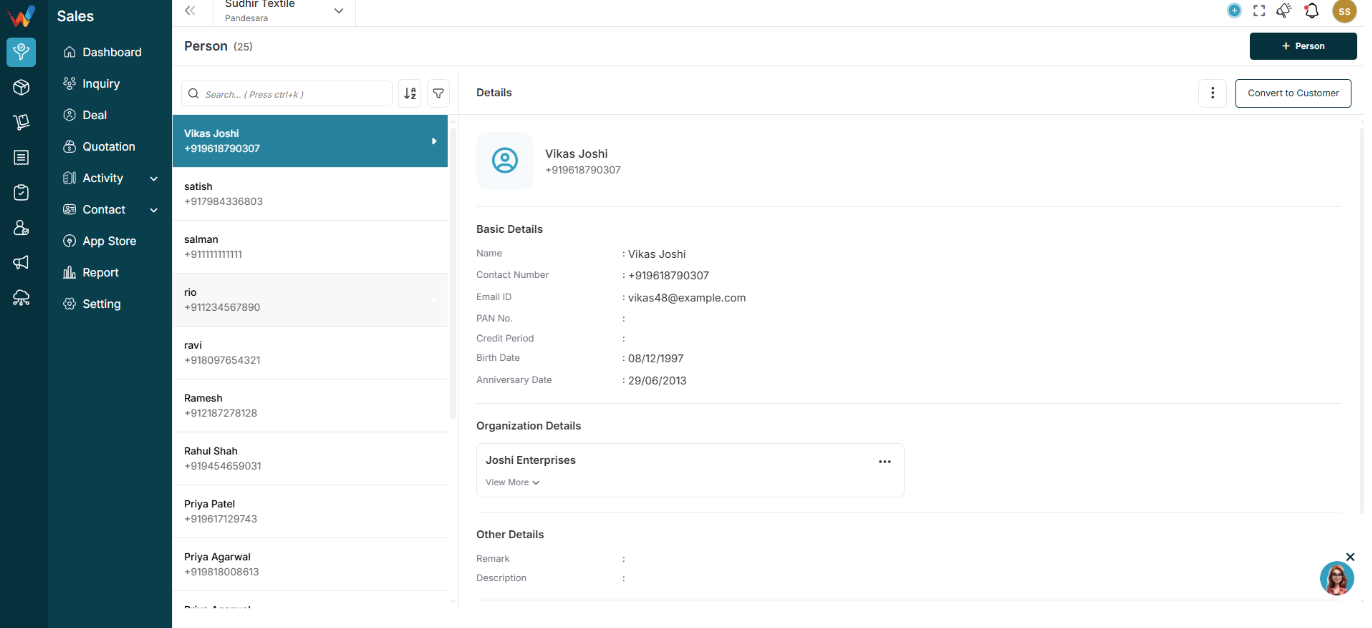
Person Detail View (Right Panel)

2.1 What Happens When You Click a Person?
When a user selects any person from the list, full details open on the right side.
Person Detail — Section Breakdown
3.1 Header Section

Shows:
- Profile icon
- Person name
- Primary contact number
Right side typically includes:
- Three dot menu (⋮)
- Convert to Customer button
3.2 Basic Details
Contains core identity information such as:
- Name
- Contact number
- Email ID
- PAN number
- Credit period
- Birth date
- Anniversary date
Edit behavior:
- Edit icon allows updating basic information
Purpose:
This is the primary identity and communication information of the contact.
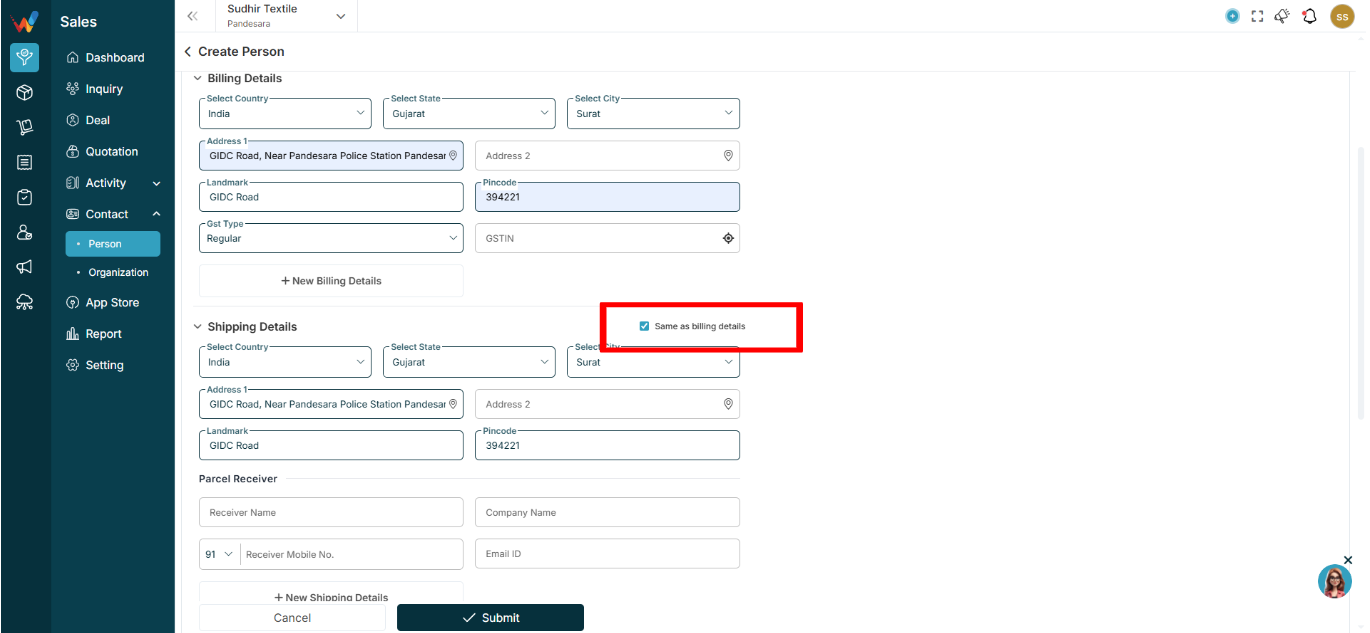
3.3 Billing Details
Displays billing-related information such as:
- Address
- City
- State
- Country
- GST type and more
Billing card actions (⋮ inside billing card) may include:
Used when:
- Contact becomes a billing party
- Contact is linked to quotation or invoice
Notes:
- Multiple billing details can be added.
3.4 Shipping Details
Same as Billing (Checkbox)
When enabled, the shipping address is auto-copied from billing.

Shipping Address Fields
Same structure as billing, typically showing:
Parcel Receiver (If Different From Buyer)
Includes:
- Receiver name
- Company name
- Contact number
- Email ID
Shipping card actions (⋮ inside shipping card) may include:

Used when:
- Receiving person is different from buying person
- Shipping details are required for quotation and invoice
Notes:
- Multiple shipping details can be added.
3.5 Other Details
Contains:
Used for:
Sales notes and historical context, for example:
“Shared details on WhatsApp. Demo scheduled 27-2.”
At the bottom, the system usually shows audit fields such as:
- Last updated by
- Created by
- Date and time
Purpose:
Supports reporting, accountability, and audit trail.
List View
Navigation Path:
Sales Module → Contact → Person

2.1 Purpose of This Screen
This screen displays all individual contacts stored in the system.
A Person can exist independently or from :
Introduction
The Person Module in WORTAL CRM is designed to manage and maintain detailed records of individual contacts associated with business activities. A ‘Person’ represents a real individual—such as a buyer, decision-maker, manager, or any stakeholder linked to Leads, Deals, or Organizations.
This module serves as a central repository for all personal and professional information, including contact details, email, identification data (e.g., PAN), credit terms, and important dates like birthdays and anniversaries. It also allows users to manage billing and shipping addresses, ensuring accurate and organized record-keeping
Visit Flow And Importance
Full Visit Flow Summary
User reaches client location
Clicks Check In
System captures GPS and time
User meets client
Clicks Check Out
Adds summary and proof
Duration auto-calculates
Why the Visit Module Is Important
2.1 For Owners
- Know where the sales team went
- Verify location
- Track time spent
- Evaluate productivity
2.2 For Managers
- Monitor visit frequency
- Track region-wise activity
- Improve field discipline
2.3 For Business
- Reduces fake reporting
- Builds visit history per lead or deal
- Improves team accountability
Check In And Follow Up a Visit And Check Out
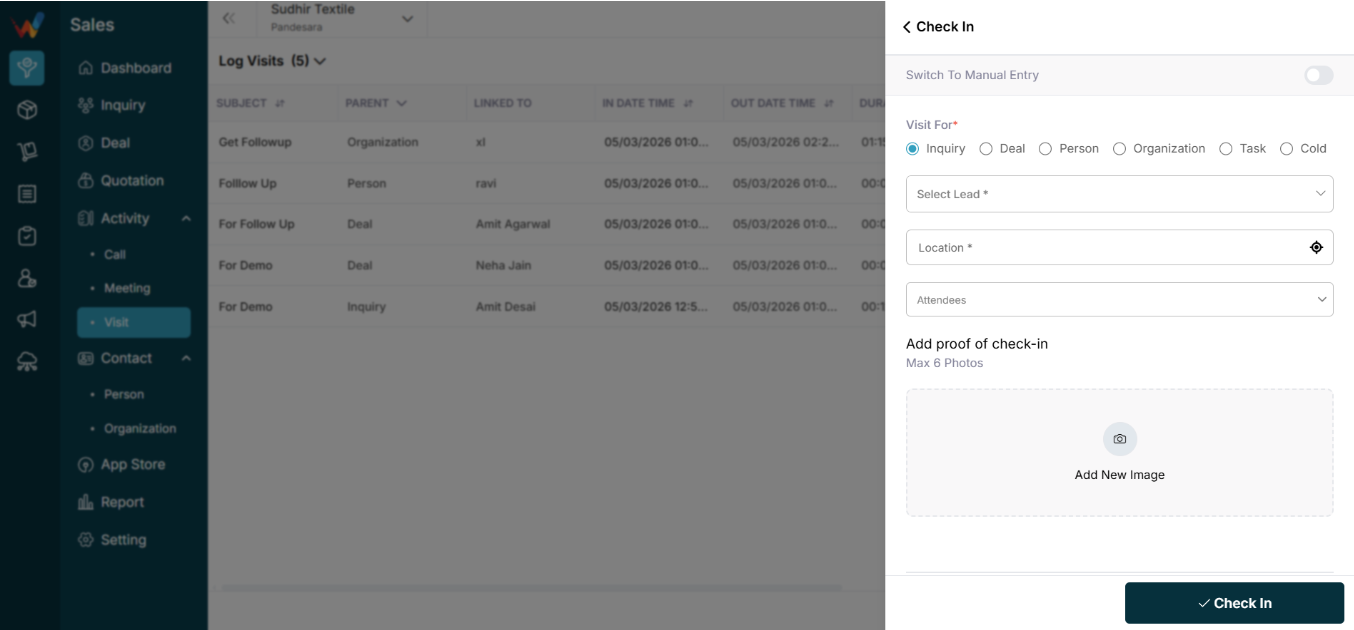
Check In
1.1 Purpose
Used when a field executive reaches the client location and starts the visit.
1.2 Switch to Manual Entry (Toggle)
Default: OFF
When OFF (GPS mode):
- Location auto-captured using GPS
- Date and time auto-captured from system
- Used for real-time tracking
When ON (Manual mode):
User manually enters:
Used when:
- Network unavailable
- GPS error
- Backdated entry is required
1.3 Visit For (Mandatory)
User must select what the visit is related to:
- Lead
- Deal
- Person
- Organization
- Task
- Cold
This decides where the visit record appears.
1.4 Select Lead / Deal / etc. (Mandatory)
Dropdown depends on Visit For selection.
Example:
If Visit For = Lead → Then you will see all lead’s records.
1.5 Location (Mandatory)
GPS mode:
- Auto-fetched from device location
Manual mode:
- User enters location manually
System stores:
- Latitude
- Longitude
- Full address
1.6 Attendees (Optional)
Internal team members present during the visit.
Used for:
- Multi-person visit tracking
- Team accountability
1.7 Add Proof of Check-In
Max: 6 photos
Purpose:
- Client office photo
- Photo with client
- Business card proof
- Site image
Ensures:
- Visit authenticity
- Field transparency
11.8 Check In Button
On click, the system stores:
- Visit For and linked record
- GPS location
- Check-in time
- Proof images
Visit status becomes: In Progress
Follow Up a Visit (Future Visit Scheduling)
2.1 Subject (Mandatory)
Title of the visit.
Examples:
- Demo Visit
- Payment Collection
- Installation Visit
2.2 Parent and Linked To (Mandatory)
Select Lead / Deal / etc.
Then select the specific record.
2.3 Date and Time (Mandatory)
Future visit date and time.
2.4 Remind Me Before
Options can include:
Used for:
2.5 Description
Detailed planning notes.
Example:
“Need to demonstrate inventory module.”
12.6 Attendees
Team members assigned to the visit.
2.7 Address Section
User defines visit location. Fields can include:
- Address 1
- Address 2
- Country
- State
- City
- Pincode
Ensures:
- Proper planning
- Travel clarity
Check Out
3.1 Purpose
Used when the user completes the visit.
Top section typically shows (read-only):
- Visit For
- Linked record
- Check-in time
- Check-in location
3.2 Switch to Manual Entry
Used if:
- User forgot to check out on time
- Time or location needs adjustment
3.3 Subject (Mandatory)
Summary title of the completed visit.
3.4 Summary
What happened during the visit?
Examples:
- Client interested
- Demo completed
- Payment expected next week
3.5 Location (Mandatory)
Default:
Manual mode:
- User enters location manually
3.6 Add Proof of Check-Out (Mandatory)
Max: 6 photos
Ensures:
- Visit closure authenticity
- Reduced fake field entries
3.7 Follow Up Dropdown
User can instantly create a follow-up:
Linked to the same record.
3.8 Check Out Button
On click, the system:
- Captures check-out time
- Calculates duration
- Marks visit as Completed
- Moves entry to Log Visits bucket
Action Menu, Filter And Columns
Row Action Menu
1.1 View
Opens visit details in view mode.
6.2 Delete
Removes the visit record (based on permission).
Note:
Visits often do not allow edit after completion for reporting and audit purposes.
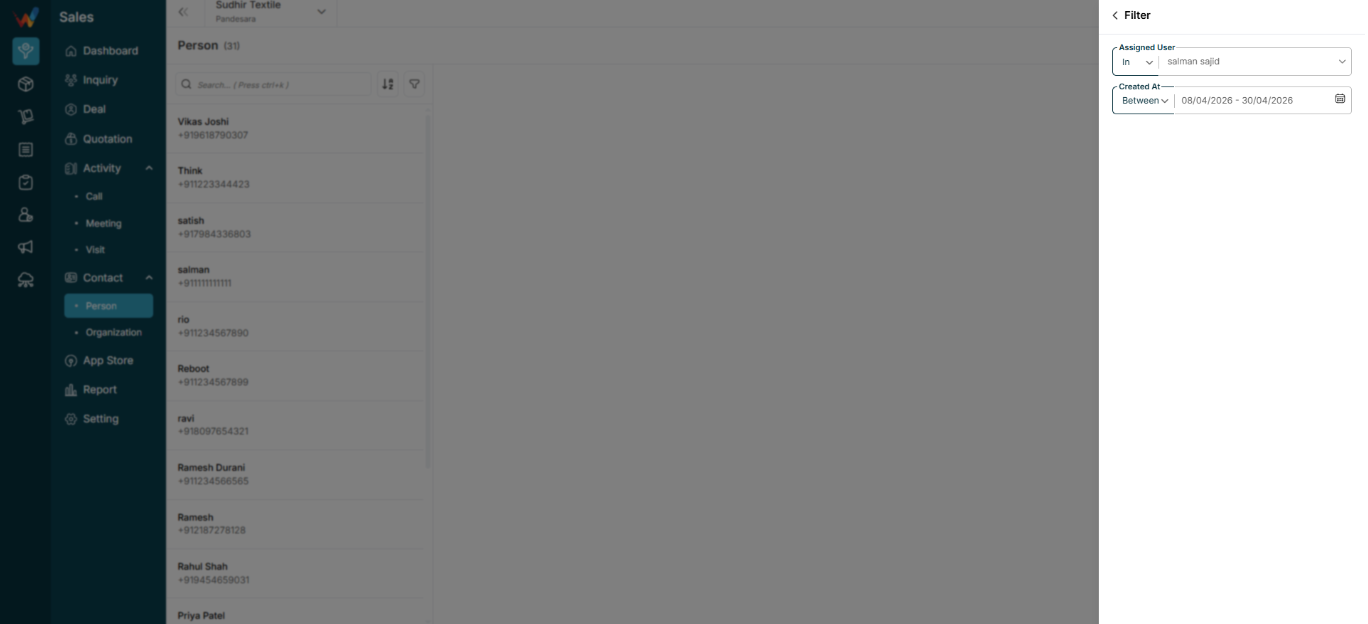
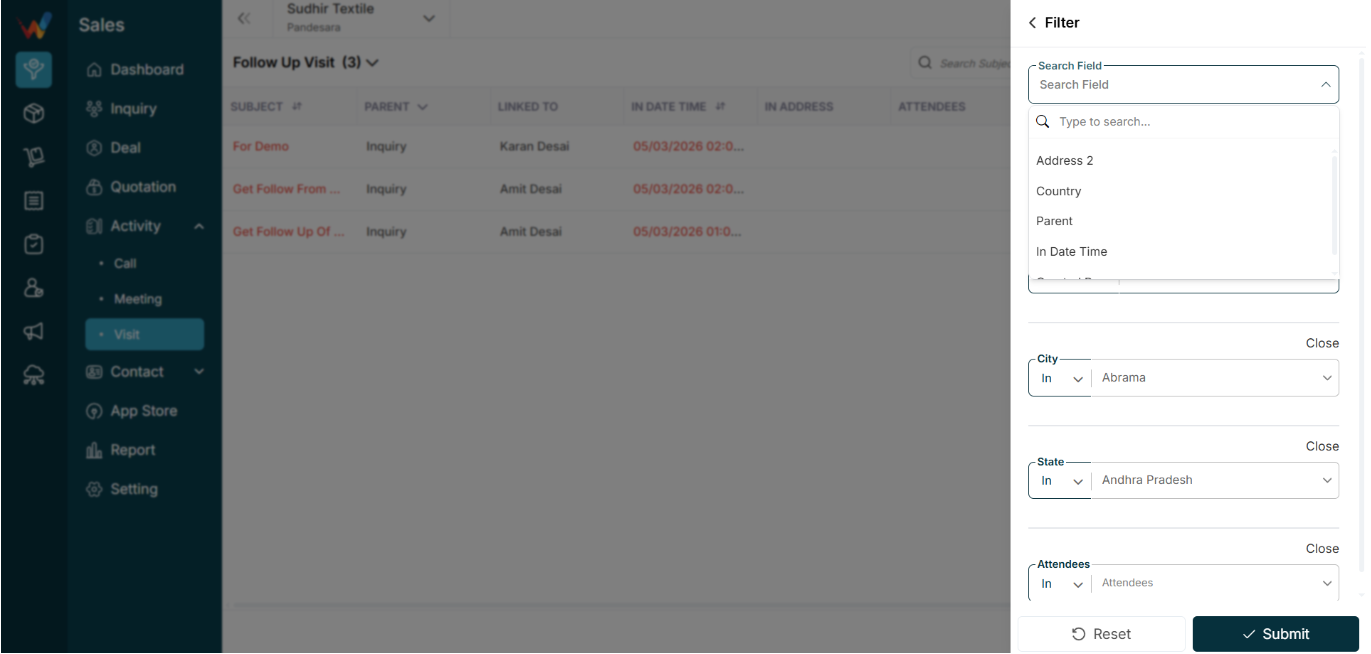
Filter Panel (Right Sidebar)
Navigation Path:
Sales Module → Activity → Visit → Click on Filter Icon
2.1 How Filtering Works
When clicking the filter icon, the user first selects a Search Field, then the system shows the relevant input (dropdown, time filter, etc.).
2.2 Common Search Fields (Examples)
Options can include:
- Address 1
- Address 2
- Landmark
- City
- In time
- Out time
- Other fields depending on configuration
2.3 Why This Is Useful
Especially useful for:
- Filtering visits by location
- Reviewing city-wise or region-wise visits
- Monitoring field activity across territories
Customize Columns Panel
3.1 What Users Can Do
Users can:
- Show or hide columns
- Reorder columns
- Personalize the table layout
Locked column:
3.2 Common Customization Examples
Field manager:
- Keeps In/Out Address visible for verification
Admin:
- Keeps Created By visible for audit tracking
Table Columns
Each row represents one field visit.
1.1 Subject
Title of the visit.
Examples:
- Demo
- Support Meeting
- Final Meeting
Helps identify visit purposes quickly.
1.2 Parent
Indicates which module the visit belongs to:
This determines where the visit appears in the CRM.
1.3 Linked To
Name of the person or deal connected to the visit.
Examples:
- Himanshu Kaushik
- Pavan Dixit
1.4 In Date Time
Time when the user checked in at the location.
Captured when the user presses Check-in.
1.5 Out Date Time
Time when the user checked out.
Captured when the user presses Check Out.
1.6 Duration
Auto-calculated:
Out time − In time
Used to measure:
- Time spent at client location
- Field productivity
1.7 Summary
Short description of what happened during the visit.
Example:
“Explained pricing and product features.”
Important for:
- Manager review and context
1.8 In Address
GPS or manually entered location at check-in.
Used to verify:
- Whether the visit actually happened at the client location
1.9 Out Address
GPS location at check-out.
Used for:
1.10 In Reason
Reason selected when checking in through manual entry (if real-time check-in was not possible).
Examples:
- Not sure of location
- Client was together
- Cold visit
1.11 Out Reason
Reason or remark added while checking out.
Examples:
- Was in a hurry and forgot
- Client unavailable
- Rescheduled
1.12 Attendees
internal team members present during the visit
1.13 Created By
User who logged the visit.
1.14 Updated By
User who last edited the visit record.
Top Right Controls

1.1 Search Subject
Search visits by subject name.
Shortcut Key: Ctrl + K
Examples:
- Demo Done
- Final Meeting
- Support Visit
4.2 Filter Icon
Navigation Path:
Sales Module → Activity → Visit → Click on Filter Icon

Open the advanced filter panel (right sidebar).
Used to narrow down visit records based on location, timing, and other fields.

4.3 Follow Up Button
Navigation Path:
Sales Module → Activity → Meeting → Click on Follow Up


Used to:
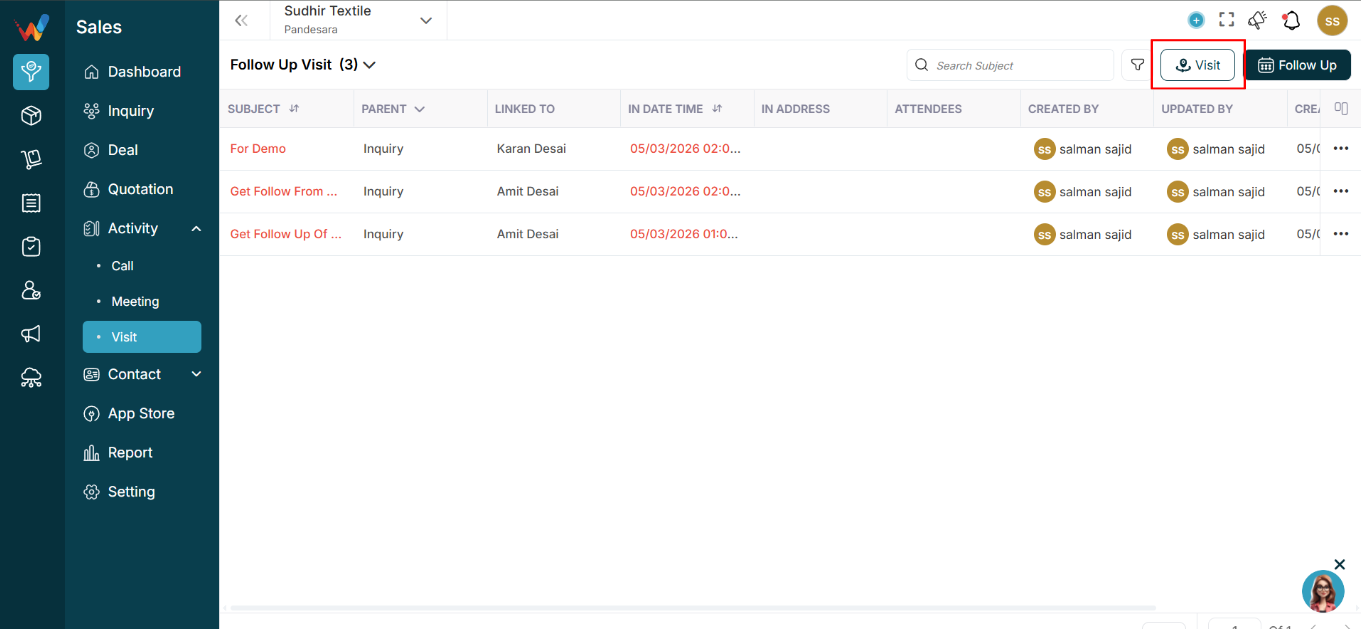
4.4 Visit Button
Navigation Path:
Sales Module → Activity → Meeting → Click on Visit


Used to:
- Log a new visit entry (past or real-time visit).
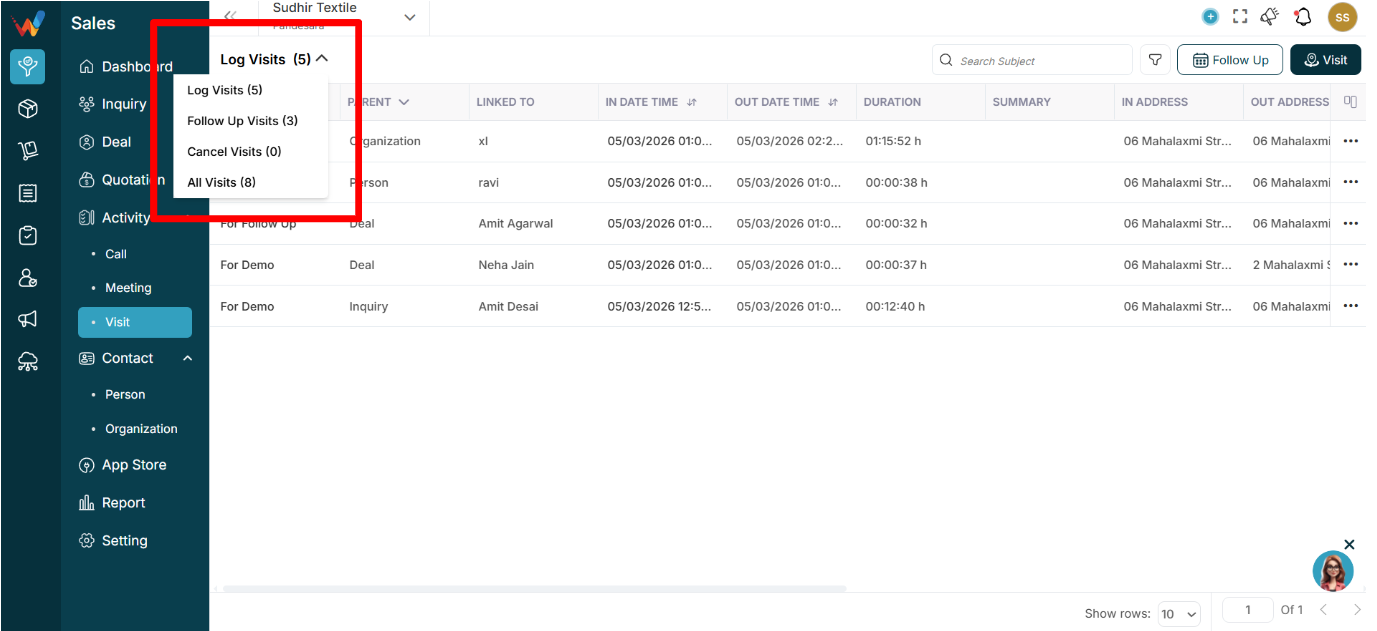
Categories Dropdown

1.1 What This Dropdown Does
The dropdown near Log Visits (5) lets users quickly switch between visit buckets without applying filters.
1.2 Available Categories
Log Visits (5)
Shows visits that are completed and logged. These typically include:
- Check-in time
- Check-out time
- Duration
- Location
Follow Up Visits (3)
Shows scheduled future visits.
Used for:
- Planning field travel
- Tracking upcoming appointments
Cancel Visits (0)
Shows visits that were scheduled but later cancelled.
Important for:
- Monitoring dropped appointments
- Evaluating field planning gaps
All Visits (8)
Shows everything combined:
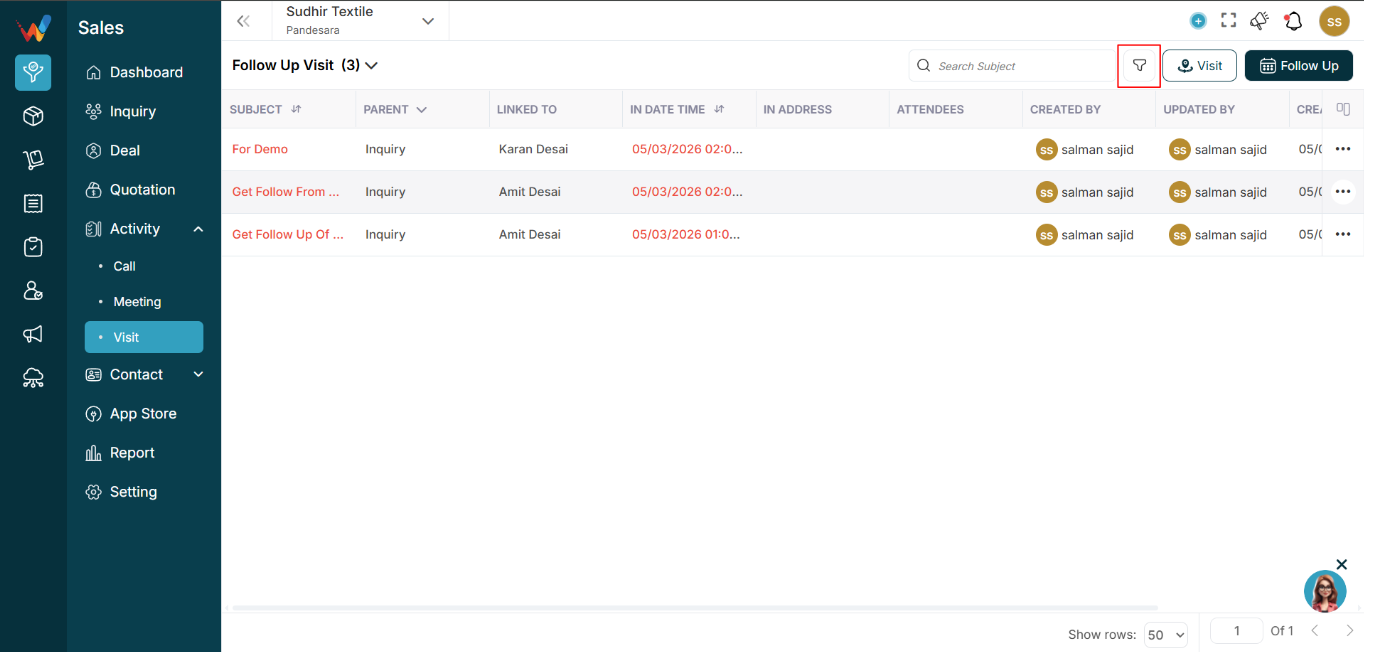
List View
Navigation Path:
Sales Module → Activity → Visit

Purpose of This Screen
This screen is used to track physical field visits made by sales team members.
Unlike Calls and Meetings, a Visit includes:
- In time
- Out time
- Location tracking
- Visit reasons
This module is mainly designed for on-field team monitoring.